Lockers in Space
Overview
The term "locker" within Space can refer to a locker, cupboard, display cabinet, box, or case fitted with an electronic device that controls the lock. Salto lockers are commonly used in corporate organizations, universities, and gyms.
The lockers functionality is license-dependent. See Registering and licensing Space for more information.
You must initialize a locker with a PPD before it can be used. The procedure for initializing lockers is the same as for initializing locks. See Initializing locks for more information and a description of the steps you should follow.
The following sections describe how to create and configure a locker.
This functionality is intended to be used with both Salto and Gantner lockers. See the table below. However, if you're configuring Gantner lockers in Space, you should also see the sections on how to add and configure GC7 (Gantner) controllers, zones and user access levels. For information on the Space-eLoxx Relaxx integration tool (Spaxx), refer to the Space-eLoxx Relaxx user guide.
Locker types
| Type | Image | Description | Energy source | Installation guide |
|---|---|---|---|---|
| Salto locker |
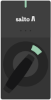  | Original Salto locker lock New Salto locker lock | Battery powered | XS4 Locker XS4 ECO.Lock |
| Gantner locker |
 | Gantner locker lock. See also info on GC7 (Gantner) controllers | Wired | Gantner NET.Lock |
Creating lockers
To create a locker, do the following:
- Select Access points > Lockers. The Lockers screen is displayed.
 Lockers screen
The Lockers screen includes a Locker state column that shows the capture status of each locker, that is, whether it has been captured by a user. This column applies only to free assignment lockers. Personal lockers do not use a capture workflow and do not have a locker state.
Capture information is only available when an online lockers license is active, or when the Control of lockers left closed setting is enabled for standalone lockers. See Access points tab for more information.
The identity of the user who captured a locker is only available for online lockers.
For the physical open/closed state of online lockers, see Online monitoring.
The Set lockers states as opened button gives you the option to reset the status of available lockers on the system. This option applies to all lockers in the system and changes the status of each locker to Open on its information screen. However, it does not affect the physical lockers. It is generally only used in installations, such as gyms or spas where only free assignment lockers are in use. To activate this button you must select the Control of lockers left closed checkbox in System > General options > Access points in Space. See Access points tab for more information.
 'Set lockers states as opened' button in 'Access points' tab
- Click on Add. The Locker information screen is displayed.
 Locker information screen
Type a name for the locker in the Name field.
Type a description for the locker in the Description field. For example, it can be used to describe where the locker is located.
Select the relevant partition from the Partition drop-down list, if required. See Partitions for more information.
Note that the partitions functionality is license-dependent. See Registering and licensing Space for more information.
Select the appropriate configuration and management options. The configuration and management fields are described in Configuring lockers.
Click Save.
The padlock icon in the top section of the Locker information screen reflects the capture state of the locker, that is, whether it has been captured by a user. This indicator applies only to free assignment lockers. Personal lockers do not use a capture workflow and do not display a locker state. Hover over the icon to see the capture details. Note that the identity of the user who captured the locker is only available for online lockers. Capture information is only available when an online lockers license is active, or when the Control of lockers left closed setting is enabled for standalone lockers. For the physical open/closed state of an online locker, see Online monitoring.
 Status icon in the Locker information screen
If required, you can activate additional fields on the Locker information screen. To activate the Ext ID field, you must add the SHOW_EXT_ID parameter on System > General options > Advanced. See Advanced tab for more information. The Ext ID field displays a unique identifier for the locker, automatically generated by the system. You can amend this identifier if required.
You can also add and name a maximum of two General purpose fields using Space General options. To activate a general purpose field, you must select the Enable field checkbox in System > General options > Access points tab in Salto Space. You can then name the field in accordance with the information that you want to capture.
You can create multiple lockers at once by using the Multiple add option. In addition, you can edit multiple lockers at once by using the Multiple edit option. The Multiple edit button is enabled when you select more than one entry on the Lockers screen. This allows you to enter the appropriate identification and configuration details on the Multiple edit screen including access rights. The details are then applied to all of the selected entries. See Configuring lockers for more information about the configuration settings for lockers.
Configuring lockers
The various fields used to configure lockers are described below.
Connection types
The Connection type panel defines the connection type for the locker. The default option is Offline. When you select any of the other (online) connection types from the Connection type drop-down list, a Configure button is displayed on the Locker information screen. See Online connection types for more information.
The connection type options are described in the following table.
| Option | Description |
|---|---|
| Offline | Used for lockers that are not connected to the Salto Network and need to be updated using a PPD. See PPD for more information about PPDs. |
| Online BLUEnet | Used for lockers that are connected to the Salto Network using BLUEnet technology. When you select this option, a + Configure button is displayed on the Locker information screen. In this + Configure screen you can add the locker to a BLUENet node or a BLUENet repeater you already had initialized in the Salto Network screen. The Lockers BLUENet functionality is license-dependent. See Registering and licensing Space for more information. |
| Online GAT Net | Used for lockers that are connected to the Salto Network and provided by a Gantner GAT Net lock. When you select this option, a + Configure button is displayed on the Locker information screen. In this + Configure screen you can add the locker to a GC7 (Gantner) controller you already had initialized in the Salto Network screen. This functionality is license-dependent. See Registering and licensing Space for more information. |
When an online GAT Net locker loses connectivity with Space, the GC7 controller can grant access autonomously using an allowlist previously sent by Space. However, please note:
Space sends up to a maximum of 50 key UIDs per locker to the controller. For offline access to work reliably for all authorized users, the locker must have fewer than 50 users with access. If more than 50 users have access to a locker, 50 UIDs are sent randomly - there is no guarantee as to which users will be able to open the locker in offline mode.
In a hotel, for example, offline mode only works for staff-type users. Hotel guests and visitors can only access GAT Net lockers when the connection to Space is active (online).
Access timetables and timed periods defined in Space are not sent to the GC7 controller and are therefore not enforced in offline mode. If a user's access to a locker is restricted by a timetable, that user will not be included in the allowlist sent to the controller and won't be able to open the locker in offline mode.
Opening modes and timed periods
See Opening modes for information on opening modes.
See Timed periods for information on timed periods.
Opening time and time zone
The Opening time panel defines how long a locker thumbturn stays active after it has been unlocked.
The following table describes the different locker opening time options:
| Option | Description |
|---|---|
| Open time | Defines how long a locker thumbturn remains active after it is unlocked. The default time value is six seconds. The value can be increased or decreased in the range 0 to 255 seconds. |
| Increased open time | Defines a longer opening time. This option is designed for disabled or 'hands full' users. The default time value is 20 seconds. The value can be increased or decreased in the range 0 to 255 seconds. You must enable this option in the user's profile. See Key options for more information. |
The Time zone panel defines which one of the system time zones is used for the locker. You must enable the multiple time zones functionality in System > General options > General to display this panel in Space. See General tab and Time zones for more information.
Locker options
The Locker options panel defines locker functionality, such as auditing locker activity, allowing users to secure a locker without a key, and reducing battery consumption. The following table describes the available locker options.
| Option | Description |
|---|---|
| Audit on keys | Allows monitoring of when and where keys are used. You must enable this feature on both the locker and the user's key. |
| Is free assignment locker | Defines whether a locker works as a free assignment locker within an area or has assigned access. To activate this option, you must add the FREE_ASSIGNMENT_LOCKER parameter in System > General options > Advanced. See Advanced tab for more information. |
| Close locker without card | Allows a user or a group of users to secure the locker without a key. This is a useful feature for common lockers that are used by a small number of users, for example, medicine cabinets or store cupboards. |
| IButton key detection: pulsed mode | Reduces the battery consumption and the risk of rust on the IButton reader contacts as the key detection is done in pulsed mode instead of continuous. To activate this option, you must enable the SHOW_KEY_DETECT_MODE parameter in System > General options > Advanced. See Advanced tab for more information. This option is only compatible with PPDs that have firmware version 1.02 or higher. |
| Admit expired keys | Allows users holding expired keys to open a locker for a specified number of days. The range is 0 to 255 days. It also allows users to access an SVN wall reader to update their keys. If the option is activated with the value "0" the expired keys will have access to the locker until 24.00 within the day that they have expired. |
| Inhibit audit trail | Ensures that the lock will not memorize openings in its audit trail. However, the lock can still write information on the key. To activate this option, you must select the Allow audit trail inhibition checkbox in System > General options > Access point. |
Associating lockers
After you have created and configured a locker, you must associate users, access levels, and/or zones with the specific locker. The following sections describe how to associate lockers with the various components.
Users
To give access permissions for a locker, you must associate the locker with the user. See Users for information about how to create and configure a user.
To associate a user with a locker, do the following:
Select Access points > Lockers. The Lockers screen is displayed.
Click the locker that you want to associate with a user. The Locker information screen is displayed. See Creating Lockers for more information about this screen.
Click Users in the sidebar. The Users dialog box is displayed. Note that the dialog box will be blank if you have not yet associated a user with this particular locker.
 Users dialog box
- Click on Add. The Add dialog box, showing a list of users, is displayed.
 Add dialog box
Select the required users.
Select the appropriate Timetable using the drop-down list and the Days period options. You can also select the Always or Never drop-down list Timetable option. The Always option is selected by default. This means that users can always open the locker, as you have not specified a timetable.
Note that the system calendars do not apply if the Always option is selected. If you select Never, they do not have access to the locker at any time. See Cardholder timetables for more information.
- Click on Save & Close. The selected users now have access permissions for that locker.
To modify a user's cardholder Timetable or Days period of a specific locker, from the Users dialog box, do the following:
- Select the user to be edited and then click on Edit.
 Edit button
- Modify the Timetable and Days period selection and save the changes.
 Edit dialog box
To dissociate a user from a locker, from the Users dialog box of the specific locker, do the following:
Select the user to be dissociated.
Click on Delete and confirm the action in the Warning dialog box.
 Delete button
Access levels
See User access levels, Visitor access levels, and Guest access levels for information about how to create and configure access levels.
To associate a locker with an access level, do the following:
Select Access points > Lockers. The Lockers screen is displayed.
Click the locker that you want to associate with an access level. The Locker information screen is displayed.
Click Access Levels in the sidebar. The Access levels dialog box is displayed. Note that the dialog box will be blank if you have not yet associated an access level with this particular locker.
Click on Add. The Add dialog box, showing a list of access levels, is displayed.
 Add dialog box
Select the required access level in the left-hand panel and the timetable in the right drop-down list.
Click on Save & Close. The locker is now associated with the access level.
To modify an access level timetable or days period of a specific access point, from the Access levels dialog box of the specific locker, do the following:
Select the access level to be edited and then click on Edit.
Modify the Timetable and Days period selection and save the changes.
To dissociate an access level from a locker, from the Access levels dialog box of the specific locker, do the following:
Select the access level to be dissociated.
Click on Delete and confirm the action in the Warning dialog box.
Zones
See Zones for information about how to create and configure a zone.
To associate a locker with a zone, do the following:
Select Access points > Lockers. The Lockers screen is displayed.
Click the locker that you want to associate with a zone. The Locker information screen is displayed.
Click Zones in the sidebar. The Zones dialog box is displayed.
 Zones dialog box
Note that the dialog box will be blank if you have not yet associated a zone with this particular locker.
Click on Add. The Add dialog box, showing a list of zones, is displayed.
Select the required zone and click on Save & Close. The locker is now associated with the zone.
To dissociate a locker from a zone, from the Zone dialog box of the specific locker, do the following:
Select the zone to be dissociated.
Click on Delete and confirm the action in the Warning dialog box.
Locker status
The following table displays the different statuses such as Low battery or Update required that your lockers may indicate at any given moment. These statuses are displayed on the Lockers screen.
| Icon | Description |
|---|---|
| Update required | Indicates that a locker needs to be updated. This icon is displayed in the Update required column. GAT Net personal lockers, unlike GAT Net free assignment lockers, are automatically marked as Update required whenever user access changes. For example, when permissions are added or removed, or when a user's key is assigned or canceled. |
| Unknown | Indicates that the battery status of a locker is unknown. This icon is displayed in the Battery column. |
| Battery status | Indicates the battery status of a locker. This can be normal, low, or run-out. |
Lockers and visitors
Visitors can only access lockers if their visitor entry has been associated with a visitor access level which, in turn, has been associated with a zone containing lockers. See Visitors and Visitor access levels for more information.
You can opt to show if a visitor has left a locker opened or closed (preventing users accessing the locker) when the visitor checks out. To activate this option:
First, enable the FREE_ASSIGNMENT_LOCKER parameter. Add it in System > General options > Advanced.
Select the Control of lockers left closed checkbox in System > General options > Access points.