Timed periods in Space
Overview
An access point timed period defines a time interval during which an access point uses a specified opening mode. For example, you can define a canteen door to automatically unlock at 12.00 and lock again at 14.00. Outside of this time period, the lock reverts to Standard mode and a key is required to unlock it. By default, access points are set to this mode. This is the expected behavior of the access point: it only allows access (the electronic lock unlocks) when a user with valid permissions uses a key to unlock it.
Opening modes are defined when you set up doors and/or lockers. See Configuring doors for more information. When you select an opening mode for an access point, you must define the relevant time period using the Access point timed periods screen as described in Creating access point timed periods.
Three parameters define an access point timed period:
- Start time
- End time
- Day of the week
There are four day types:
You must configure the system calendar before you create access point timed periods. See Calendars for more information.
Creating access point timed periods
To create an access point timed period, do the following:
- Select Access points > Access point timed periods. The Access point timed periods information screen is displayed.
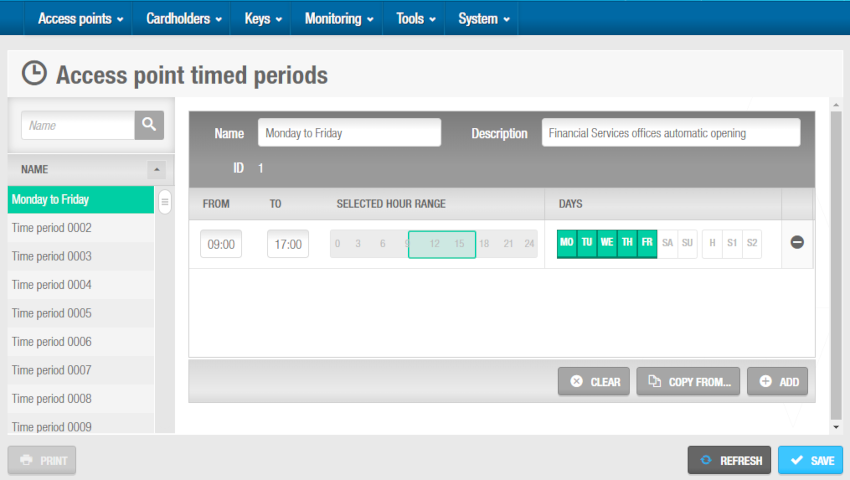
 'Access point timed periods' information screen
Select a time period from the Name panel on the left side of the screen. You can rename the timed period to something more relevant to your organization, for example, Monday to Friday. Time period 001 is automatically selected. If you have already configured this period entry, select the next time period. Up to 1024 time periods can be created.
Type an optional description of the access point timed opening in the Description field.
Select the relevant partition from the Partition drop-down list, if required. See Partitions for more information.
Note that the partitions functionality is license-dependent. See Registering and licensing Space for more information.
Click Add. The Access point timed periods panel is displayed.
Type a start time for the timed period in the From field.
Type an end time for the timed period in the To field.
Click the applicable days in the Days panel and save the changes. In addition to the days of the week, you can also create timed periods for holidays (H) and special days (S1 and S2).
You can create up to eight different periods for each timed period by clicking Add. See Calendars for more information about holidays and special days.
 Back
Back
