Using Space
Interface components
This section describes the components of the Salto Space home screen which is divided into the following three main areas:
- Operator area
- Main menu bar
- Quick-access tiles
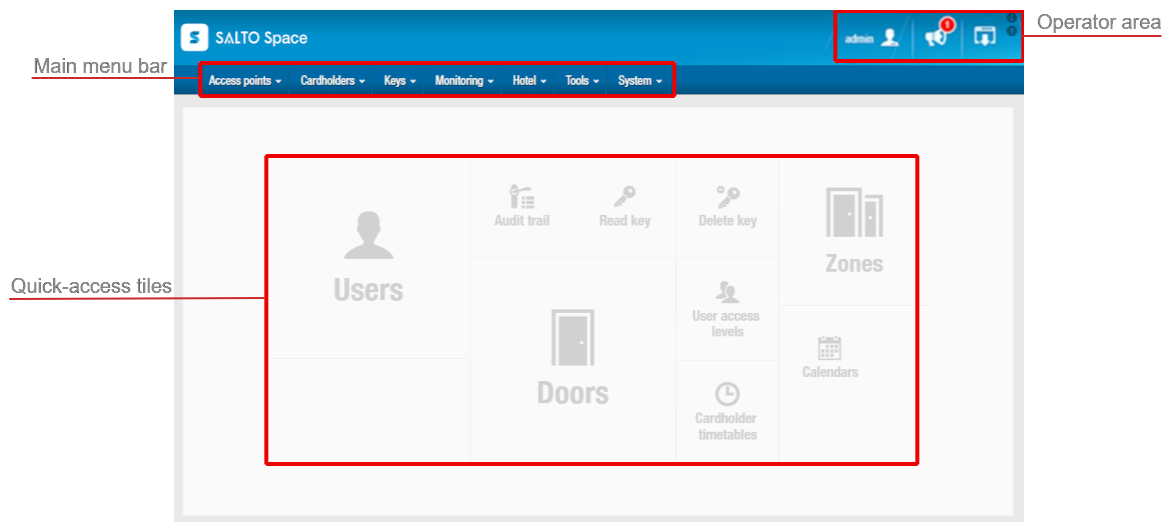 Space home screen
Operator area
| Icon | Description |
|---|---|
Operator | Used to change the login password and edit local settings. Note that this changes depending on the login used. For example, if a hotel operator logs in, this could display 'hotel'. Each operator can customize specific settings such as their preferred language or, if using an Ethernet encoder, the encoder to use. |
Alerts | Displays alerts so that you can see specific system-related issues, for example, unfinished tasks. |
Log out | Used to log out of Space. |
About | When you click this icon, the About window opens. This window displays information relating to your Space license and version as well as displaying links to the locker kiosk and attendance monitoring screens, for example. The information displayed on this screen depends on which features you have access to in your Space license. |
User guide | When you click this icon, you are redirected to the Space user guide. |
Main menu bar
| Item | Description |
|---|---|
| Access points | Creates and controls access points, for example, doors, lockers and rooms. It also enables the creation of zones to group and manage these access points. |
| Cardholders | Controls who has permissions to use a key, for example, users, guests or visitors. This menu also controls when and where the key can be used through the use of timetables. |
| Keys | Enables keys to be read, updated and deleted from the system. It is also used to check visitors in and out. |
| Monitoring | Provides an audit trail of the site by tracking access point activity. |
| Hotel | Enables guest check-in, check-out, and key management for hotels. See Hotel sections for more information. |
| Tools | Gives you the ability to export a list of existing users, doors, etc., make a database (DB) backup, or create schedule jobs such as a DB table synchronization or an audit trail export. |
| System | Provides system audit functionality, tracking event and object modifications. This menu also contains specific administration functionality such as managing network devices and adding and deleting operators, operator groups and partitions. There is also a calendar option that can be used to configure holiday and special day periods. |
Quick-access tiles
The home screen contains shortcuts for quick access to the most commonly used options. The quick-access tiles that are displayed vary according to whether you are accessing the Admin interface or the Hotel interface.
The Admin interface quick-access tiles are listed in the following table.
| Quick-access tile | Alternative access path from Main menu bar |
|---|---|
| Users | Cardholders > Users |
| Audit trail | Monitoring > Audit trail |
| Read key | Keys > Read key |
| Delete key | Keys > Delete key |
| Zones | Access points > Zones |
| Calendars | System > Calendars |
| User access levels | Cardholders > User access levels |
| Cardholder timetables | Cardholders > Cardholder timetables |
| Doors | Access points > Doors |
See Hotel user guide sections for Hotel interface quick-access tiles.
Common screen tasks
Using the sidebar to associate entries
You can associate or disassociate entries with other system elements, for example, users, access levels, and zones, by clicking the sidebar links at the right-hand side of the corresponding dialog box. The sidebar links available vary according to the dialog box displayed.
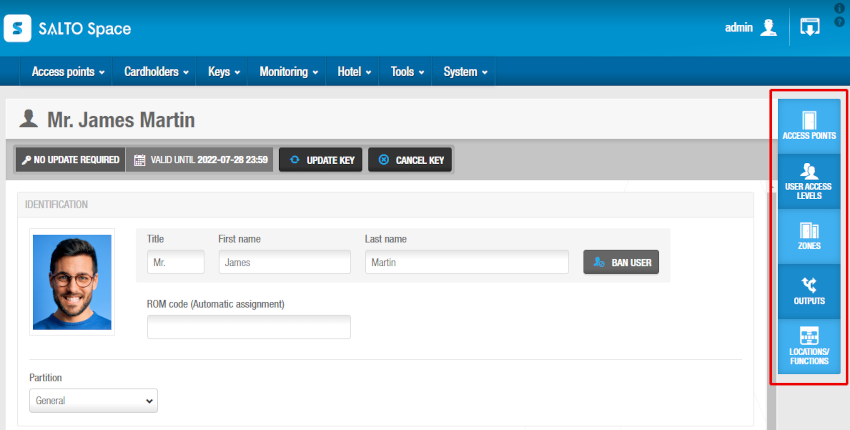 Sidebar links
Adding and deleting from selection lists
Use the Add (+) and Delete (-) buttons in an Add/Delete dialog box to add or delete items from a list. To delete an item, first select it in the dialog box.
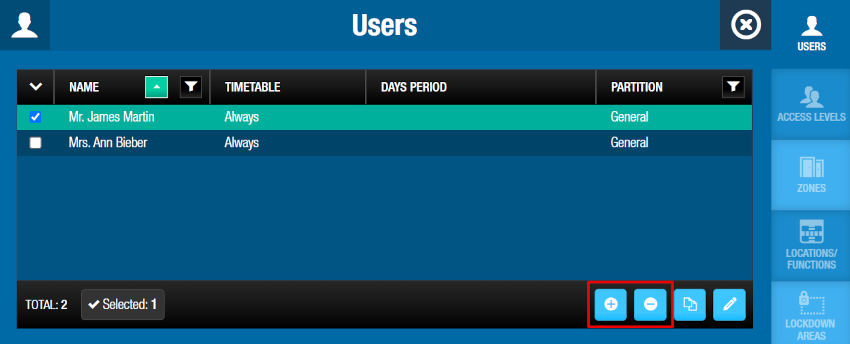 Adding and Deleting buttons
Copying information using Copy from
You can copy information when associating sidebar links by clicking the Copy from button in the corresponding dialog box. For example, if you are associating a door with a user, you can copy the users already associated with another door to the current door by clicking the Copy from button.
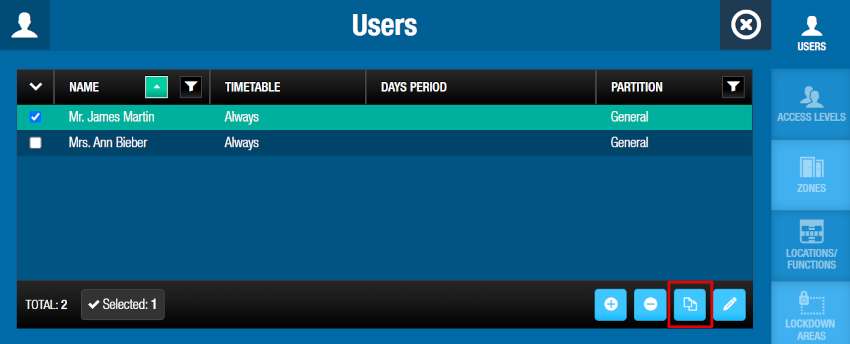 Copy from button
Filtering data by search term
You can use the Funnel icon to search for specific data. The filtering options vary according to the screen that is displayed. Common filters include user name, operator name, event, and locations.
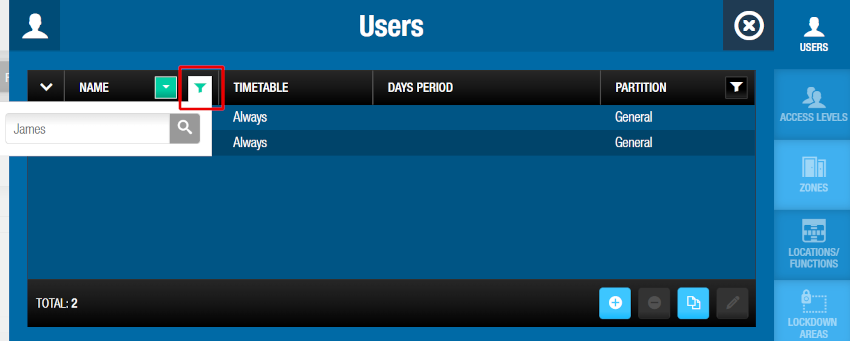 Filtering data using a search term
Multi selection of rows
Click on the top left corner arrow of the entity list to select all the entities within the list, only the entities from the current page or none of them.
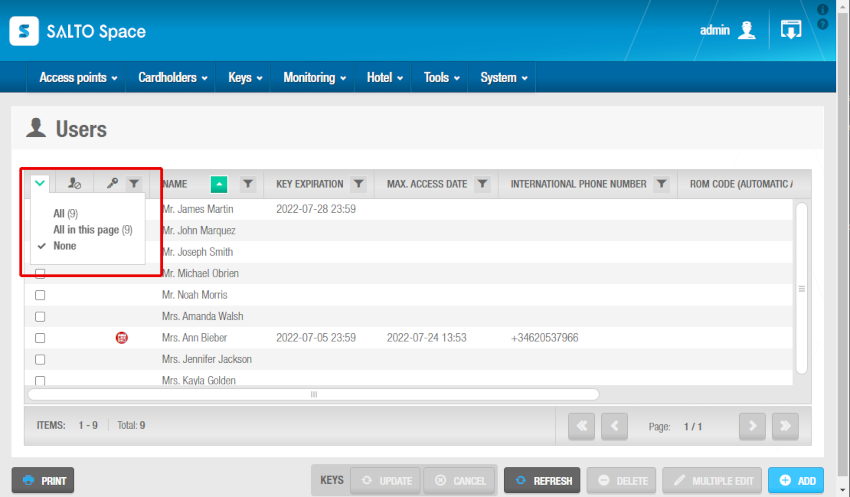 Multiple users selection
Select multiple separate entities from a list by marking the checkboxes on the left side column. A selection can be made on different pages, and the summary of the quantity of selected entities or items, as well as the quantity of the total entities, will appear on the bottom of the list. The window shows the navigation information regarding the available pages, and you can also navigate from the current position to the first or last page:
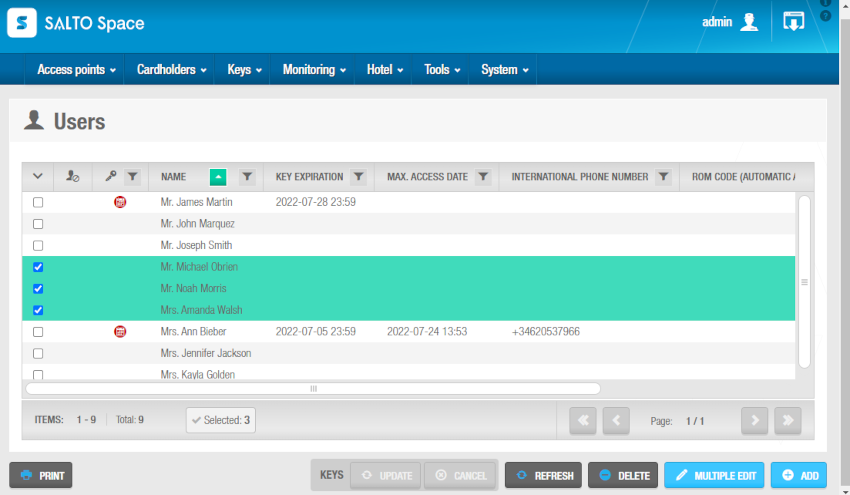 Multiple users selection
Table customization
Columns on some entity lists, such as Doors or Zones, can be customized so that you can position columns on a different order by clicking on the configuration button at the top right of the screen:
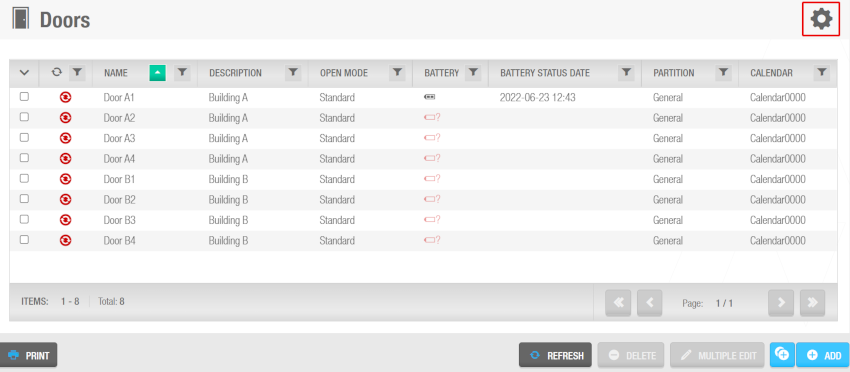 Configuration button on the Doors table
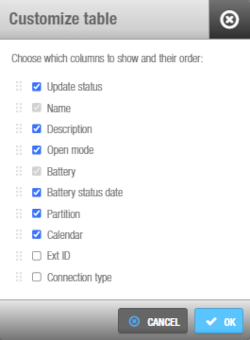 Customize table dialog box
On the entity lists that are not provided with a configuration button, such as Users, you can drag columns to change their order. However, columns cannot be hidden.
The new positions are saved in the database and the same layout is kept the next time the entity list is opened.
Sorting data chronologically or alphabetically
You can use the up/down arrow keys to display screen data alphabetically or chronologically as applicable.
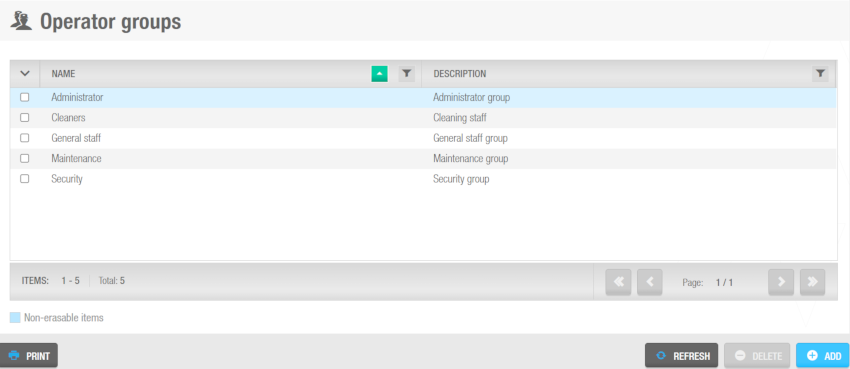
The following figure shows an example of an Operator groups list screen with the up arrow highlighted. The operator group names are sorted and listed alphabetically.
 Sorting data alphabetically
Data marked as non-erasable cannot be deleted from the system. Such entries are highlighted in blue on the list screens, like for example the "Administrator group" shown in the screenshot above.
Exporting data in Space
A Print button is displayed on various screens in Space, for example, the Users screen, the User information screen, and the Calendars screen. You can use this button to export the data on the screen to a specific format. Then a hard copy of it can be printed. For example, you can print the user list if you want to keep a paper record of the users in your site. You can export the data to the following file formats:
- Acrobat (PDF) file
- Excel 2007
- CSV (comma-separated values)
The following example shows how to export the User list to a specific file. Then, you will be able to print a hard copy of the file:
Select Cardholders > Users. The Users screen is displayed.
Click on Print. The Print dialog box is displayed.
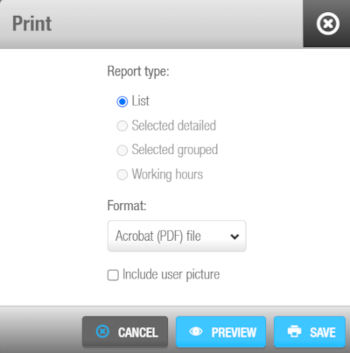 Print dialog box
- Select the format.
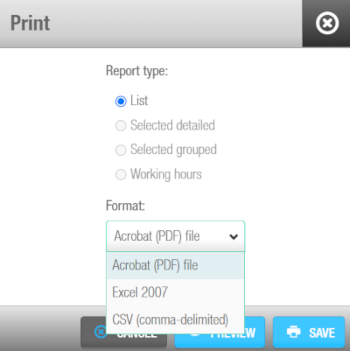 Formats
You can preview the list to be exported by clicking on Preview. The preview is only available for PDF.
- Click on Save. The file is downloaded and opened automatically.
If you select a user before you click Print, you will be able to print either the complete user list by selecting List on the Print dialog box, or other details related to the selected user by clicking on Selected detailed, Selected grouped or Working hours.
Users multi edition
A Multiple edit button is available. You can use this button to edit multiple user's files and access rights at the same time. For example, you can amend the key options or the key expiration or add access in a door for several users.
To edit multiple user's files at the same time, do the following:
- Select the users you want to edit.
- Now that multiple users are selected, the Multiple edit button turns blue. Click Multiple edit.
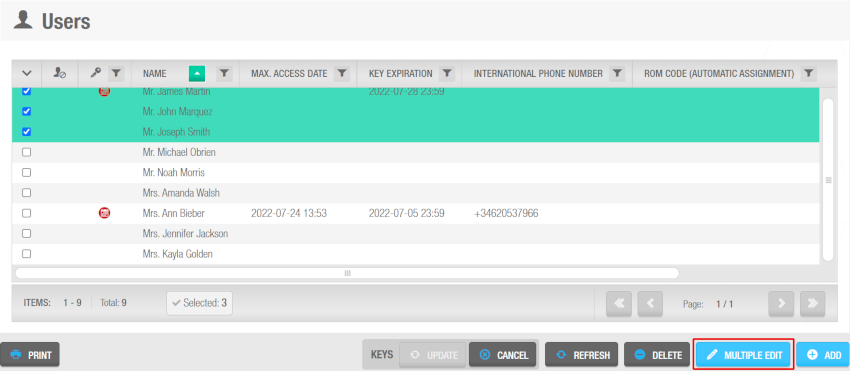 Multiple edit button
Copy entities access configuration
A Copy from button is displayed on each entity configuration screen to configure the accesses in a quicker way. Entities could be Doors, Lockers, etc., but also Users, Guests and Visitors.
Just selecting an entity, for instance a user, the accesses that will be granted to this user on the Access points, User access levels, Zones, Outputs or Locations / Functions tabs, could be copied from another user.
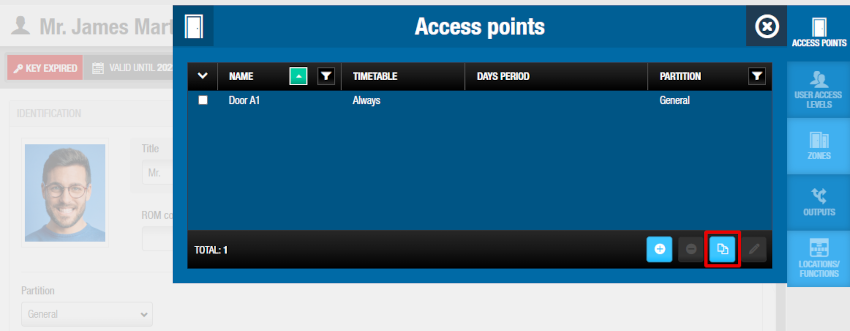 Copy from button
Following the above example, the accesses from another user could be copied on each of the access tabs. Depending on the existing accesses, the software could request to copy the entire configuration of another user (if the accesses are currently empty), or ask the operator to choose how the access should be copied, as can be seen on the picture below:
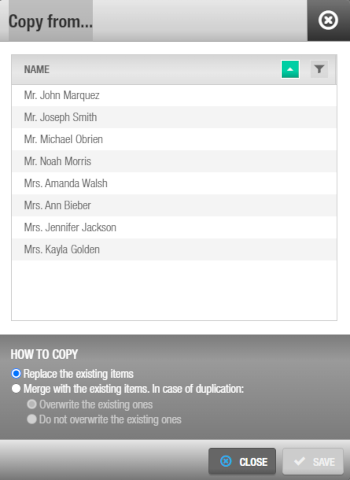 How to copy
The software allows the following options:
- Replacing the existing items on the given list.
- Merging the existing items. In this case, if there are duplicated entities, existing entities could be overwritten or not. Overwriting affects the possible timetable access limitations.
 Back
Back