Elevators in Space
Overview
This section includes information about the following Salto Space menus:
The elevators features integration is license-dependent. It must be configured and activated in the System > General options > Elevators tab. Select the corresponding option on the drop-down menu and save the changes. See Registering and licensing Space for more information.
In case your elevator's keypad or touch screen is controlled by a Salto device, select the Salto-controlled keypad. Otherwise, select the corresponding manufacturer.
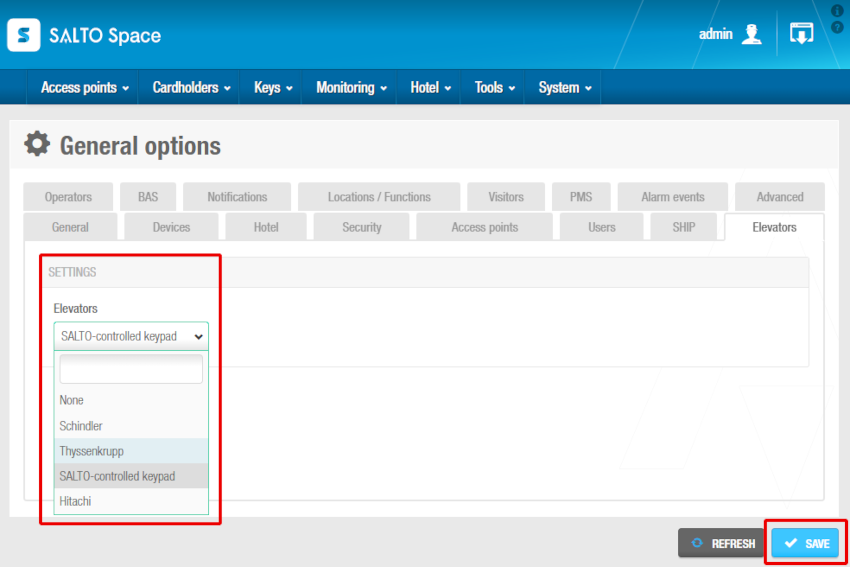 Elevators integration configuration screen
Elevator groups
An elevator group is a category with which a group of elevators giving access to the same Destinations is represented.
Creating elevator groups
To create an elevator group, perform the following steps:
- Select Access points > Elevator Groups. The Elevator Groups screen is displayed.
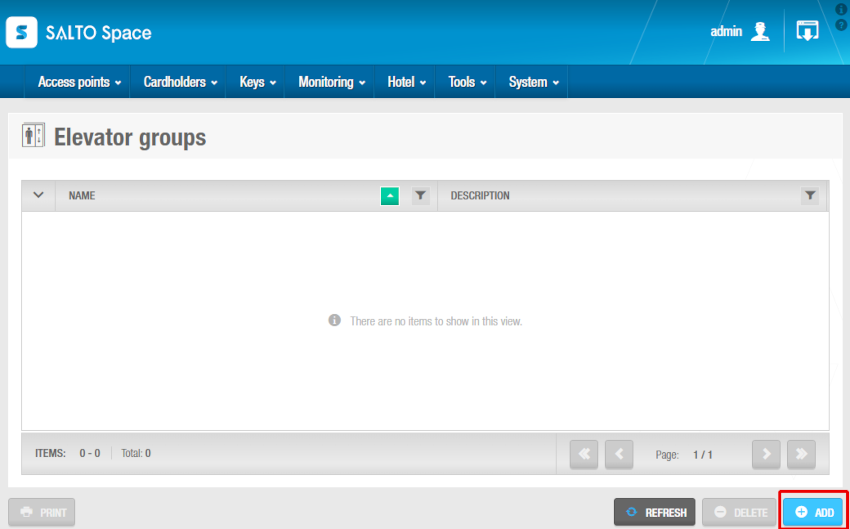 Elevator groups screen
- Click Add. The Elevator Groups information screen is displayed.
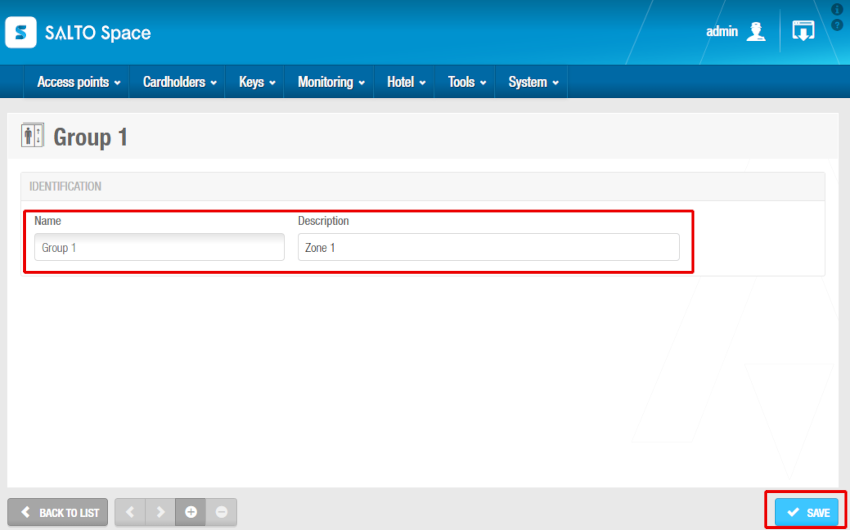 Elevator groups information screen
Type a name for the elevator groups in the Name field and a description in the Description field.
Click Save.
Associating elevator groups
Once you have created an elevator group, you must associate destinations and destination entry terminals with that elevator group. You must perform this action when creating destinations and destinations entry terminals, from their corresponding information screen. See Destinations and Destination entry terminals for a description on how to create and associate them with elevator groups.
Destinations
A destination is a category represented by a new type of permission to floors. For example, it allows you to indicate the specific elevator door that will open (front or rear) on a floor if the elevator has two separate access points.
Creating and associating destinations
To create a destination, perform the following steps:
Select Access points > Destinations. The Destinations screen is displayed.
Click Add. The Destinations information screen is displayed.
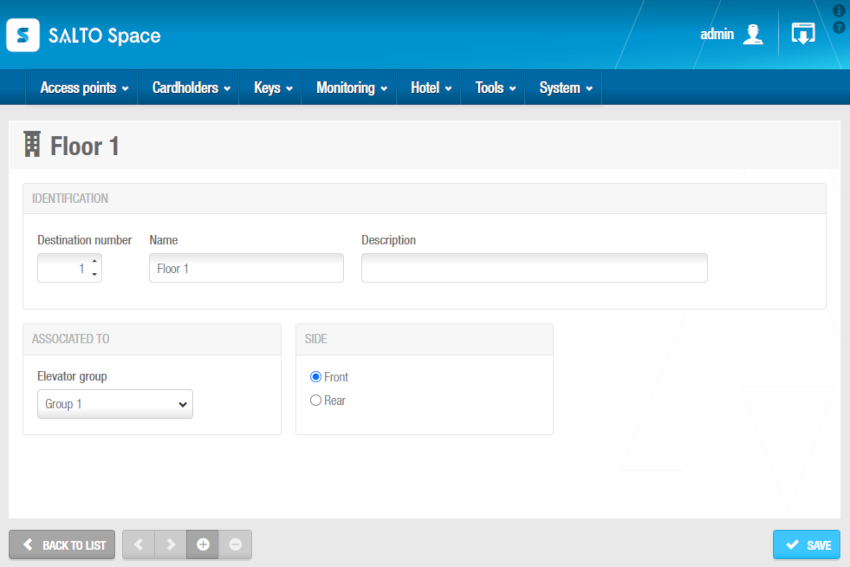 Destination information screen
Select the Destination Number representing the floor number, type a name for the destination in the Name field and a description in the Description field.
Select the Elevator Group with which you want to associate this destination.
If applicable, select the corresponding elevator doors Side (Front or Rear).
Click Save.
Destination entry terminals
A destination entry terminal (DET) is a category represented by a device. For example, a touch screen or keypad, in which you select the destination you want to go to.
Creating and associating destination entry terminals
To create a destination entry terminal, perform the following steps:
Select Access points > Destination entry terminals. The Destination entry terminals screen is displayed.
Click Add. The Destination entry terminal information screen is displayed.
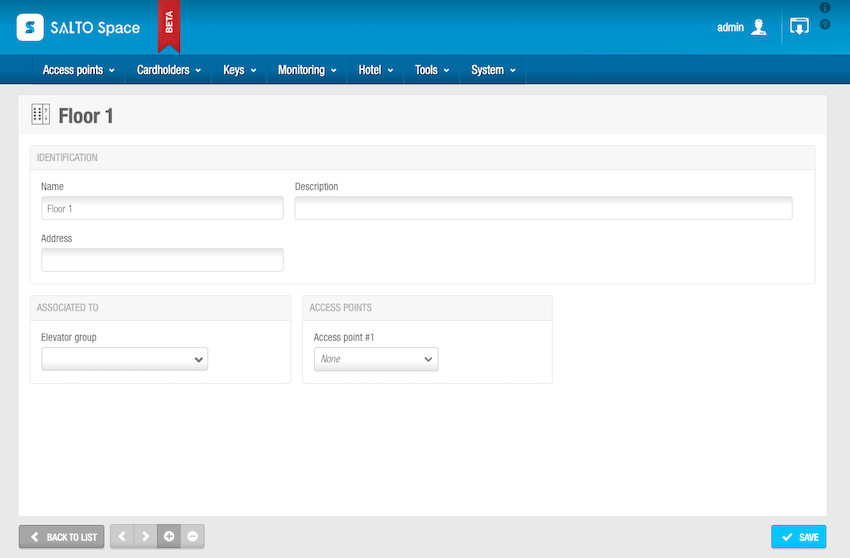 Destination entry terminal information screen
Type a name, a description and the address (for example, the DET location, with 8 digits, numbers and letters only from A to F) in the corresponding fields for the DET.
Select the Elevator Group with which you want to associate this DET.
Select the Access point you will define as DET.
Only if applicable, if you want this DET to enter in sleeping mode and display a sleeping mode screen when not in use, select the (Options >) Sleep checkbox.
If applicable, choose a calendar and a time zone.
The Calendar drop-down list defines which calendar is applied to the destination entry terminal. See Calendars for more information.
The Time zone panel defines which one of the system time zones is used for the destination entry terminal. You must enable the multiple time zones functionality in System > General options to display this panel. See Activating multiple time zones and Time zones for more information.
- Click Save.
Access levels for elevators
Access levels related to elevators are defined as the destination of the users/visitors/guests, which access must be given to the users/visitors/guests via the Cardholders > User access levels / Visitor access levels / Guest access levels menus.
The explanation below includes the information related to how to set up access for users. The process for guests and visitors is the same but these access levels must be configured in the corresponding Visitor and Guest access levels menus.
To associate destinations with user access levels, follow the steps below:
Go to Cardholders > User access levels.
Click on Add. The User access level information screen is displayed.
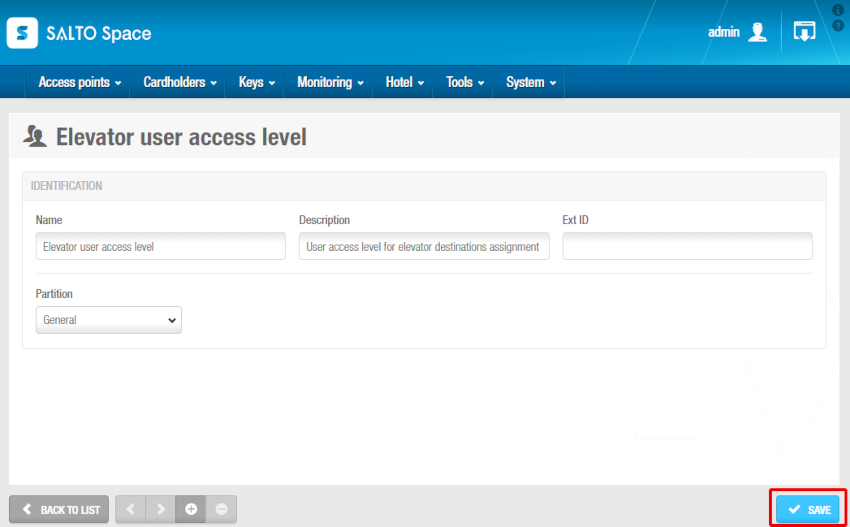 User access level information screen
Type a name in the Name field and a description in the Description field for the User access level.
Select the relevant partition from the Partition drop-down list, if required. See Partitions for more information.
Note that the partitions functionality is license-dependent. See Registering and licensing Space for more information.
If required, you can activate the Ext ID field that appears on the User access level information screen by adding the SHOW_EXT_ID parameter on System > General options > Advanced. See Advanced tab for more information. The Ext ID field displays a unique identifier for the user access level, automatically generated by the system when the new user access level is saved. You can amend this identifier if required.
Click on Save. Once the User access level is created, the Access points, Zones, Users, Outputs and Destinations menus appear on the right sidebar.
Click on Destinations. The Destinations dialog box is displayed. Note that the dialog box will be blank if you have not yet associated a destination with this particular user access level.
Click on Add. The Add dialog box is displayed.
Select the destination/s to be associated with this user access level and click on Save & close. The destinations and the user access level are now associated.
 Back
Back
