Partitions in Space
Overview
Partitions are items within the system that are grouped together for ease of management, forming sub-groupings within an installation. Partitions allow admin operators to delegate more granular control, separating an installation into different 'parts' (buildings, departments, offices) that can then be individually managed by other operators.
A common use case for a partition could be the humanities building in a university or an office space located within a larger building that contains multiple office spaces rented by different companies.
Operators who have access to these partitions can only manage the items belonging to them (such as specific access points, users, user access levels, among others) depending on the partition permissions set by the operator with admin rights (admin operator). See Creating operator groups for more information about the permissions for partitions. Operators who do not have access to a partition cannot manage the items belonging to it.
The partitions functionality is license-dependent. See Registering and licensing Space for more information.
Partitions can include the following items:
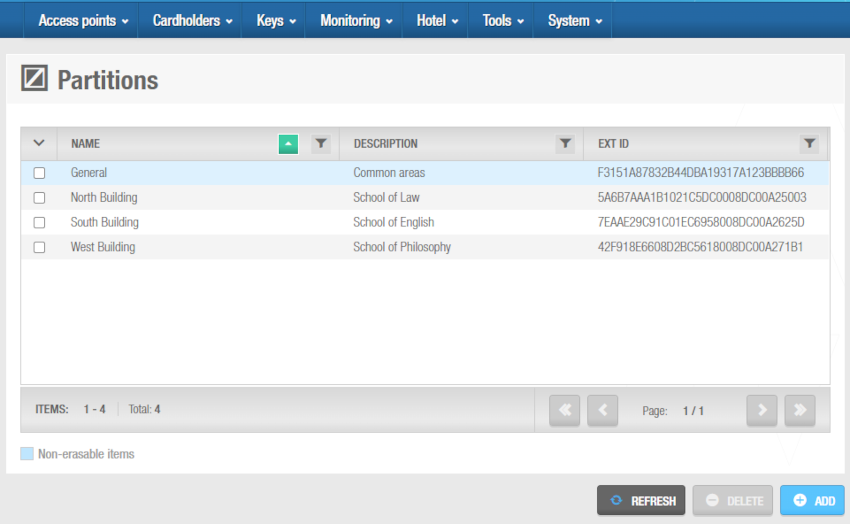
There is one default partition in the system (General), which cannot be removed, but you can create additional partitions as needed. An operator can view and modify their own partitions in accordance with the permissions set by the admin operator. However, only the admin operator can create and delete partitions. See Operator group global permissions for more information.
When you modify, for example, lock settings, they often have to be physically updated with a PPD for those changes to take effect. This is not the case with partitions, because partitions is a software-only feature.
If you delete a partition, you must select another partition to which items in that partition should be moved.
Creating partitions
To create a partition, do the following:
- Select System > Partitions. The Partitions screen is displayed.
 'Partitions' screen
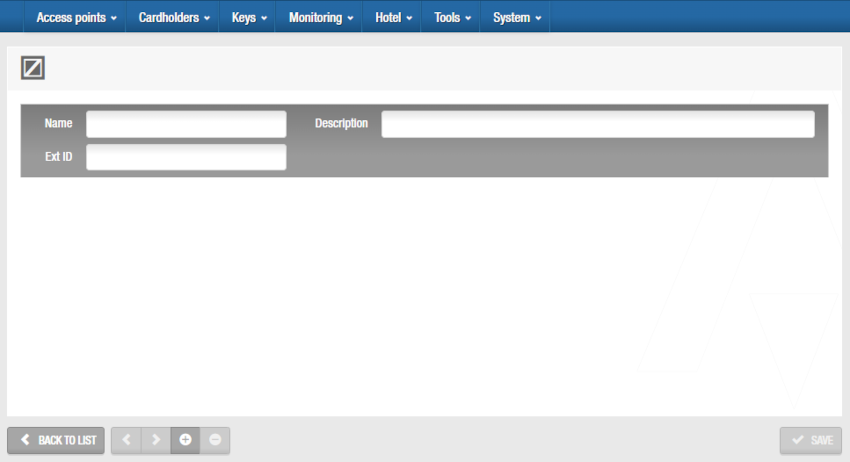
- Click Add. The Partition information screen is displayed.
 'Partition' information screen
Type a name for the partition in the Name field.
Type a description for the partition in the Description field.
Click Save.
If required, you can activate the Ext ID field that appears on the Partition information screen by adding the SHOW_EXT_ID parameter on System > General options > Advanced. See Advanced tab for more information. The Ext ID field displays a unique identifier for the partition, automatically generated by the system. You can amend this identifier if required.
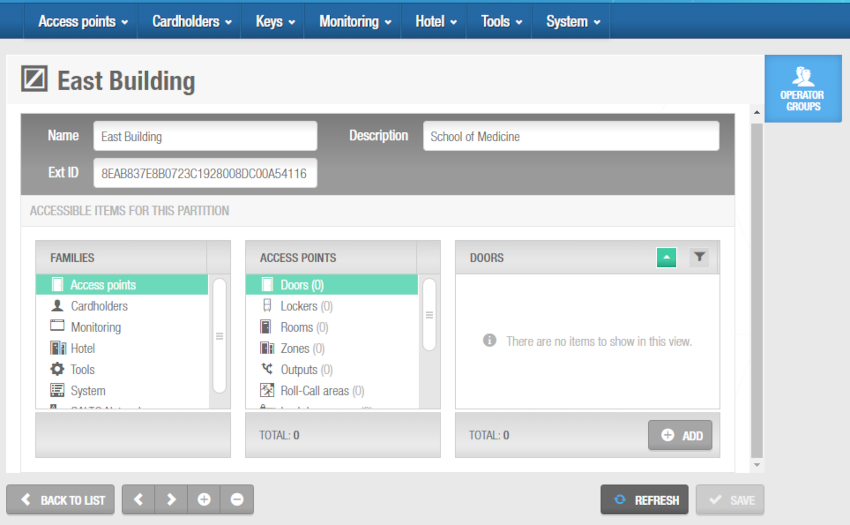
Select Access points in the Families panel. The Access points list is displayed.
Select Doors from the Access points list. The Doors panel is displayed on the Partition information screen.
 'Doors' panel in the 'Partition' information screen
Click Add in the Doors panel. The Add dialog box, showing a list of doors, is displayed.
Select the appropriate partition from the Partition drop-down list. The list updates to show all the doors in the selected partition.
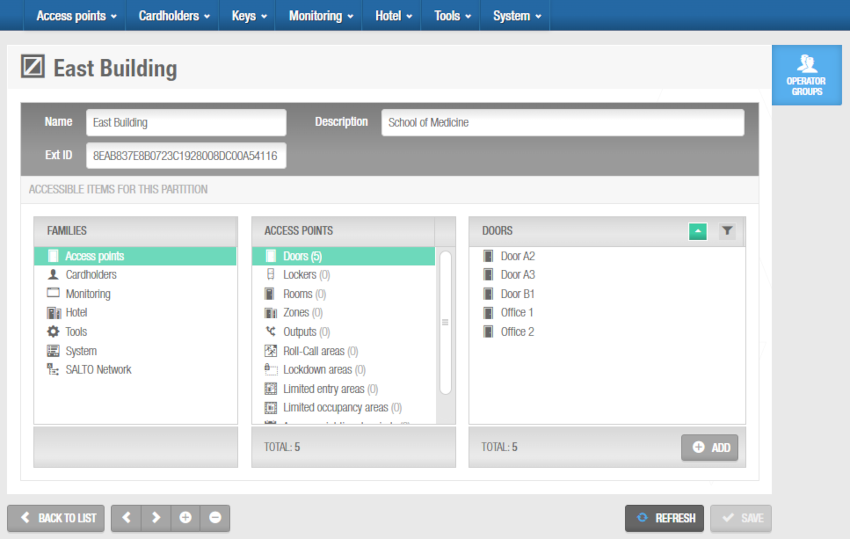
Select the required doors to be added to the current partition and save the changes. The selected doors are displayed in the Door panel on the Partition information screen.
 Selected doors
Follow the procedure described in steps 6 to 9 for each entry in the Access points list.
Follow the procedure described in steps 5 to 9 for each family in the Families panel. See Partition Family Types for a description of family types.
If you need to move any item to a different partition, from the Partitions screen, click on the partition to which you want to move the item and follow steps 5 to 9 according to the specific item.
When you create partitions, you can move items (such as doors or users) from one partition to another using the Add dialog boxes on the appropriate Partition information screen. You can also do this on the information screen for each item. For example, you can move a door to a different partition by selecting the new partition in the Partition field on the Door information screen and clicking Save. Note that you must select Access points > Doors and click the required door on the Doors screen to view the Door information screen.
Partition family types
You can add different items to partitions. These items are grouped into seven families on the Partition information screen.
They are described in the following table.
| Family | Description |
|---|---|
| Access points | Includes the following items: - Doors - Lockers - Rooms - Zones - Locations - Functions - Outputs - Roll-call areas -Lockdown areas - Limited entry areas - Limited occupancy areas - Access point timed periods - Access point automatic changes |
| Cardholders | Includes the following items: - Users -Visitors -User access levels -Visitor access levels - Guest access levels - Limited entry groups - Limited occupancy groups - Limited entry timetables - Cardholder timetables |
| Monitoring | Includes audit trail advanced filters |
| Hotel | Includes check-in groups |
| Tools | Includes Entity exportation and Alarm events |
| System | Includes calendars |
| Salto Network | Includes every network device, such as encoders, gateways, nodes, etc. |
Associating partitions
After you have created a partition and added items to it, you must associate operator groups with that partition. You can do this by selecting the partition in the Partitions & Permissions panel on the Operator group information screen. See Creating operator groups for more information.
To view the operator groups associated with a partition, follow the steps below:
Select System > Partitions. The Partitions screen is displayed.
Click on the partition of which the operator group list you want to view. The Partition information screen is displayed.
Click Operator groups in the sidebar. The Operator groups dialog box, showing a list of operator groups, is displayed.
 Back
Back