Entity exportation in Space
Overview
Entity exportation gives you the ability to export a list of existing entity types, such as Users, Doors, User access levels, etc., in CSV format.
Entity exportation consists of three steps:
Step one: Job configuration
To complete this first step do the following:
- Select Tools > Entity exportation. The Entity exportation screen is displayed.
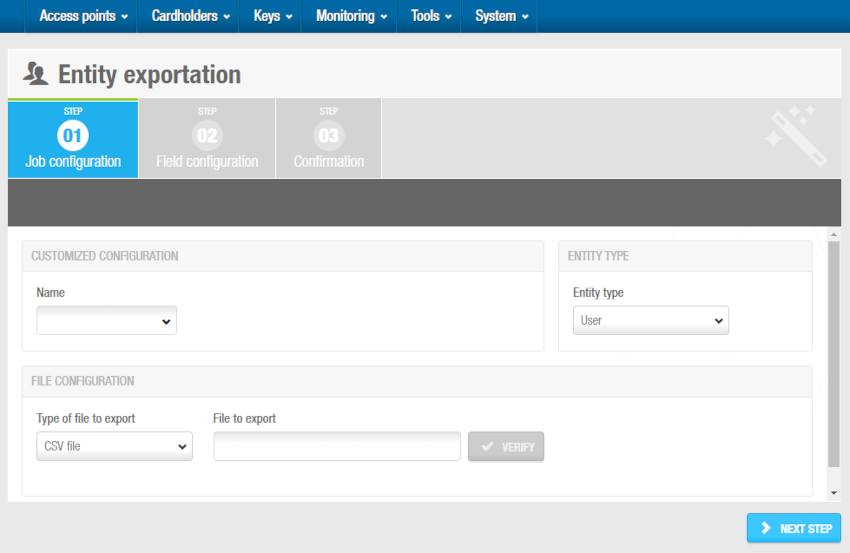 'Entity exportation' screen
Type a name for the job in the Name field. For example, "Expired users" or "Current valid access levels". If you enter a name, the current exportation will be saved as a template for future use.
The default option in the Type of the file to export field is CSV file. This is the only file format currently supported.
Type a name for the file that you want to export in the File to export field, such as
C:\SALTO\user-details, and follow the steps below:
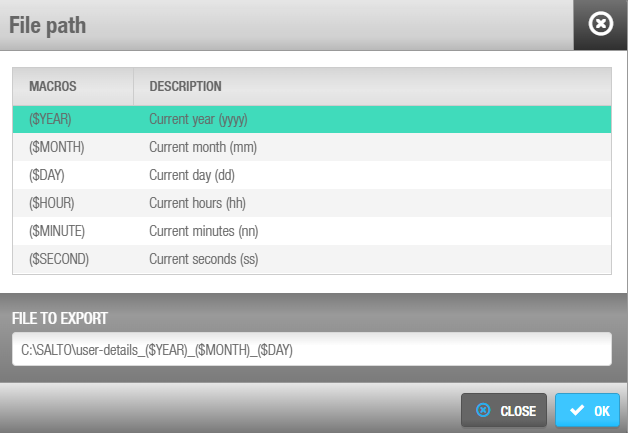 'File path' dialog box
- Press F2 to display the File path dialog box and insert macros in the file name if required.
Using macros, for example,
($YEAR)_($MONTH)_($DAY), allows you to save the file with a unique name so it is not overwritten by the next file that is created. - Double-click the appropriate macro to insert it in the file name. Each macro you insert is displayed in the file name in the File to export field.
- Click OK when you have finished inserting macros and the appropriate file name is displayed in the File to export field.
- You can click Verify on the File configuration panel to verify the file directory exists and is correct.
- In the Entity type panel, select the entity you want to export. You can select User, Door, User access level, Zone, Locker or Room.
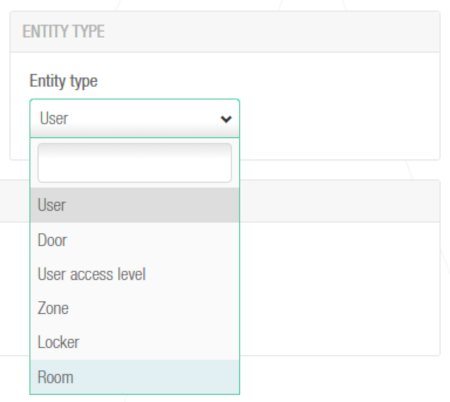 'Entity type' drop-down list
In Entity partition, select the partition the users to export are from. See Partitions for more information about partitions. The default option is Any partition, meaning that users from any partition will be exported.
Click Next step. The Field configuration screen is displayed.
Step two: Field configuration
To complete step two:
- Select the format from the File format drop-down list on the Field configuration screen. This specifies the format of the file containing the exported entity data.
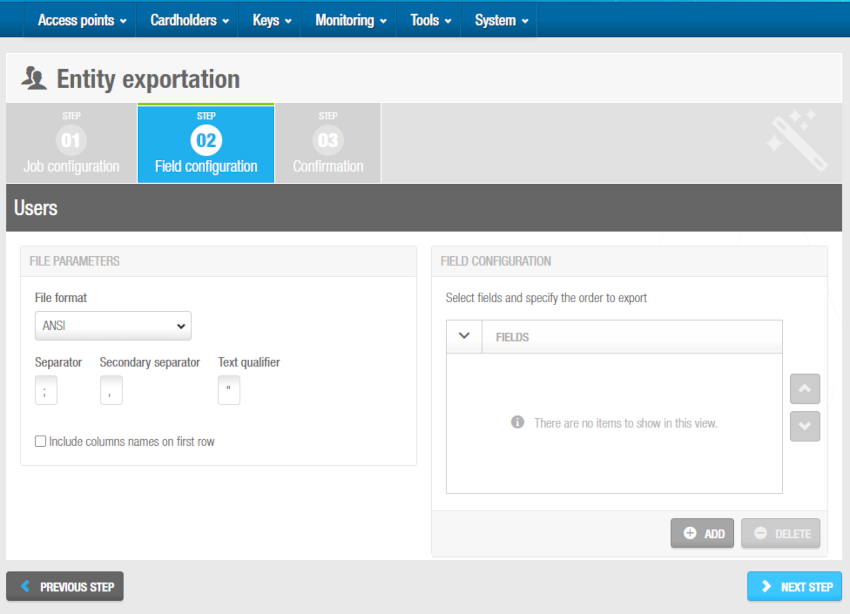 'Field configuration' screen
The Separator, Secondary separator and Text qualifier fields are automatically populated but you can change the characters in those fields if required. These fields specify how the entity data is stored in the file.
Select the Include column names on first row checkbox if required. If you select this, the column names are included in the first row of the file.
Click Add in the Field configuration panel. The Select fields dialog box, showing a list of fields, is displayed.
The content of the fields may vary depending on the entity you are exporting. For example, if you are exporting User, the fields will be those found in the user list.
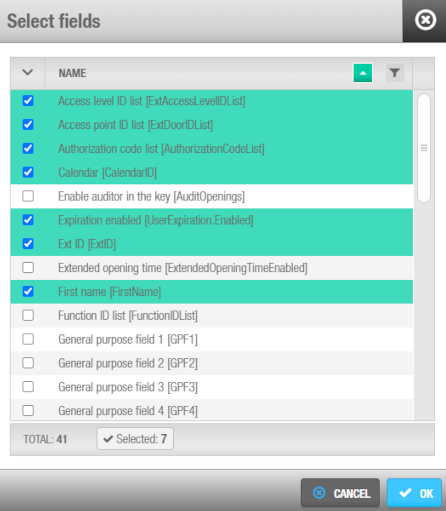 'Select fields' dialog box
- Select the required fields and click Accept. The selected fields are displayed in the Fields list on the Field configuration screen.
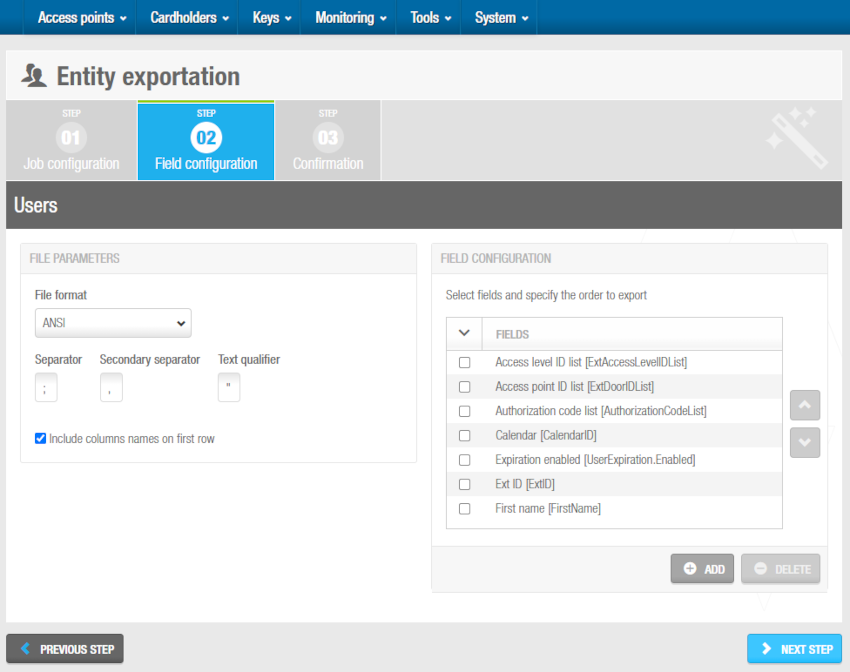 Fields selected in the 'Field configuration screen'
The order of the fields in the Fields list determines the order in which the fields are exported. You can select fields and click the up and down chevrons to change the order of the fields if required.
Click Next step. The Confirmation screen is displayed.
Step three: Confirmation
To confirm the exportation of an entity:
- Review the job configuration details on the Confirmation screen. Click Previous Step if you need to amend the job configuration details.
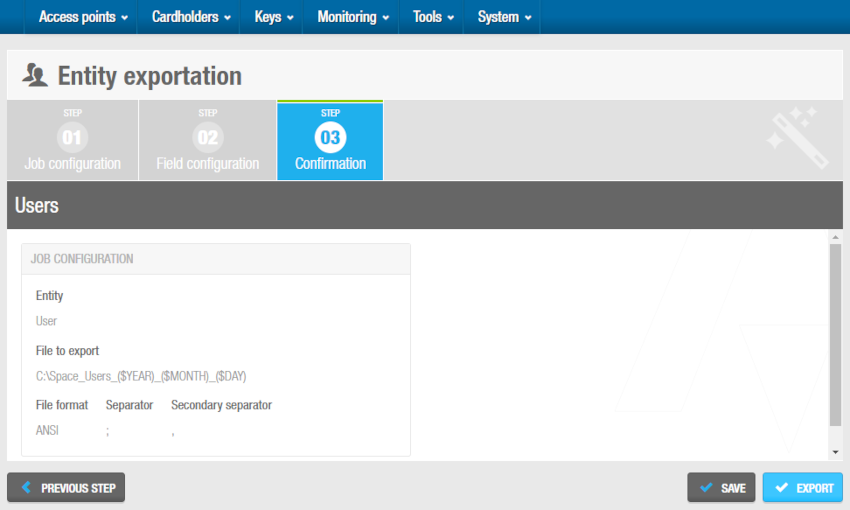 'Confirmation' screen
- You can click Save to save the exportation template if you need to export the same entity in the future. The Save dialog box is displayed. Type Name and Description and save the changes.
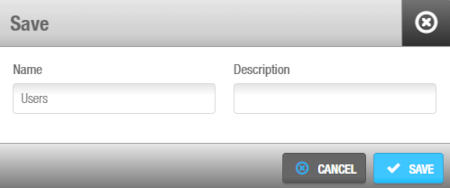 Enter the details in the 'Save' dialog box to save the exportation template
- Click Export to perform a one time exportation. Once the operation has been completed, a confirmation message is displayed.
To verify that the exportation was successful, go to the directory you have previously selected and open the exported file with a program that can use CSV files.
