Guest access levels in Space
Overview
Guest access levels are used to group together guests and access points for access to a specific area. For example, you can create a first floor access level for all guests staying on the first floor or a leisure access level for guests to access the gym. You must define the guest access levels before checking in guests.
The following sections describe how to create and associate a guest access level.
Creating guest access levels
To create a guest access level, do the following:
- Select Cardholders > Guest access levels. The Guest access levels screen is displayed.
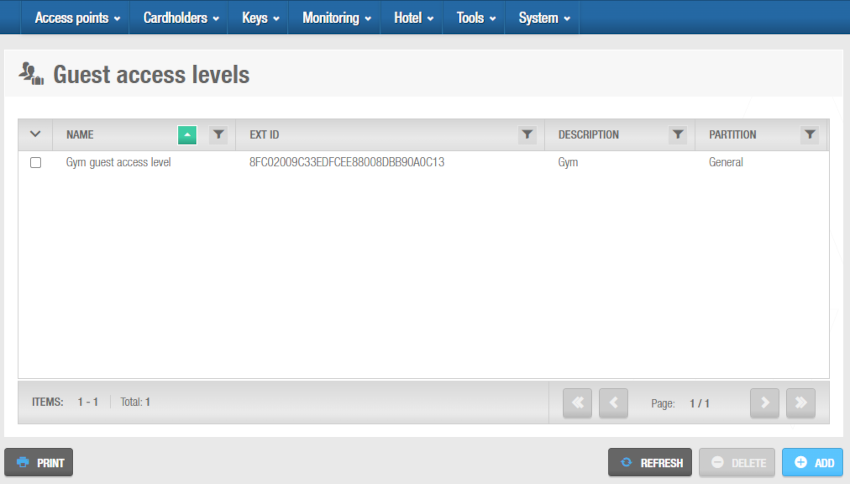 'Guest access levels' screen
- Click Add. The Guest access level information screen is displayed.
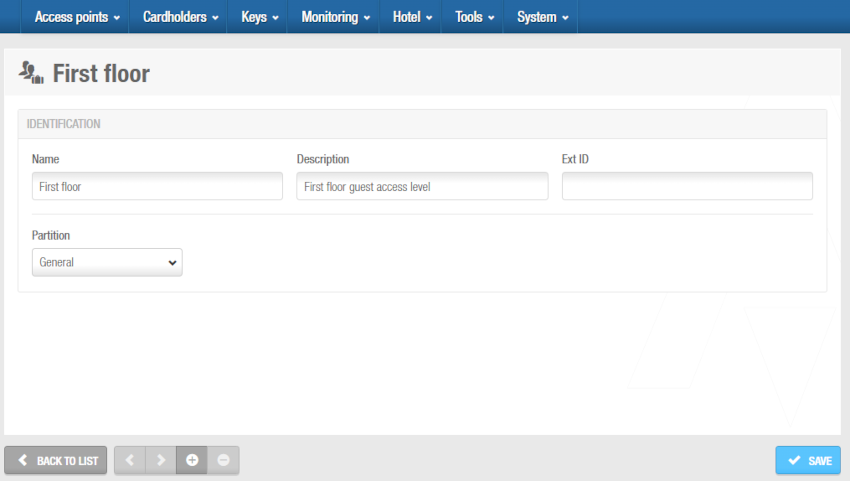 'Guest access level' information screen
Type a name for the guest access level in the Name field.
Type a description for the guest access level in the Description field.
Select the appropriate partition from the Partition drop-down list, if required. See Partitions for more information.
Note that the partitions functionality is license-dependent. See Registering and licensing Space for more information.
- Click Save.
Associating guest access levels
After you have created a guest access level, you must associate zones, outputs, and guests with that guest access level. The following sections describe how to associate guest access levels with those entities.
Zones
To associate a zone with a guest access level, do the following:
Select Cardholders > Guest access levels. The Guest access levels screen is displayed.
Click the guest access level that you want to associate with a zone. The Guest access level information screen is displayed.
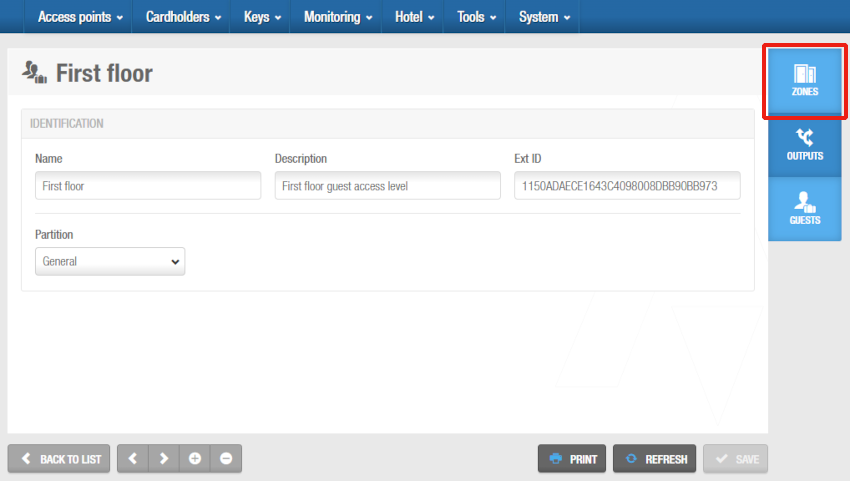 Click 'Zones' in the sidebar
- Click Zones in the sidebar. The Zones dialog box is displayed. Note that the dialog box will be blank if you have not yet associated a zone.
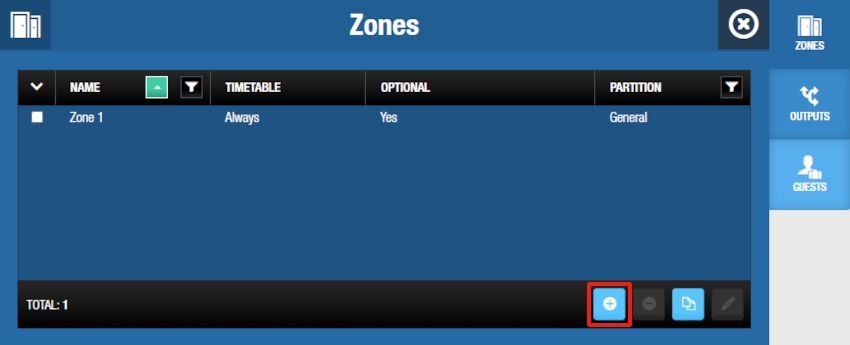 'Zones' dialog box
Click Add. The Add dialog box, showing a list of zones, is displayed.
Select the required zone.
Select the appropriate Timetable using the drop-down list or specify whether access is optional. You can also select the Always or Never drop-down list Timetable option. The Always option is selected by default. This means that guests associated with the specified guest access level always have access to that zone, as you have not specified a timetable.
Note that the system calendars do not apply if the Always option is selected. If you select Never, they do not have access to that zone at any time. See Cardholder timetables for more information.
- Select Yes or No as appropriate. If you select Yes, the hotel operator can decide whether or not to grant access when they check in a guest. If you select No, access is granted to all guests in the guest access level by default. Note that if you specify an access point as optional, it is displayed as a checkbox option in the Optional facilities panel on the Hotel check-in screen. Optional access is useful for hotels offering various accommodation packages and rates to guests, for example, accommodation with or without spa access.
For security purposes, a guest access level cannot be associated with a zone that contains a room. Guests can only be given access to their own rooms or specific additional rooms at check-in.
- Click on Save & Close. The selected guest access level now has access permissions for that zone.
To modify a zone's cardholder Timetable, from the Zones dialog box, do the following:
- Select the zone to be edited and then click on Edit.
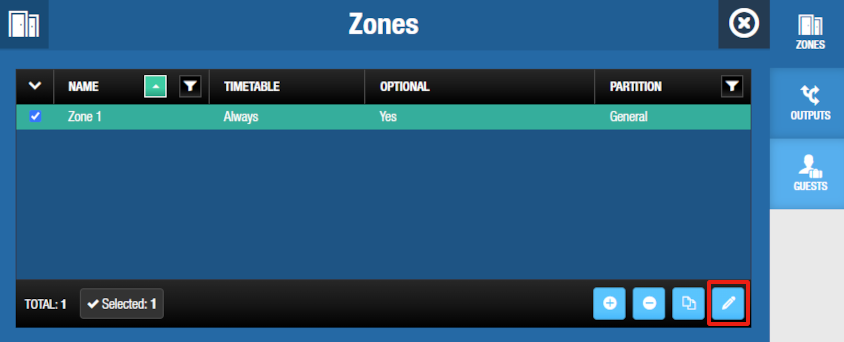 'Edit' button on the 'Zones' dialog box
- Modify the Timetable or select whether access is optional and save the changes.
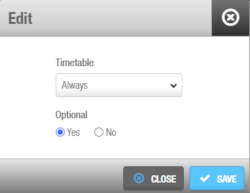 'Edit' dialog box
To dissociate a zone from a guest access level, from the Zones dialog box of the specific guest access level, do the following:
- Select the zone to be deleted.
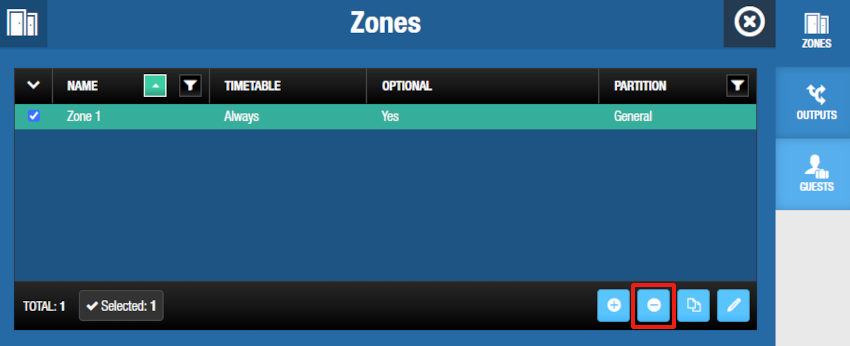 'Delete' button on the 'Zones' dialog box
- Click on Delete and confirm the action in the Warning dialog box.
Outputs
To associate an output with a guest access level, do the following:
Select Cardholders > Guest access levels. The Guest access levels screen is displayed.
Click the guest access level that you want to associate with an output. The Guest access level information screen is displayed.
Click Outputs in the sidebar. The Outputs dialog box is displayed. Note that the dialog box will be blank if you have not yet associated an output.
Click Add. The Add dialog box, showing a list of outputs, is displayed.
Select the required output and specify whether access is optional. For example, you can give all guests in the guest access level access to the penthouse floor by default or opt to grant guests access to this floor during check-in. See Zones for more information and a description of the steps that you should follow.
It is recommended that you select No in the Optional column for the ESD_#1 and ESD_#2 outputs that are generated by the system. This ensures that guests automatically receive access to the ESD in their room when their key is encoded, and hotel operators do not have to grant this access to individual guests during check-in. See Associated device lists and Zones for more information.
- Click on Save & Close. The guest access level is now associated with the output.
To modify the Optional column selection within an output associated to a guest access level, from the Outputs dialog box of the specific guest access level, do the following:
Select the output to be modify.
Click on Edit. The Edit dialog box is displayed.
Modify the selection and save the changes.
To dissociate an output from a guest access level, from the Outputs dialog box of the specific guest access level, do the following:
Select the output to be deleted.
Click on Delete and confirm the action in the Warning dialog box.
Guests
To associate a guest with a guest access level, do the following:
Select Cardholders > Guest access levels. The Guest access levels screen is displayed.
Click the guest access level that you want to associate with a guest. The Guest access level information screen is displayed.
Click Guests in the sidebar. The Guests dialog box is displayed. Note that the dialog box will be blank if you have not yet associated a guest.
Click Add. The Add dialog box, showing a list of guests, is displayed.
Select the required guest.
Click on Save & Close. The guest access level is now associated with the guest.
To dissociate a guest from a guest access level, from the Guests dialog box of the specific guest access level, do the following:
Select the guest to be deleted.
Click on Delete and confirm the action in the Warning dialog box.
Associated devices
This option's availability on the Guest access level information screen depends on the Hotel tab configuration. See Hotel tab for more information on how to activate this option.
To associate an associated device with a guest access level, do the following:
Select Cardholders > Guest access levels. The Guest access levels screen is displayed.
Click the guest access level that you want to associate with an associated device. The Guest access level information screen is displayed.
Click Associated devices in the sidebar. The Associated devices dialog box is displayed. Note that the dialog box will be blank if you have not yet associated an associated devices.
Click Add. The Add dialog box, showing a list of associated devices, is displayed.
Select the required associated devices and specify whether access is optional. For example, you can give all associated devices in the guest access level access to the penthouse floor by default or opt to grant guests access to this floor during check-in. See Associated device lists and Zones for more information.
Click on Save & Close. The guest access level is now associated with the associated device.
To modify the Optional column selection within an associated device associated to a guest access level, from the Outputs dialog box of the specific guest access level, do the following:
Select the output to be modify.
Click on Edit. The Edit dialog box is displayed.
Modify the selection and save the changes.
To dissociate an associated device from a guest access level, from the Associated devices dialog box of the specific guest access level, do the following:
Select the associated device to be deleted.
Click on Delete and confirm the action in the Warning dialog box.
Destinations
This option is license-dependent and its availability on the Guest access level information screen is also determined by the Hotel tab configuration. See Registering and licensing Space for more information on licensing options.
To associate a destination with a guest access level, do the following:
Select Cardholders > Guest access levels. The Guest access levels screen is displayed.
Click the guest access level that you want to associate with a destination. The Guest access level information screen is displayed.
Click Destinations in the sidebar. The Destinations dialog box is displayed. Note that the dialog box will be blank if you have not yet associated a guest.
Click Add. The Add dialog box, showing a list of destinations, is displayed.
Select the required destination.
Click on Save & Close. The guest access level is now associated with the destination.
To dissociate a destination from a guest access level, from the Destinations dialog box of the specific guest access level, do the following:
Select the destination to be deleted.
Click on Delete and confirm the action in the Warning dialog box.
 Back
Back
