Rooms in Space
Overview
Hotel access points can include rooms, suites, zones, and outputs. Rooms are specific to hotel sites in Space and can be assigned to one or more guests.
The following section describes how to create and configure a room.
Creating rooms
To create a room, do the following:
- Select Access points > Rooms. The Rooms screen is displayed.
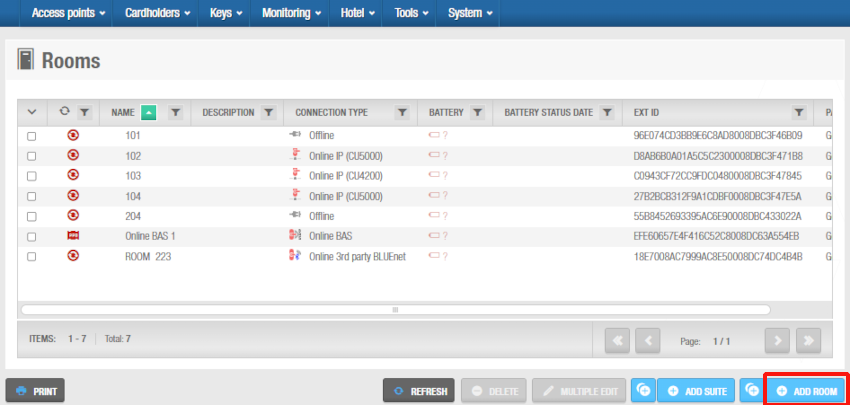 Use the 'Add room' button to create a new room
- Click Add room. The Room information screen is displayed.
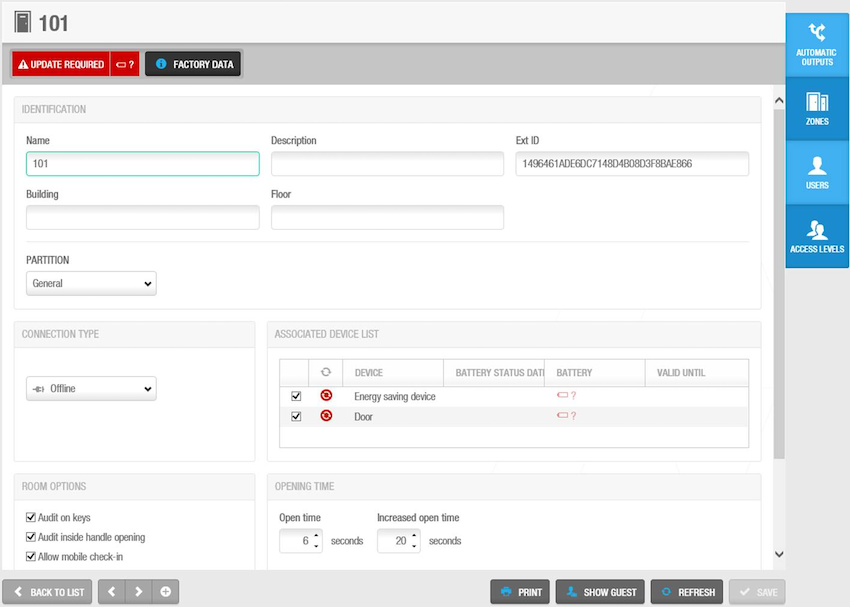 Use the room information screen to add all the details pertaining to that specific room
Type a name for the room in the Name field.
Type a description for the room in the Description field.
Select the appropriate partition from the Partition drop-down list, if required. See Partitions for more information.
Note that the partitions functionality is license-dependent. See Registering and licensing Space for more information.
Select the appropriate configuration options as described in Configuring rooms.
Click Save.
You can activate up to two general purpose fields on the Room information screen if required. To activate a general purpose field, you must select an Enable field checkbox in System > General options > Access points. You can then name the field in accordance with the information that you want to capture. See Access points tab for more information.
Configuring rooms
The following sections describe the various fields used to configure rooms.
Opening modes
The default opening mode for rooms and suites is Standard.
However, you can change this to Toggle or Office in the Opening mode panel of the specific room.
If the advanced parameter EXIT_LEAVES_OPEN is also active, the modes Exit leaves open and Toggle + Exit leaves open can also be selected.
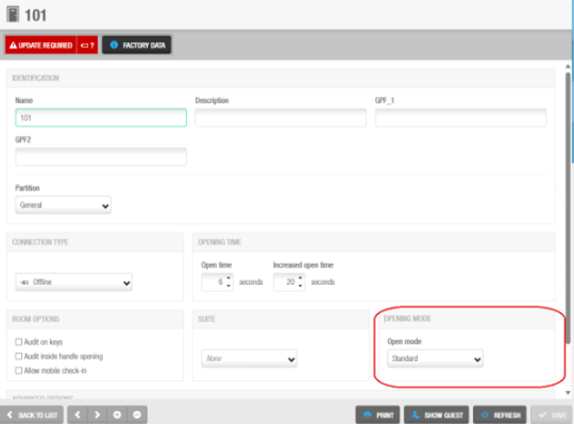 From Space 6.11 onwards, the opening mode is configured in the individual room profile
From Space 6.11 onwards, opening mode configuration has been decentralized from the General options > Hotel tab to individual room profiles. This allows each hotel room to have its own specific opening mode settings rather than sharing a universal configuration across the entire installation.
See Hotel tab and Opening modes and timed periods for more information.
Connection types
The Connection type panel defines the connection type for the room. The default option is Offline. When you select any of the other (online) connection types, a Configure button is displayed on the Room information screen. This button is activated when you click Save. See Online connection types for more information about configuring connection types.
Additional panels are also displayed on the Room information screen depending on the connection type that you select.
The connection type options are described in the following table.
| Option | Description |
|---|---|
| Offline | Used for doors that are not connected to the Salto Network and need to be updated using a PPD. See PPD for more information about PPDs. |
| Online IP (CU5000) | Used for doors that are hardwired to the Salto Network and managed using Ethernet TCP/IP protocols. See Salto Network for more information. When you select this option, a Lockdown area panel and a Limited occupancy area panel are displayed on the Room information screen. For an online CU, you can add the room to a lockdown area and/or a limited occupancy area if required. See Lockdown areas and Limited occupancy areas for more information. |
| Online IP (CU4200) | Used for doors that are hardwired to the Salto Network and managed using Ethernet TCP/IP protocols. See Salto Network for more information. This connection uses the same options as those for the CU5000. You can also choose the Enable key update option to work with SVN-Flex. This allows keys to be updated at online BLUEnet locks, similar to the key-updating capabilities of CU devices. For this functionality to work, you need to update the firmware of the locks to the latest version. |
| Online RFnet | Used for doors that are connected to the Salto Network using RF technology. When you select this option, a Lockdown area panel is displayed on the Room information screen. This means you can add the door to a lockdown area if required. See Lockdown areas for more information. The RF functionality is license-dependent. See Registering and licensing Space for more information. |
| Online BLUEnet | Used for doors that are connected to the Salto Network using BLUEnet technology. When you select this option, a + Configure button is displayed on the Connection type information screen. In this + Configure screen you can choose the gateways/nodes you can connect to the lock. That BLUEnet functionality is license-dependent. See Registering and licensing Space for more information. You can also choose the Enable key update option to work with SVN-flex. This allows keys to be updated at online BLUEnet locks, similar to the key-updating capabilities of CU devices. For this functionality to work, you need to update the firmware of the locks to the latest version. |
| Online BAS | Used for doors that are connected to a building automation system (BAS) that is integrated with the Salto Network. Before selecting this option, check that your BAS integration has been fully configured in Space General options. See BAS tab in General options for more information. When you select this option, a Lockdown area panel is displayed on the Door information screen. See Lockdown areas for more information. The RF functionality is license-dependent. See Registering and licensing Space for more information. |
Associated device lists
Selecting the Energy saving device checkbox in the Associated device list panel activates the ESD in the specified room. ESDs are used to control the activation of electrical equipment in a room or area. They are used in the majority of hotel sites. See the section on ESDs for more information.
You must select the Associated devices checkbox on the Hotel tab in General options to display the Associated Device List panel. You can also amend the configuration settings for associated devices in General options. See Hotel tab and Configuring associated devices for more information.
When you activate a room's ESD, you must initialize it using a PPD. See Initializing rooms and ESDs for more information.
ESD_#1 and ESD_#2 outputs are automatically generated by the system.
These outputs activate the relays for ESDs.
They cannot be deleted.
Granting guests access to ESDs
You must complete the following process to give guests access to ESDs:
Create a guest access level and associate the required guests with the guest access level. See Guest access levels for more information about creating guest access levels and associating guests.
Associate the
ESD_#1andESD_#2outputs with the guest access level.
Note that, in general, the ESD_#1 output controls access to electrical lights, and the ESD_#2 output controls access to AC (air conditioning) systems.
You must associate both of these outputs with guest access levels.
See Outputs for more information. about associating outputs with guest access levels.
- Amend the optional access settings for the
ESD_#1andESD_#2outputs so access is granted to all guests by default.
This means that when you check in a guest to a specific room, for example, room 101, their key can automatically be used to access the ESD in the room, for example, @ESD_101. If you don't do this, you have to grant this access to individual guests during check-in. See Outputs for more information.
Check in the guests to the required rooms.
Guest keys can only be used to access ESDs in rooms if a guest has been checked in to the room.
Granting users access to ESDs
The process for granting hotel staff (users) access to ESDs in rooms is different than for guests.
You must do the following:
Create a zone and associate the required ESDs with the zone.
Associate users (or user access levels) with the zone.
Associate users (or user access levels) with the
ESD_#1andESD_#2outputs.
If required, you can associate users with the ESD_#1 output only.
This means that they can activate electrical lights but not AC systems, which are controlled by the ESD_#2 output.
See Zones and Outputs for more information.
Room options
The Room options panel controls how the door activity is audited and whether mobile guest keys can be used to access rooms.
The options are described in the following table.
| Option | Description |
|---|---|
| Audit on keys | Allows monitoring of when and where user keys, for example, hotel staff keys, are used. You must enable this feature on both the access point and the user's key. When this option is selected, the door is enabled to write or stamp the audit on the key as long as the key's memory is not full. Also, the Audit openings in the key checkbox is enabled on the User information screen. If you select an online connection type in the Connection type panel, the Audit on keys checkbox is greyed out. This is because online doors are connected to the system, and can send audit information directly to it. |
| Audit inside handle opening | Allows monitoring of when a guest exits a room. |
| Inhibit audit trail | Ensures that the lock will not memorize openings in its audit trail. However, the lock can still write information on the key. To activate this option, you must select the Allow audit trail inhibition checkbox in the System > General options > Access points tab. |
| Allow mobile check-in | Allows mobile guest keys to be used to access a room. Mobile guest keys allow guests to access a room by using the JustIN Mobile app on their mobile phone (instead of a separate physical credential). When you select this option, a Send key to guest's mobile checkbox and a Notification message field are displayed on the Hotel check-in screen for the room. This option is only compatible with smartphones using iOS or Android operating systems. |
Opening time
The Opening time panel defines how long a door stays open after it has been unlocked.
The options are described in the following table:
| Option | Description |
|---|---|
| Open time | Defines how long the handle remains active. The door locks as soon as the handle is released, even if the time value is not reached. The default time value is six seconds. The value can be increased or decreased in the range 0 to 255 seconds. |
| Increased open time | Defines a longer opening time. This option is designed for disabled or 'hands full' users. The default time value is 20 seconds. The value can be increased or decreased in the range 0 to 255 seconds. You must enable this option in the user's profile. See Key options for more information. |
Suites
Selecting a suite from the drop-down list in the Suite panel adds the room to the suite.
Time zones
The Time zone panel defines which one of the system time zones is used for the room. You must enable the multiple time zones functionality in General options to display this panel.
See Activating multiple time zones and Time zones for more information.
Associating rooms
After you've created and configured a room, you must associate automatic outputs and zones with that room. The following sections describe how to associate rooms with those entities.
Automatic outputs
See Automatic outputs for a definition and information about how to create and configure an automatic output.
To associate an automatic output with a room, perform the following steps:
Select Access points > Rooms. The Rooms screen is displayed.
Click on the room that you want to associate with an automatic output. The Room information screen is displayed.
Click Automatic outputs in the sidebar. The Automatic outputs dialog box is displayed.
Note that the dialog box will be blank if you have not yet associated an automatic output.
Click Add. The Add dialog box, showing a list of automatic outputs, is displayed.
Select the required automatic output in the left-hand panel and click Save.
The room is now associated with the automatic output.
You can also change the access point timed period of the automatic output. See Access point timed periods for more information.
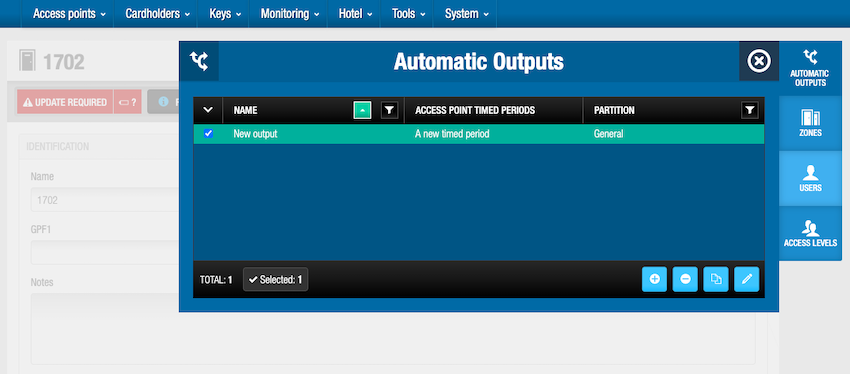 Automatic outputs dialog box for hotel rooms
Zones
See the section on Zones for a definition and information about how to create and configure a zone. You can associate rooms with zones by using the Access points dialog box in the sidebar of the specific zone's information screen. See also the Access points section for a description of the steps that you should follow.
You can view a list of zones that are associated with each room on the system.
To view the zones associated with a room, do the following:
Select Access points > Rooms. The Rooms screen is displayed.
Click the room with the zone list you want to view. The Room information screen is displayed.
Click Zones in the sidebar. The Zones dialog box, showing a list of zones, is displayed.
Users
In the Users section of Space, you can see information about which users of the system have been assigned access to the room directly. You can associate rooms with users via the Cardholders > Users section, by modifying the access points the user has access to in their profile. See the Cardholders section for a description of the steps that you should follow.
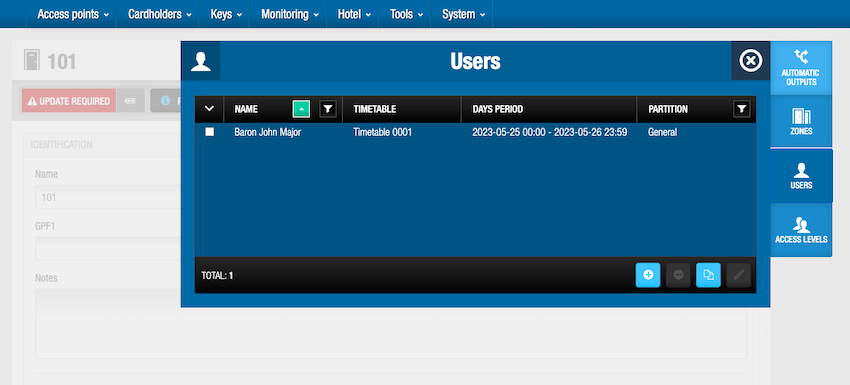 You can see which users have access to the room in the 'Users' panel
Access levels
In the access levels section of Space, you can see information about which access levels of the system have been assigned to the room. You can associate rooms with access levels via the Cardholders > Access levels option, by modifying the access points that are associated with each access level. See access levels for a description of the steps that you should follow.
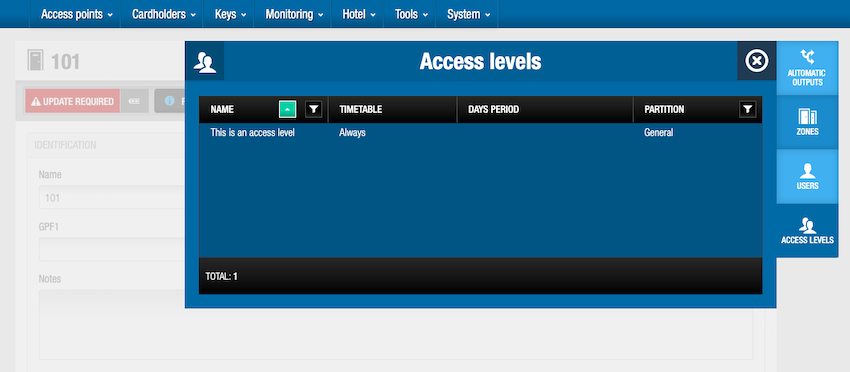 You can see which access levels are associated with the room in the 'Access levels' panel
 Back
Back
