Online connection types in Salto Network
Introducción
When adding a door to the system, you must specify the appropriate connection type: online or offline. When you select an online connection type, the door is displayed on the Salto Network screen, and you can click the entry to configure it.
You can select the following online connection types:
Your BAS integration must be fully configured in System > General options before you can select the Online BAS option. See BAS tab for more information.
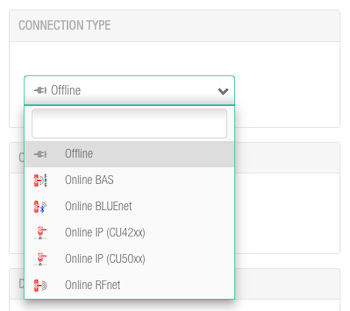 You select the door's connection type in 'Access points' > 'Doors'
See Connection types for more information about selecting the correct connection types in non-hotel installations. For hotel installations, see hotel Connection types.
Online IP (CU50xx)
To configure an online IP (CU50xx) door, do the following:
Select System > Salto Network. The Salto Network screen is displayed.
Click on the online IP (CU50xx) door that you want to configure. You have previously created and configured the door as Online IP(CU50xx) in the Door information screen. The Access point: Online IP (CU50xx) information screen is displayed.
The connection type is displayed when you hover the mouse pointer over the icon beside the door name in the Name column. Online IP (CU50xx) doors are online SVN points.
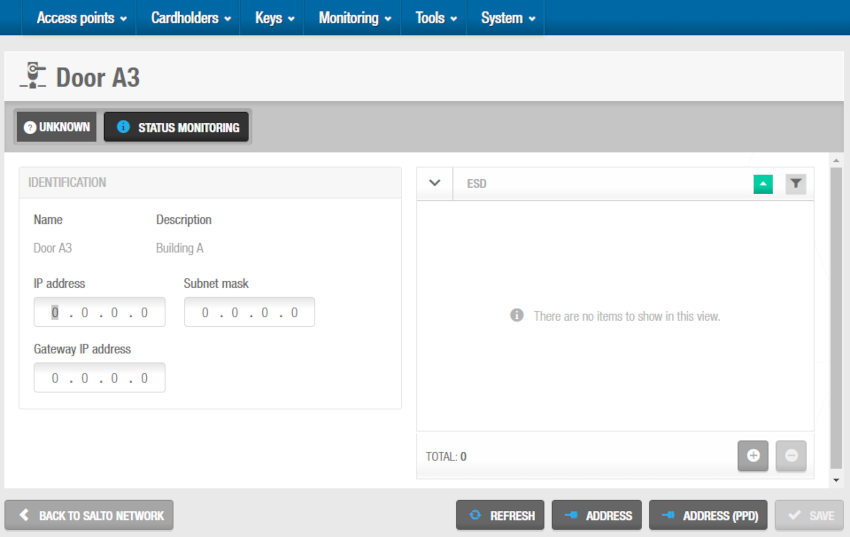 'Access point: online IP (CU50xx)' information screen
Type an IP address for the door in the IP address field.
If required, type an IP address for the door in the Subnet mask field and the Gateway IP address.
If required, click Add (+) in the ESD panel. The Add dialog box, showing a list of ESDs, is displayed. See Energy Saving Devices for more information about ESDs.
Select the required ESDs. You can hold down the Ctrl key while clicking the ESDs to make multiple selections.
Click Save & Close. The selected ESD is displayed in the ESD panel.
Save the changes and click on Back to Salto Network to return to the Salto Network screen.
Online IP (CU42xx)
To configure an online IP (CU42xx) door, do the following:
Select System > Salto Network. The Salto Network screen is displayed.
From the Unreachable items tab, click the online IP (CU42xx) door that you want to configure. You have previously created and configured the door as Online IP(CU42xx) in the Door information screen. The Online IP (CU42xx) information screen is displayed.
The connection type is displayed when you hover the mouse pointer over the icon beside the door name in the Name column. Online IP (CU42xx) doors that are not connected to CU42xx nodes are displayed in the Unreachable items tab. See CU42xx (Auxiliary) for more information about CU42xx (Auxiliary) controllers.
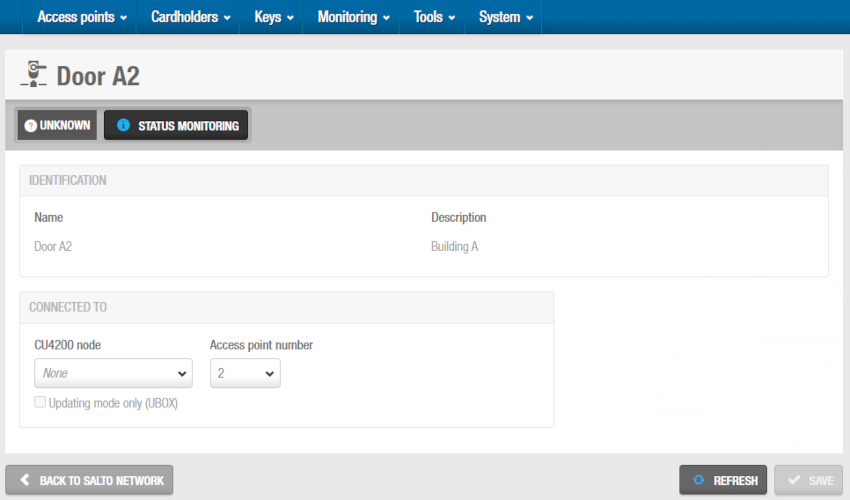 'Access point: online IP (CU42xx)' information screen
Select the CU4200 node to which you want to connect the door from the Connected to drop-down list.
Select either 1 or 2 from the Access point number drop-down list. You cannot select 2 unless you have selected 2 in the Access point count drop-down list on the CU4200 node information screen. Otherwise, this exceeds the door number count for the node.
Save the changes and click on Back to Salto Network to return to the Salto Network screen.
Online RFnet
To configure an online RFnet door, do the following:
Select System > Salto Network. The Salto Network screen is displayed.
Click the online RFnet door that you want to configure. The Online RFnet information screen is displayed.
The connection type is displayed when you hover the mouse pointer over the icon beside the door name in the Name column. Online RFnet doors that are not yet connected to RFnet nodes are displayed in the Unreachable items tab. See RFnet/BLUEnet nodes for more information about RFnet nodes.
![]() Connection type detail
Connection type detail
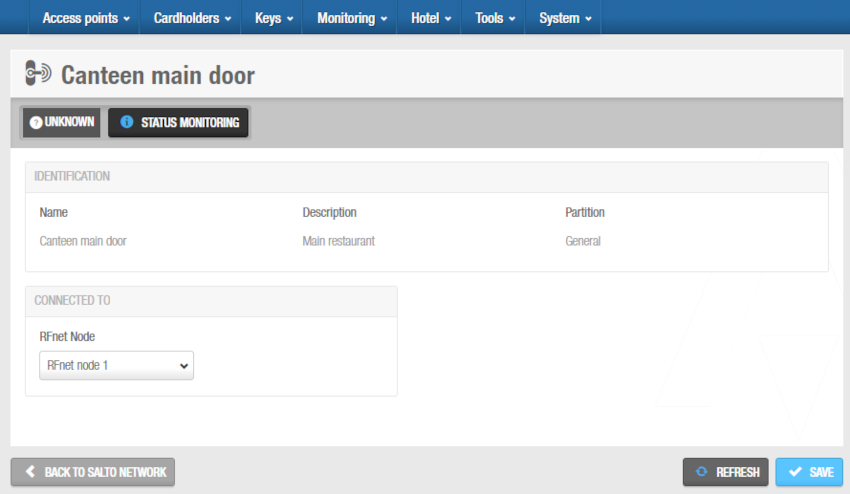 'Online RFnet' information screen
Select the RFnet node to which you want to connect the door from the drop-down list in the Connected to panel.
Save the changes and click on Back to Salto Network to return to the Salto Network screen.
Online BLUEnet
To configure an online BLUEnet door, do the following:
Select System > Salto Network. The Salto Network screen is displayed.
Click the online BLUEnet door that you want to configure. The Online BLUEnet information screen is displayed.
The connection type is displayed when you hover the mouse pointer over the icon beside the door name in the Name column. Online BLUEnet doors that are not yet connected to BLUEnet nodes or repeaters are displayed in the Unreachable items tab. See RFnet/BLUEnet nodes and BLUEnet repeaters for more information.
![]() Connection type detail
Connection type detail
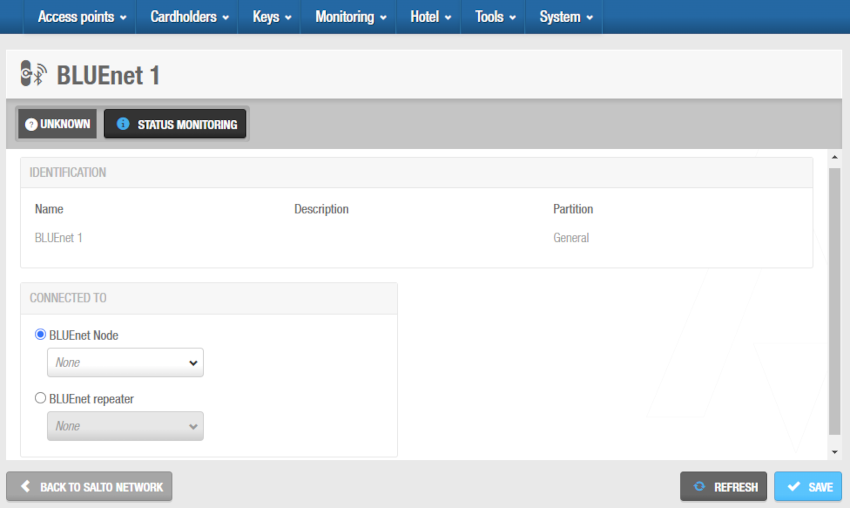 'Online BLUEnet' information screen
In the Connected to panel, select the BLUEnet node and the BLUEnet repeater (if applicable) to which you want to connect the door from the drop-down list.
Save the changes and click Back to Salto Network to return to the Salto Network screen.
Online BAS
You do not have anything to configure in the Online BAS information screen. In this screen, you can consult the room ID that has been assigned to an online BAS door. To do so, follow the steps below:
Select System > Salto Network. The Salto Network screen is displayed.
Click the online BAS door that you want to consult. The Online BAS information screen is displayed.
The connection type is displayed when you hover the mouse pointer over the icon beside the door name in the Name column. See BAS tab in General options for more information on BAS integration configuration.
- Click on Back to Salto Network to return to the Salto Network screen.
 Atrás
Atrás
