General tab in Space General options
Introducción
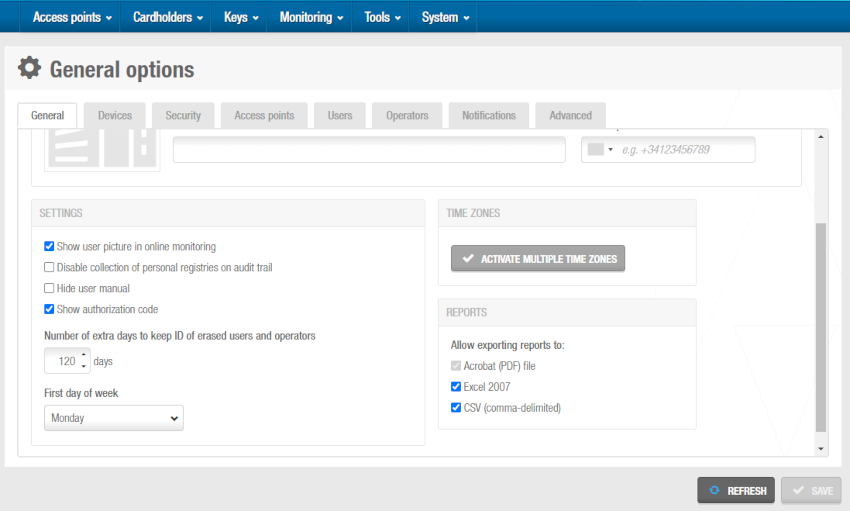
By using the General tab, you can enter general system configuration information and activate multiple time zones.
Select System > General options > General to view the tab.
 Screenshot showing some of the options available in the 'General' tab
General tab items
| Item | Descripción |
|---|---|
| Installation image | You can upload an image with a standard format, such as JPEG or PNG, to identify your installation. Note that this image will be also shown in JustIN Mobile digital keys, for example. The maximum file size must be 512 KB. |
| Property name | Displays the name of the database. This field is automatically populated with the name that was given to the database during the installation process. However, you can amend the name in the field if required. |
| Dirección | Allows you to enter the address in which your installation is located |
| Contact phone number | Allows you to enter a contact phone number for your installation |
| Show user picture in online monitoring | Displays the picture of the user in online monitoring when the user is accessing via an online access point. |
| Disable collection of personal registries on audit trail | Restricts the type of data that is displayed in the audit trail. When you select this checkbox, operators cannot view locking and unlocking events, or failed access attempts. Instead, only entries for lock and key updates that occur are displayed. |
| Hide user manual | Hides the user guide from the software interface. The question mark at the upper right-hand corner will not be shown. |
| Show authorization code | Allows you to have the field of Authorization code in the users information screens. See Configuring users for more information. |
| Number of extra days to keep ID of erased users and operators | Defines the period of grace to activate the process of erasing the remaining data of removed cardholders and operators within the database. The default value is 120 days. Warning: Once this time period is completed, cardholder/operator removed events will no longer be identifiable in both the audit trail and the system auditor. |
| First day of week | Specifies the first day of the week in the system calendar. The selected day is displayed as the first day of the week in the Days panel on the Cardholder timetables screen. |
| Activate multiple time zones | Activates the multiple time zones functionality in Space. See Activating multiple time zones and Time Zones for more information. |
| Reports | Allows exporting reports to the following formats: - Acrobat (PDF) file - Excel 2007 - CSV (comma-delimited) |
| Show only audit trail events from accessible partitions locks | Restricts the data the operators will see in the audit trail depending on the access the operators has to different partitions. |
| Show only time periods, timetables and calendars from accessible partitions | Restricts the data the operators will see in the time periods, timetables and calendars depending on the access the operators has to different partitions. |
Activating multiple time zones
To activate multiple time zones, do the following:
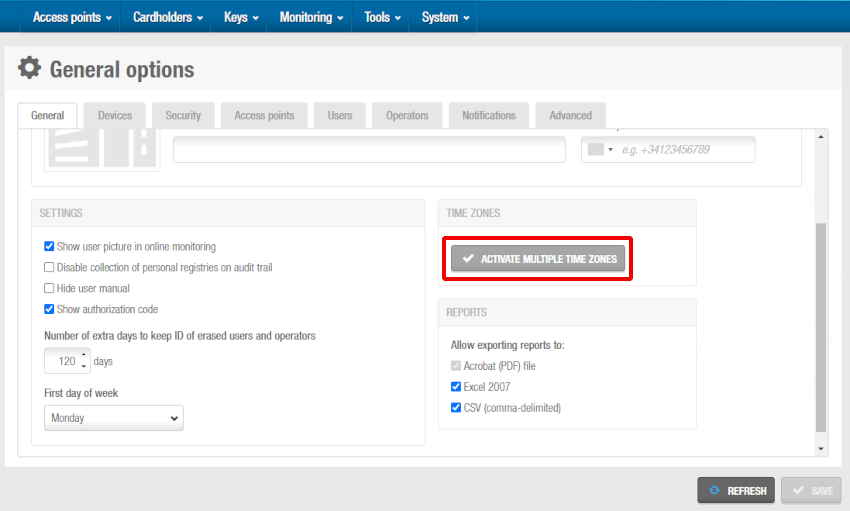
- Select System > General options > General.
 'General' tab - 'Activate multiple time zones' button
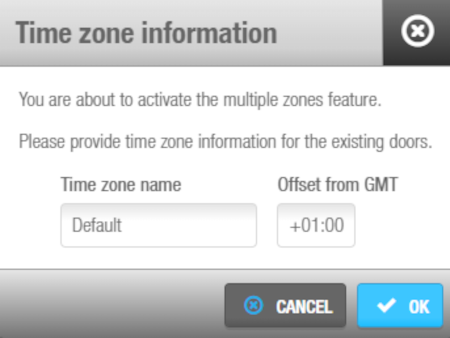
- Click Activate multiple time zones. The Time zone information dialog box is displayed.
 'Time zone' information dialog box
The Time zone name field displays the name of the default system time zone. You can amend this text if required.
Type the appropriate time parameter in the Offset from GMT field. The value you enter is used to calculate the time zone according to Greenwich Mean Time (GMT).
Click OK.
Click OK again on the Activate multiple time zones confirmation screen. The General tab is updated to show that multiple time zones are enabled.
You can click Deactivate multiple time zones to deactivate the multiple time zones functionality at any time. However, you must delete any additional time zones you have created in Space before you can do this.
See Time zones for more information about using the multiple time zones functionality.
 Atrás
Atrás
