Cardholder timetables in Space
Introducción
Cardholder timetables control the time periods during which a user's key can be used with an installation's access points. For example, a user who works 12-hour shifts over a four-day period could have a timetable that looks like the following example:
- 08.00 to 20.00 Monday
- 08.00 to 20.00 Tuesday
- 20.00 to 08.00 Wednesday
- 20.00 to 08.00 Thursday
A timetable can be set up so that outside of these periods the user's key is not valid and they cannot access the installation.
When you create cardholder timetables, you can choose which are used with an installation's access points for individual users and user access levels. This is done by selecting the required cardholder timetable in the dialog boxes for access points in the sidebar on the User and User access level information screens. See Access points and Zones for more information and a description of the steps you should follow. You can also choose cardholder timetables to be used with an installation's access points for guest access levels and visitor access levels.
You must configure the system calendar before you create cardholder timetables. See Calendars for more information.
Creating cardholder timetables
To create a cardholder timetable, do the following:
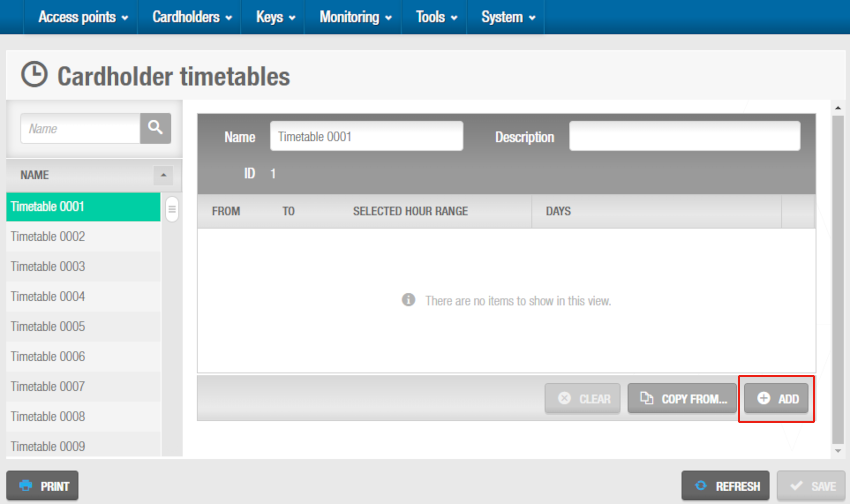
- Select Cardholders > Cardholders timetables. The Cardholders timetables screen is displayed.
 'Cardholder timetables' screen
Select a timezone entry from the Name panel on the left side of the screen. Timezone 001 is automatically selected. If you have already configured this timezone entry, select the next timezone entry. Up to 1024 timezone entries can be created. Each timezone entry is a cardholder timetable.
Type an optional description of the timezone entry in the Description field. It is recommended that you enter a descriptive name for the timezone entry, for example 'Shift 1' or 'Shift 2'. A maximum of 64 characters is allowed.
Select the relevant partition from the Partition drop-down list, if required. This adds the timezone entry to the selected partition. Note that you can select different partitions from the Partition drop-down list in the left-hand column to view a list of timezone entries for each partition. If required, you can select timezone entries from the list and move them to a different partition by selecting the appropriate partition in the Partition field and clicking Save. See Partitions for more information.
Note that the partitions functionality is license-dependent. See Registering and licensing Space for more information.
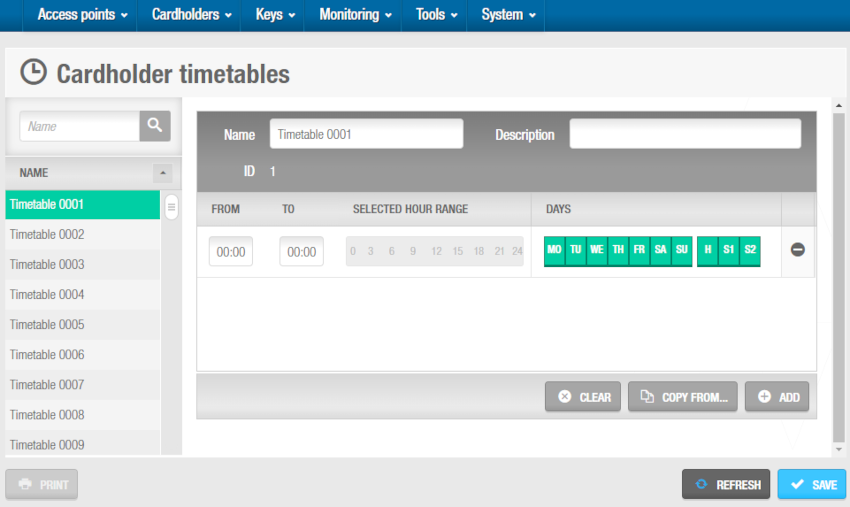
- Click on Add. The Cardholder timetables panel is displayed.
 'Cardholder timetables' panel
Type a start time for the timezone entry in the From field and an end time for the timezone entry in the To field.
Click the applicable days in the Days panel. If you want to deselect a day, click the applicable day again. If you want to deselect all entries, click the minus (-) icon. In addition to the days of the week, you can also create timed periods for holidays (H) and special days (S1 and S2). See Calendars for more information about holidays and special days.
Click Save.
Copying Cardholder Timetables
You can copy saved cardholder timetables information from one specified timezone entry to another.
The following example shows how to copy all the information from one cardholder timetable to another - in this case, from Timezone 001 to Timezone 002:
Select Cardholders > Cardholder timetables. The Cardholder timetables screen is displayed.
Select Timetable 0002 in the Name panel on the left side of the screen. The details for this timetable are displayed.
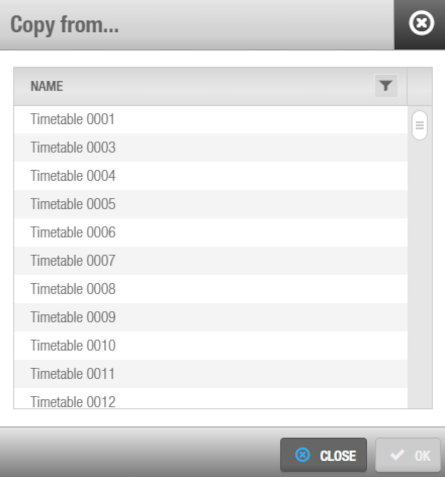
Click Copy from…. The Copy from… dialog box is displayed.
 'Copy from' dialog box
Select Timetable 0001 and click OK. The Timetable 0001 configuration information is copied to the Timetable 0002 entry.
Save the changes.
 Atrás
Atrás
