Events streams in Space
Overview
The events stream functionality allows third parties to receive real-time notifications about events that occur (for example, a door opened by a particular cardholder) within Space. See also the Stream of events from the Space software document for more information. If you don't already have this document, contact your Salto partner or tech support team to receive a copy of it.
The events stream functionality is license-dependent. See Registering and licensing Space for more information.
An events stream conveys the following information about an event:
- Who produced it (for example, the cardholder)
- When it was produced (for example, the date/time)
- Where it was produced (for example, the location of the door)
- What type of event was produced (for example, the door was opened)
The aim of the events stream is to filter the audit trail. See Audit trail for more information about audit trails. Sending selected events in the appropriate order to the third-party system enables it to process the received information and perform real-time actions.
You must complete these steps within the wizard to create an events stream:
Step 1: configuring the general settings
The first step of creating an events stream is to provide general information such as the formatting and encoding of the events stream.
To provide the general information, follow the steps below:
Select Tools > Events streams. The Events streams list dialog box is displayed.
Click Add. The Events stream configuration dialog box is displayed.
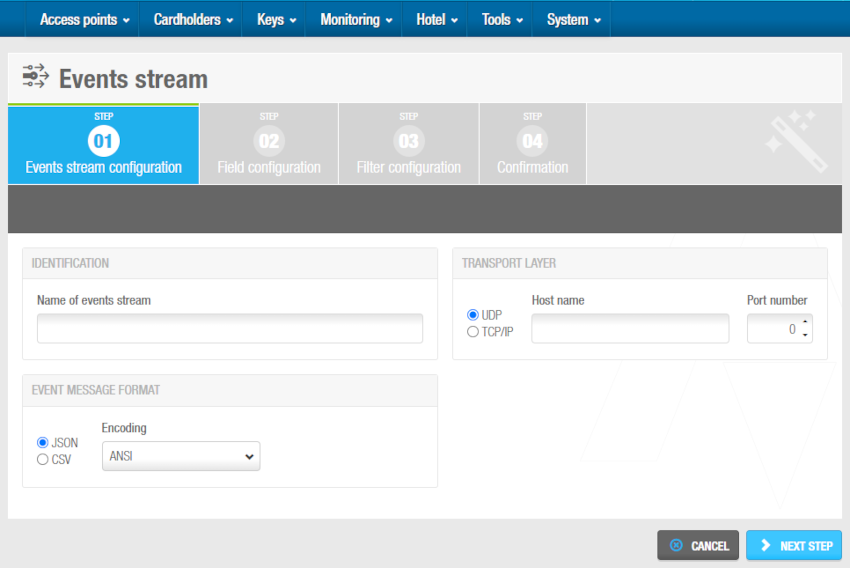 'Events stream' configuration dialog box
Type the events stream name in the Name of events stream field.
Select either UDP or TCP/IP in the Transport layer panel. Event streams can be received through UDP or TCP/IP protocols.
Type the machine name in the Host name field and the port number in the Port number field. Event streams will be notified through the machine name and port number of the listening socket you specify.
Select either JSON or CSV in the Event message format panel. JSON uses a string format. CSV uses a list format where a list of field values is separated by a semicolon. See examples of each below.
- JSON format
{
    "EventID": "11223344556677889900",
    "EventDateTime": "2023-04-14T13:03:20Z",
    "EventTime": "13:03:20",
    "EventDateTimeUTC": "2023-04-14T11:03:20Z",
    "OperationID": 17,
    "OperationDescription": "Door opened: key",
    "IsExit": false,
    "UserType": 0,
    "UserName": "John Smith",
    "UserGPF3": "Marketing department",
    "DoorName": "Gym",
    "DoorGPF1": "Leisure area"
}- CSV format
EVENT_START "11223344556677889900"; 2023-04-14T13:03:20; 13:03:20; 2023-04-14T13:03:20z; 17; "Door opened: key"; false; 0; "John Smith"; "Marketing department"; "Gym"; "Leisure area" EVENT_ENDSelect the applicable character encoding from the Encoding drop-down list. You can select ANSI, UTF-8, Unicode, or Unicode Big Endian.
Click Next step. The dialog box to select the data fields is displayed. You can also click Previous step on any step to return to the previous dialog box.
Step 2: selecting the data fields
After you provide the general information about the events stream, you need to select the data fields for the events stream.
To select the data, follow the steps below:
- Click Add/Delete. The Add/Delete dialog box is displayed.
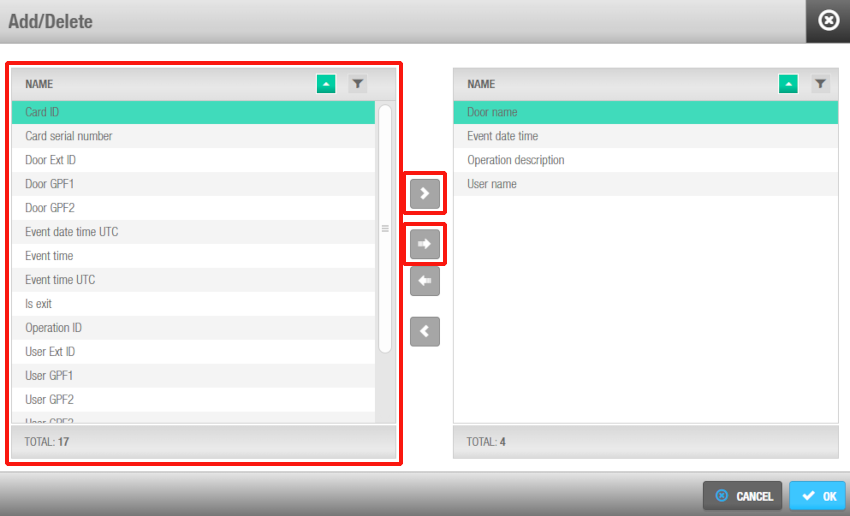 'Add/Delete' dialog box
Select the data fields that will be sent as part of the events stream. The fields listed here match the information passed by keys to the Space SQL database (SQL DB) and to the third-party systems.
Click the chevron to transfer the selected fields to the right side of the dialog box. If you click on the arrow all the fields available in the left side of the dialog box will be sent to the right side.
Click OK. The fields you selected are displayed. Note that if you want to have a specific order in the list, you must select them one at a time. When the fields are added to the list, you cannot change the order.
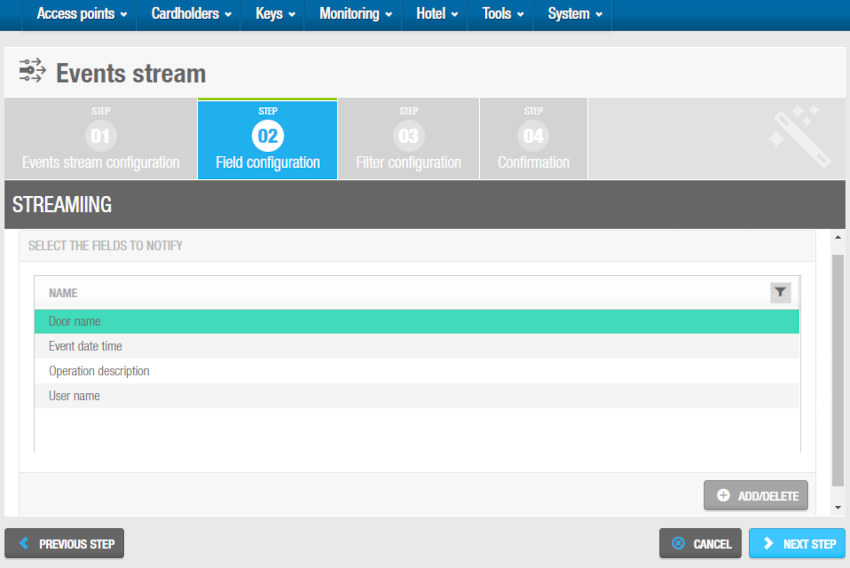 Selected fields displayed
- Click Add/Delete if you want to remove entries from this field.
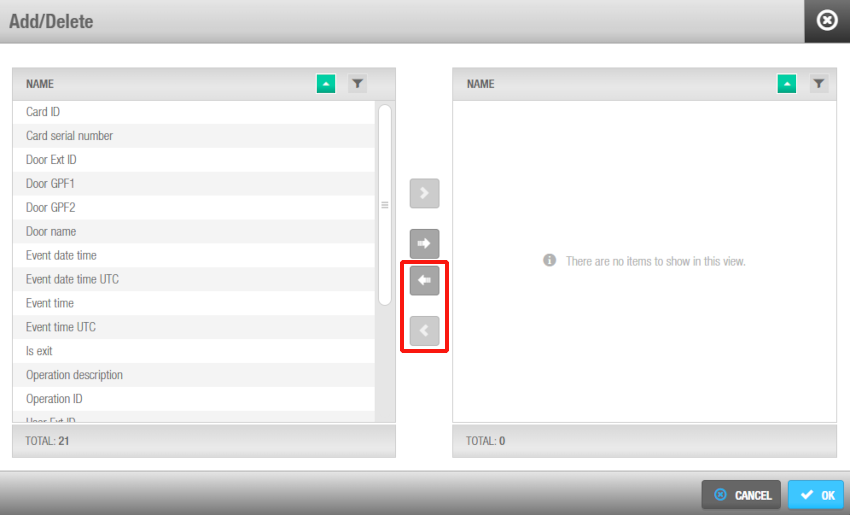 Deselecting fields displayed
- Click Next steps. The Who, Where, What, and When panels and the Real time window fields are displayed.
Step 3: specifying the parameters
After you select the data fields for the events stream, you need to specify the parameters, for example, the location and type of event, for the events stream.
To specify the parameters, do the following:
- Select the users in the Who panel.
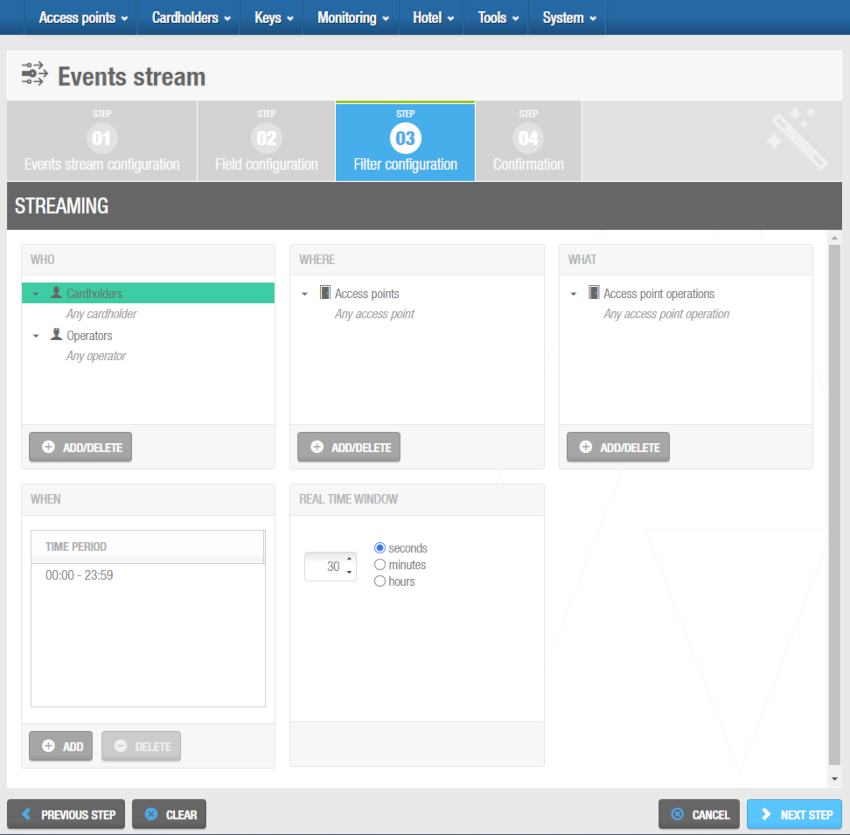 'Who', 'Where', 'What', 'When' and 'Real time window' panels
Click the Add/Delete button below the Who panel. The Add/Delete dialog box, showing two tabs: Cardholders and Operators. The list of cardholders is displayed by default.
Select the required cardholders in the left panel (Non-selected items) and click the chevron. The selected cardholders are displayed in the right panel (Selected items).
By default, Any cardholder is displayed in the Selected items panel. This means that all users are included in the events stream. To remove this value, select Any cardholder in the Selected items panel and click the inverted arrow. Any cardholder is displayed in the Non-selected items panel. You must repeat these steps if you want to remove Any operator from Operators, Any door from Doors, and Any operation from Operations, as applicable.
Click OK.
Click the Operators tab.
Repeat the above steps for operators.
Click OK. The selected cardholders and operators are displayed in the Who panel.
Repeat the above steps to select the required doors in the Where panel.
Repeat the above steps to select the required operations in the What panel.
Click Add below the When panel. The Add period dialog box is displayed.
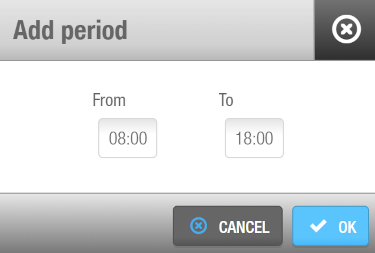 'Add period' dialog box
Select the applicable time interval using the arrows in the From and To fields. This specifies the active period for the events stream. In the above example, the system only sends events during the period 08:00 to 18:00.
Click OK. The selected time interval is displayed in the When panel.
Specify the frequency of events stream notifications by typing the applicable number in the Real time window field and selecting either seconds, minutes, or hours, as applicable. For example, if you specify 30 seconds, the system only sends events created 30 seconds ago or less.
Confirming the configuration settings
After you specify the parameters for the events stream, you need to confirm the configuration settings.
To do this, do the following:
- Click Next. The events stream configuration settings are displayed.
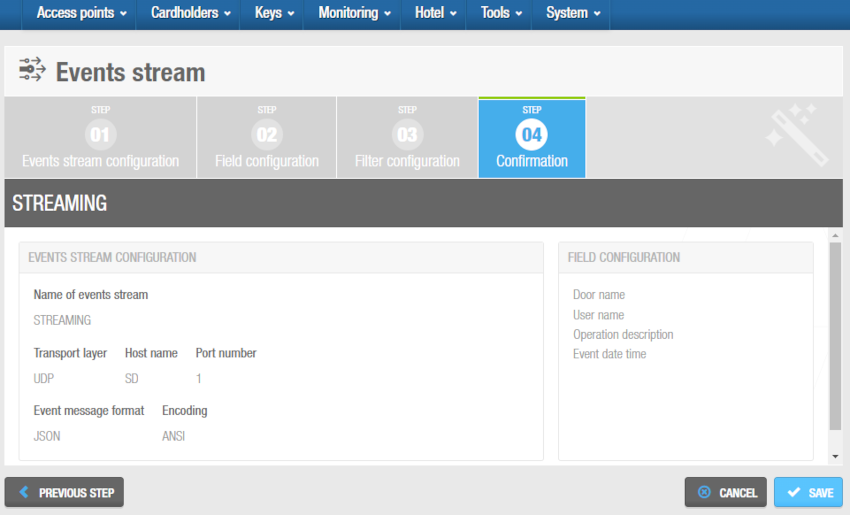 Confirming the configuration settings
- Click Save. A message is displayed confirming that the changes will not take effect until you restart the Space service.
The events stream you created is displayed in the Events streams screen.
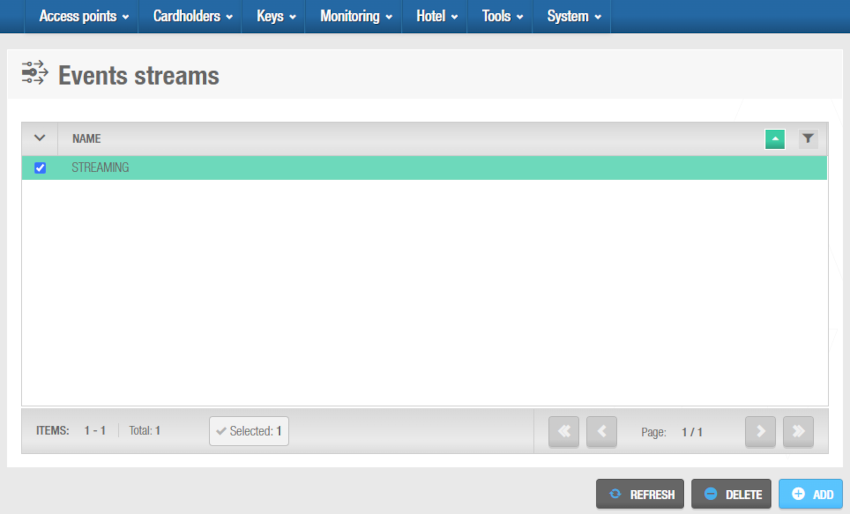 Created event stream
 Back
Back
