Alarm events in Space
Overview
Alarm events refer to actions that represent an occurrence or detection upon some condition. Every alarm event has a trigger and once triggered an alarm event automatically launches one or several actions.
That's to say, if a specific condition is met then an event is triggered based on how you configure it in Space. For example, you could trigger an alarm event to turn on a surveillance camera every time a specific access point is unlocked.
The alarm events functionality is license-dependent. See Registering and licensing Space for more information.
Alarm events must belong to a partition. This will restrict access to alarm event entities to those operators having the appropriate partitional permissions. Any operator, with the appropriate permissions, could see and modify the configuration of alarm events. See Operators and Operators groups.
Creating alarm events
To create an alarm event, do the following:
- Select Tools > Alarm events to view the Alarm events screen.
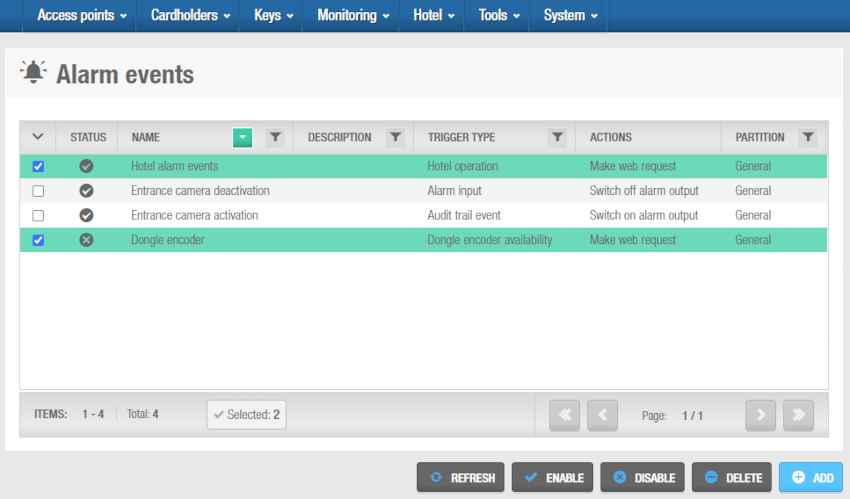 'Alarm events' screen
- Click Add to add an alarm event. The Alarm event information screen displays.
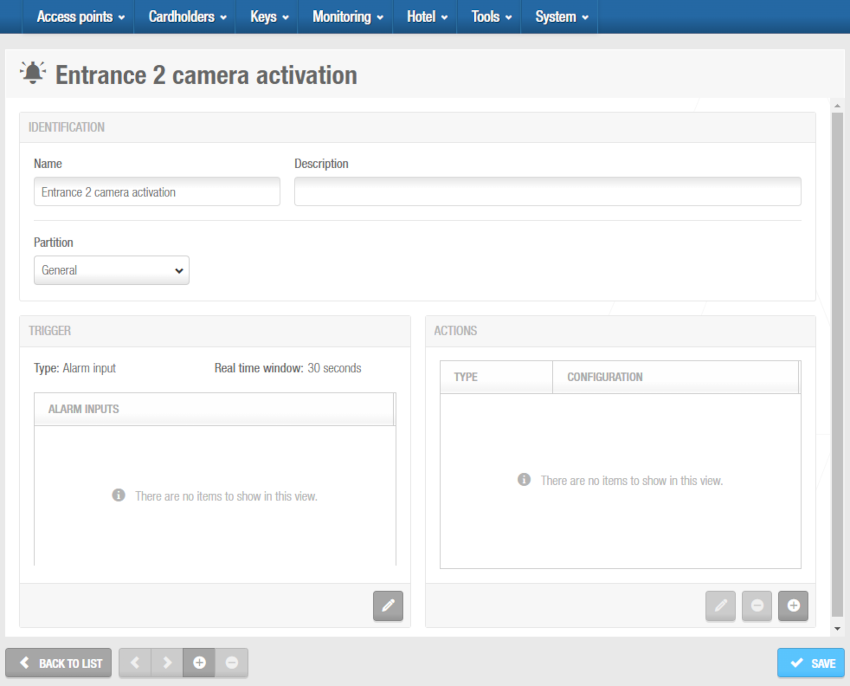 'Alarm event' information screen
Type a name for the alarm event in the Name field.
Type a description in the Description field.
Select the relevant partition from the Partition drop-down list, if required. See Partitions for more information.
Note that the partitions functionality is license-dependent. See Registering and licensing Space for more information.
Add the required trigger type, such as an audit trail event or an alarm input, by editing the Trigger panel. See Trigger types for more detailed information on the trigger types available in Space.
Add the required action, such as Send email or Open online door, by clicking the Plus (+) icon (Add button). You can also delete or edit an existing action by clicking the corresponding button. See Action types for more detailed information on the actions types available in Space.
Click Back to list to return to the Alarm events screen.
Managing alarm events
Once you have created alarm events, you can manage them using the buttons available on the Alarm events screen.
| Button | Description |
|---|---|
Refresh | To refresh the Alarm events screen with updated data, click the Refresh button. |
Enable | You can select any disabled alarm event and click the Enable button to activate them. |
Disable | You can select any enabled alarm event and click the Disable button to deactivate them. |
Delete | You can select any alarm event and click the Delete button to delete them. |
Add | To create a new alarm event, click the Add button. |
Trigger types
The following trigger types can be configured in Space:
Audit trail events
Any audit trail event can be defined as a trigger in the Edit trigger screen. See Creating alarm events for more information on this process.
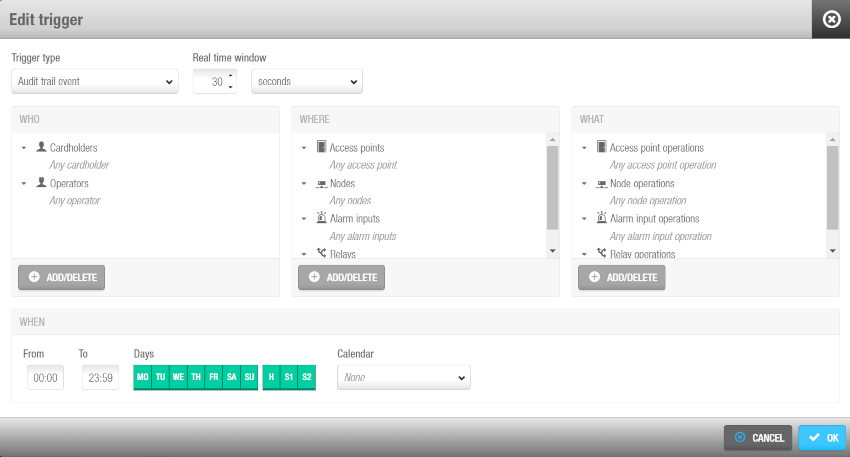 'Audit trail event' trigger type on the 'Edit trigger' screen
The Real time window parameter determines the allowed time range between the moment the event occurred and the actual moment it reaches Space for a given action to take place. The default value for the Real time window is set to 30 seconds. In short, in installations with online devices, events are received from online access points at the moment they occur and alarm actions are executed at the moment the event reaches Space. However, regarding events that take place at standalone/offline access points, this parameter should be extended, since it is unlikely that the events will reach Space in such a short time.
You need to define audit trail events per user (Who panel), per access point or devices (Where panel), per operation (What panel) and for a period of time (When panel). Click the Add/Delete buttons in every panel to select the required options for the audit trail event.
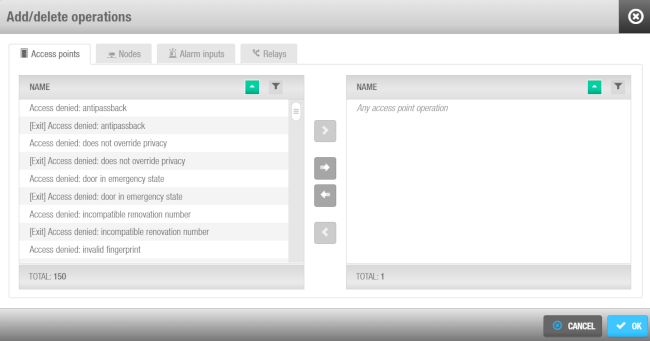 'Add/Delete operations' dialog box
Alarm inputs
Alarm inputs can be used to activate a trigger. For example, an emergency button or a fire detector.
Alarm inputs are only valid when using CU42E0 online units, CU4200 online units and/or online CU4EB8. They are defined in the online inputs through Salto Network with an specific name, such as "Camera disabled".
First of all, you have to define the physical input from the corresponding device information screen within Salto Network:
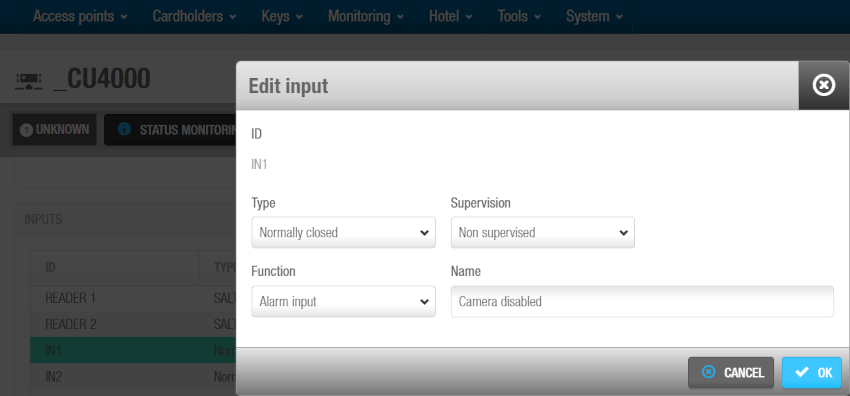 Edit input
Then, the alarm input with detector needs to be raised and edited according to this physical input from the Edit trigger screen of the corresponding alarm event.
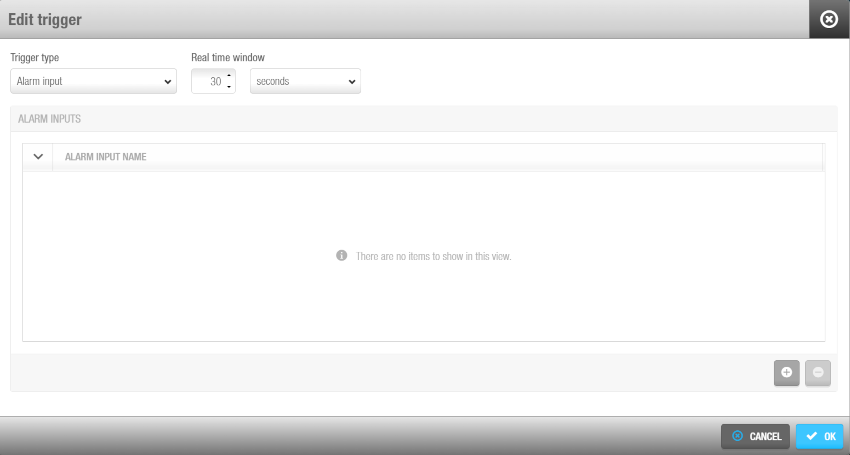 Edit alarm events
And add to it the previously created online input by clicking the Add button ('+' icon)
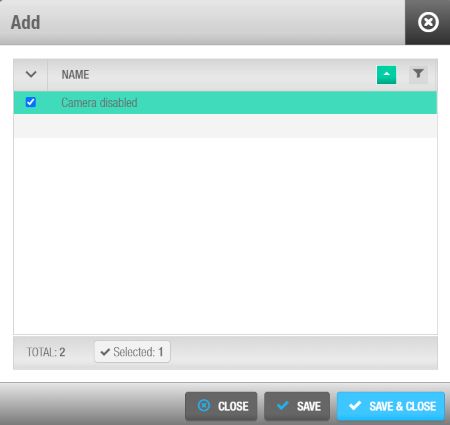 Add to the online input
Intruder detection
The intruder detection trigger has been designed to detect suspicious keycard rejections. For example, an intruder finds a lost keycard and tries it on several doors hoping that one will unlock.
You have to enable and configure the Intruder detection trigger type from System > General options > Alarm events:
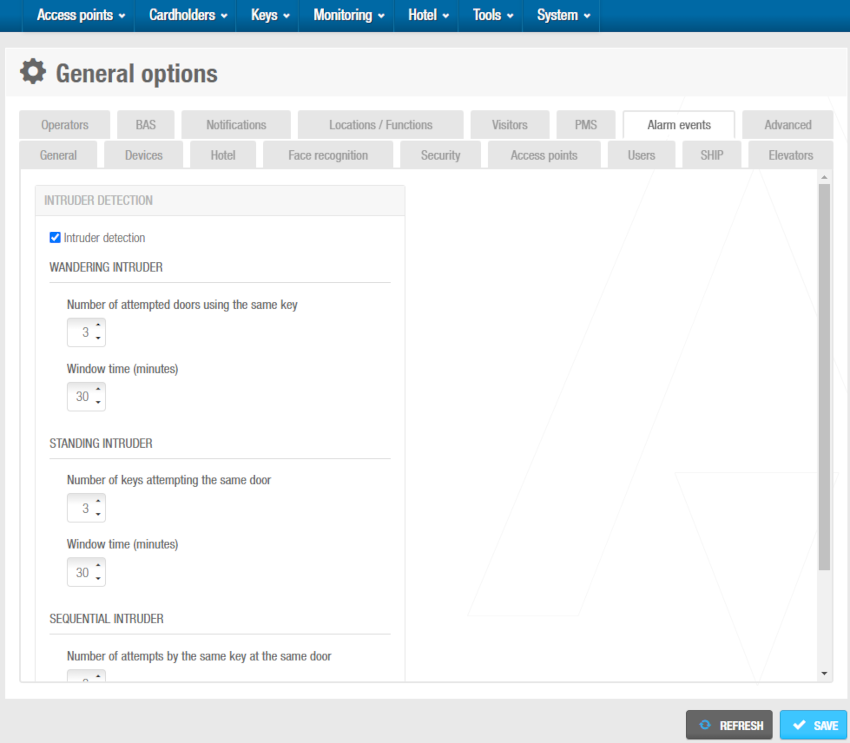 Intruder detection panel in the 'Alarm events' tab
Once the Intruder detection is enabled and configured, you must restart the Space service from the setup tool called "ProAccess Space Configurator" for the changes to take effect.
You can now create an Intruder detection trigger. The following intruder detection options are available:
| Intruder type | Description |
|---|---|
| Wandering intruder | The trigger is activated when the system detects that an intruder is trying to use the same key at a number of different doors during the window of time you have configured in the Alarm events tab. |
| Standing intruder | The trigger is activated when the system detects that an intruder is trying to use, at the same door, the number of keys and the window of time you have set in the Alarm events tab. |
| Sequential intruder | The trigger is activated when the system detects that an intruder is trying to use the same key at the same door during the window of time you have configured in the Alarm events tab. |
Dongle encoder availability
When you create a Dongle encoder availability trigger, a notification will be sent when the encoder stops or start being available.
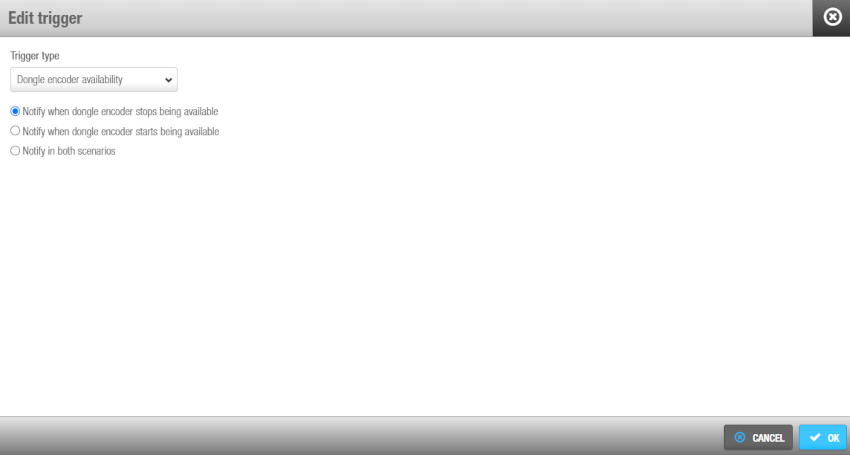 'Dongle encoder availability' trigger type
You can select one of the following options:
- Notify when dongle encoder stops being available
- Notify when dongle encoder starts being available
- Notify in both scenarios
Hotel operation
The Hotel operation trigger is activated every time a hotel operation is completed. For example, a check-in, check-out or when a copy of guest keys is made.
Some possible actions for this trigger could be Make web requests, Send email, Switch on/off alarm output, Open online door, etc.
Action types
An action will be carried out when the corresponding trigger criteria is met.
You can use the following types of actions in Space:
- Switch on alarm output
- Switch off alarm output
- Send email
- Start lockdown
- End lockdown
- Cancel key
- Make web request
- Open online door
Switch on alarm output
Alarm outputs can be used to activate an action. For example, you could turn on a surveillance camera when a specific door is unlocked.
Alarm outputs are only valid when using CU42E0 online units, CU4200 online units and/or online CU4EB8. They are defined in the online outputs through Salto Network with an specific name, such as "Entrance camera".
First, you must define the output from the corresponding device information screen within Salto Network:
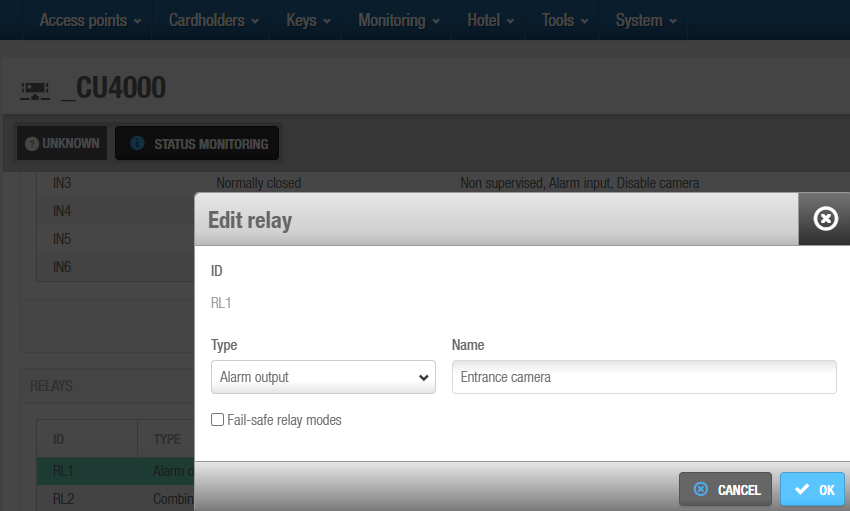 Defining an alarm output from the 'Edit relay' screen
Next, add the alarm output from the Action dialog box.
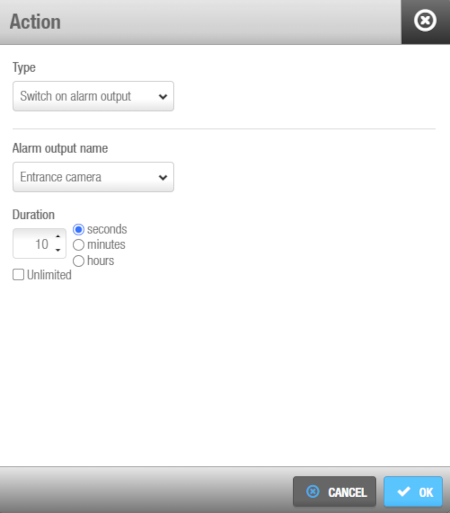 Add the alarm output
Select the type of output, the pre-created relay output and the duration of the relay activation. The alarm output name has been defined when editing the relay.
If you set the duration to 0, it means the relay will be activated without an automatic interruption (it will remain active indefinitely).
Switch off alarm output
Alarm outputs can also be used to disable a relay output, when an alarm has been previously activated.
The process to add a Switch off alarm output action is similar to the Switch on alarm output one. See Switch on alarm output for more information.
Send email
The Send email action type can be enabled to notify via email when a specific event takes place. For example, you could configure it to send an email to an operator when the dongle encoder is not available.
For this functionality to work it is necessary to create a sender email address in General options > Notifications tab. You can see how to define the required host, port and protocol in the example below:
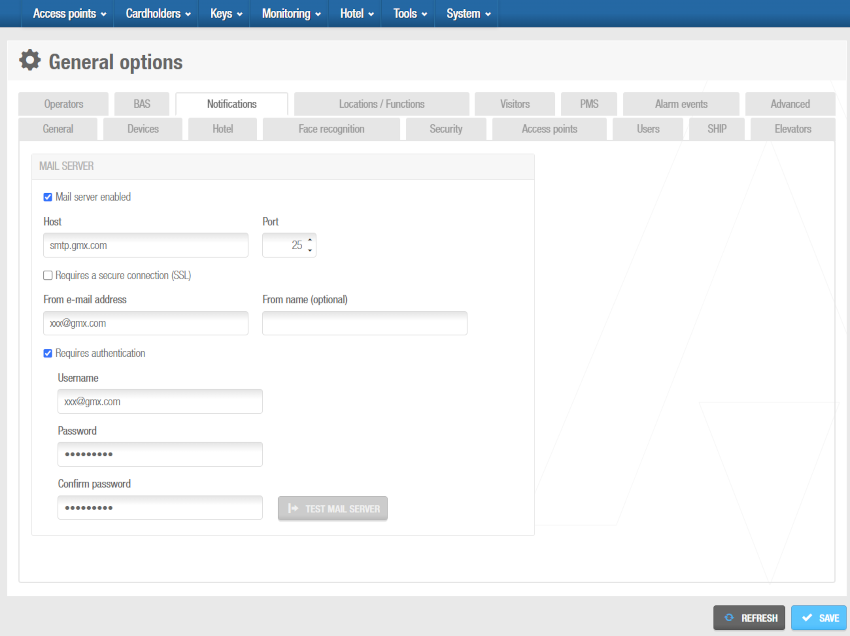 Create a sender email address in the 'Notifications' tab
In the Action dialog box, when selecting the Send email type, you must define who is going to receive the email, the subject and the content of it.
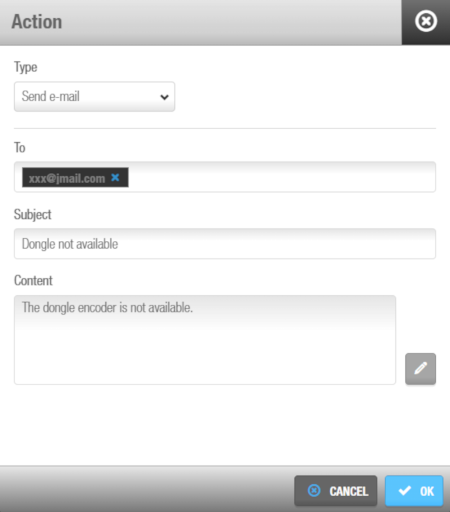 Define the email address of the person who will receive the notifications
You can click the pencil icon on the right of the Content field to add macros to the content of the email according to the trigger selected.
Start lockdown
The Start lockdown action type could be used to lock all doors in a specified area in the event of an external threat.
When selecting this action type, you must define the affected lockdown area and the operation to be done, that is, closing or opening the access points in the selected area.
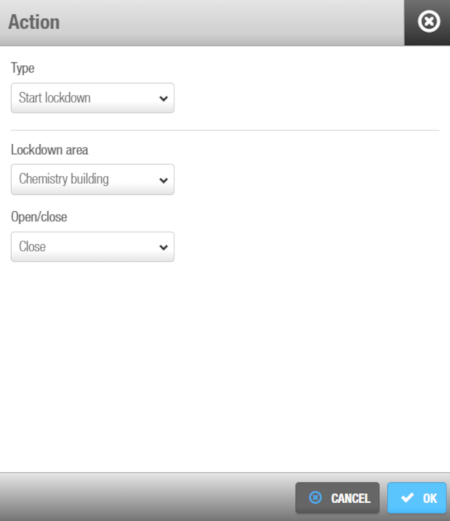 'Start lockdown' action
End lockdown
The End lockdown action type could be used to counter a previously-created Start lockdown action. For example, all the access points in an area are closed and they need to be reopened.
When selecting this action type, you must define the applicable lockdown area.
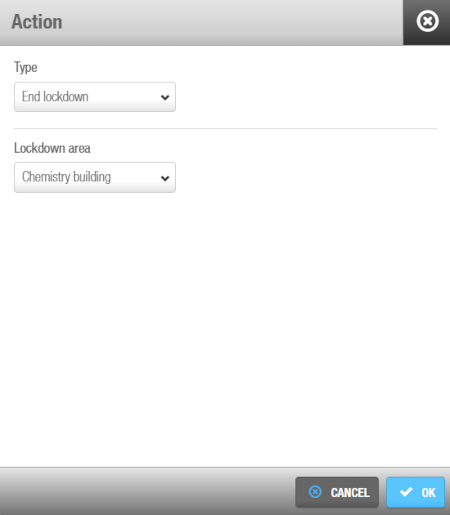 'End lockdown' action
Cancel key
The Cancel key action type cancels a specific key when a specific trigger is activated. For example, it could detect an intruder who might be trying to unlock the same door with a stolen or lost key several times unsuccessfully. See Intruder detection for more information on this trigger type.
Make web request
The Make web request action type sends a request to a URL you define in the Action dialogue box.
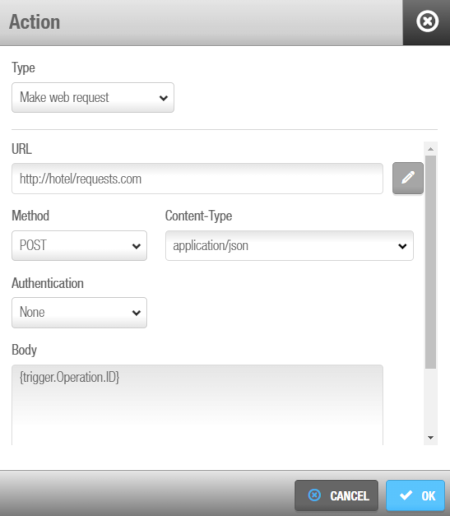 'Make web request' action
This could be used, for example, to send a web request each time a hotel operation trigger has been activated.
You must define the URL, the Method, the Content-Type, the Authentication and the Body, where you can add macros if required as you can see in the image above.
Open online door
The Open online door action type opens the access point you define in the Action dialog box every time the trigger previously added to this alarm event is activated.
For example, when a front-desk receptionist presses a button (alarm input), the defined online access point is opened. See Alarm input for more information on this trigger type.
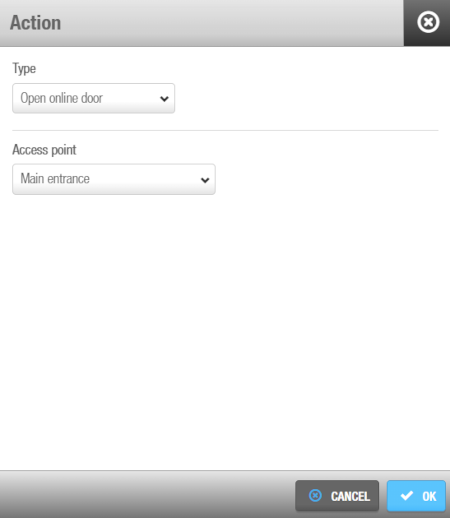 'Open online door' action
 Back
Back