Time zones in Space
Overview
Setting Space up with the correct time zone configuration ensures your locks always have the correct time. This allows cardholders to continue to have access at the appropriate time as well as providing you with accurate logs. Remember that after changing any time settings, the access points must be updated to receive this change.
The system has one default time zone. However, you can use multiple time zones in Space if required. This is necessary if your company has offices operating in different time zones within the same Space installation. For example, you might operate in Australia and you have an office in Perth, Australian Western Standard Time (GMT+8), and another one in Melbourne, Australian Eastern Standard Time (GMT+10).
You must enable the multiple time zones functionality from the General tab in System > General options. See Activating multiple time zones for more information. When you activate this functionality, an Add button is added to the Time zones screen. This allows you to add time zones and configure the Daylight saving time (DST) for them as appropriate.
A Time zone drop-down list is also displayed on various screens in Space, for example, the Door and Locker information screens. You can use the drop-down list to select the time zone that you want to apply to locks and network devices, such as encoders and gateways. See Adding network devices for more information.
Adding time zones
To add a time zone, do the following:
- Select System > Time zones. The Time zones screen is displayed.
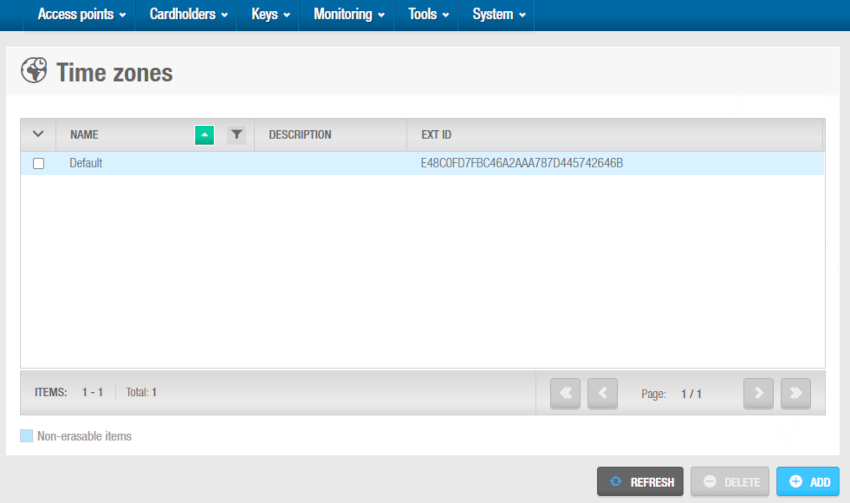 'Time zones' screen
- Click Add. The Time zone information screen is displayed.
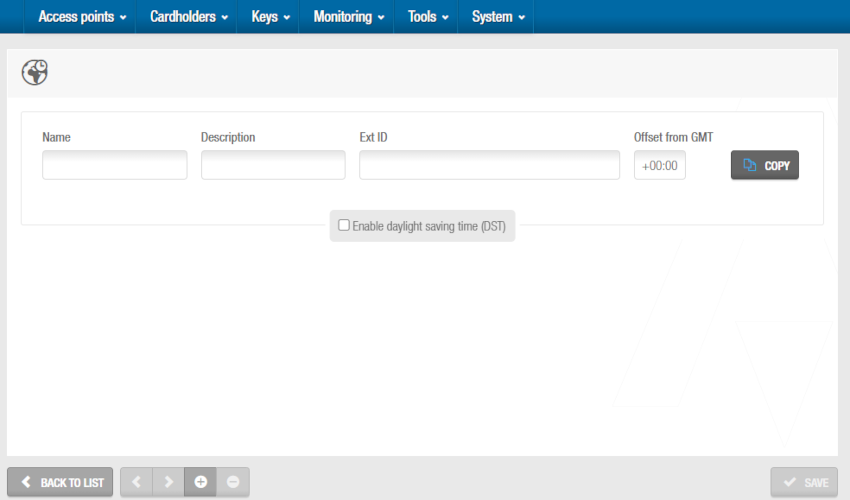 'Time zone' information screen
- Click Copy. The System world time zones dialog box, showing a list of time zones, is displayed.
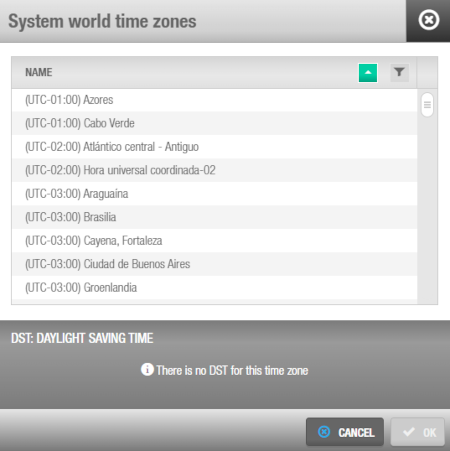 'Time zone information' dialog box
- Select the required time zone and click Accept. The Name, Description, and Offset from GMT fields, and the fields for the DST rule option on the Time zone information screen are populated with the information for the selected time zone.
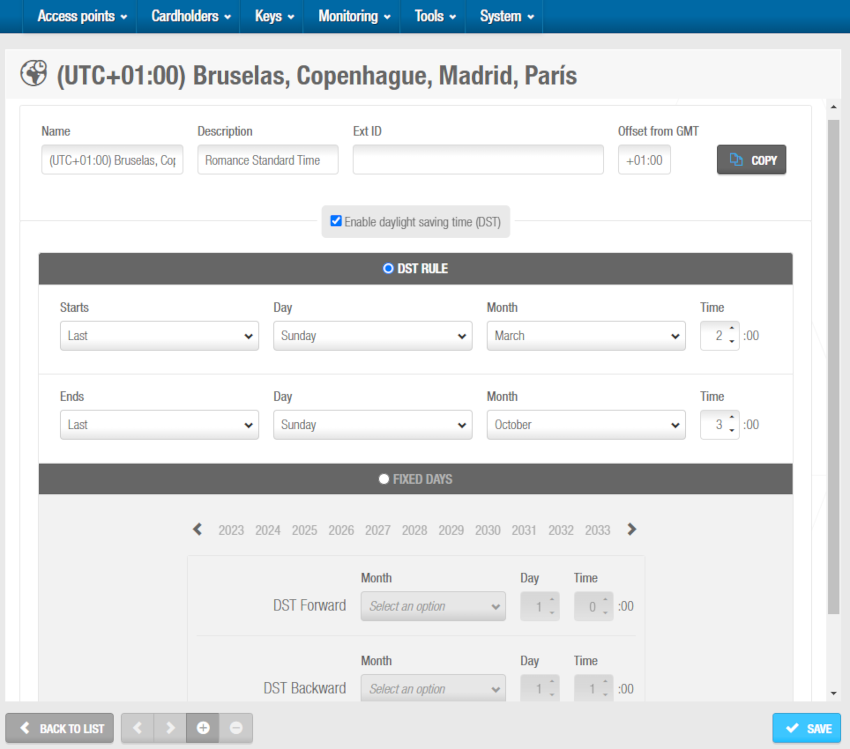 'Time zone' information screen
Note that the fields for the DST rule option are not populated if the time zone you select does not use DST. You must manually enter the details for the Fixed days option on the system if required. Both options are described in DST options.
You can also manually enter the appropriate information for the time zone in the fields on the Time zone information screen.
- Click Save.
Deleting time zones
You can select a time zone on the Time zones screen and click Delete to delete it. However, you cannot delete the default system time zone.
Daylight saving time (DST)
Daylight saving time (DST) is the practice of moving clocks forward by one hour in spring to extend light in the evening, and moving clocks back by one hour in autumn.
By default, Salto electronic locks make these time changes automatically. However, you can disable this option if required. See Configuring DST for more information.
It is recommended that you allow Space to update for DST automatically. Otherwise, you must manually update each door with a PPD on the date of the time change. Note that only online access points will be updated automatically, and if some did not update, you can manually update them from the System > Salto Network screen. Nevertheless, offline locks must always be updated with a PPD.
Configuring DST
You can select the month, week, day, and hour when time changes occur for the default system time zone. You can also set the time changes for future years in advance if required.
It's recommended to use the DST rule option so that your locks will always have the correct settings year after year. In the USA, for example, these are the most common settings for DST rule:
- Starts: Second Sunday of March at 02:00
- Ends: First Sunday of November at 02:00
To configure DST, do the following:
- Select System > Time zones. The Time zones screen is displayed.
 'Time zones' screen
- Click the Default entry. The Default information screen is displayed.
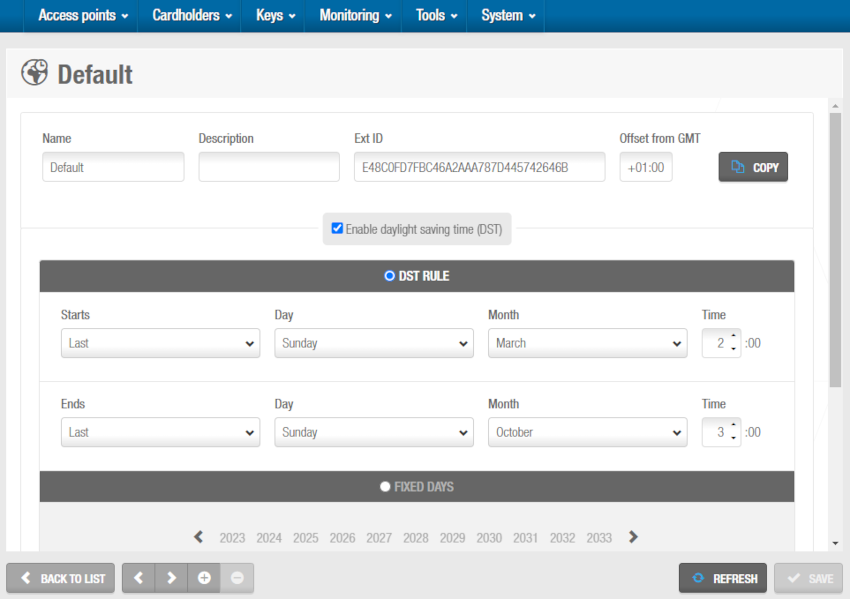 'Default' information screen
Clear the default text and type a name in the Name field, for example, "Daylight saving time". The new screen name is displayed.
Type a description for the DST in the Description field. The Enable daylight saving time (DST) checkbox is selected by default. If you clear this checkbox and click Save, this disables the DST feature, and the DST rule and Fixed days options are not displayed.
Type the appropriate value in the Offset from GMT field. This value is used to calculate the time zone according to Greenwich Mean Time (GMT).
Select either the DST rule or the Fixed days option. The DST rule option is selected by default. Both options are described in DST options.
You can click Copy to display the System world time zones dialog box and select a time zone from the list. When you do this, the Name, Description, and Offset from GMT fields, and the fields for the DST rule option are populated with the information for the selected time zone. The fields for the DST rule option are not populated if the time zone you select does not use DST. You must manually enter the details for the Fixed days option on the system.
Click Save.
DST options
The DST options are described in the following table.
| Option | Description |
|---|---|
| DST rule | Allows you to set the month, week, day, and hour when the forward and backward time changes occur. To do so, select the appropriate parameters in the Month, Starts, Ends, Day, and Time fields. Note that you cannot set the forward time change to occur after 22:00 or the backward time change to occur after 23:00 on the selected day. You can click Copy on the Time zone information screen to select a world time zone and populate the fields for the DST rule option with the relevant information for the time zone. |
| Fixed days | Allows you to set the month, day, and hour of forward and backward time changes for individual years. To do so, select the appropriate year from the list of years, select the appropriate parameters in the DST forward and DST backward fields, and click Save. Note that you cannot set the forward time change to occur after 22:00 or the backward time change to occur after 23:00 on the selected day. You should repeat this process for each required year. You can click Show calendar to select parameters using the calendar view, and click Reset dates to reset the parameters for selected years. |
 Back
Back
