Roll-call monitoring in Space
Overview
The roll-call functionality identifies whether users are inside or outside a specific location in an installation. You can use it to list the individual users in a specified area, for example, a laboratory, at a particular time. A roll-call area in Space tracks the time and date individual users entered that area. See Roll-call areas for information about how to create a roll-call area.
Note that the roll-call functionality is license-dependent. See Registering and licensing Space for more information.
Searching for users
If a user needs to be located, you can search all roll-call areas for that user.
To search all roll-call areas, follow the steps below:
Select Monitoring > Roll-call monitoring. The Roll-call screen is displayed.
Select the user's name from the Search user drop-down list after entering the corresponding characters in the field. The user is displayed within the appropriate roll-call area.
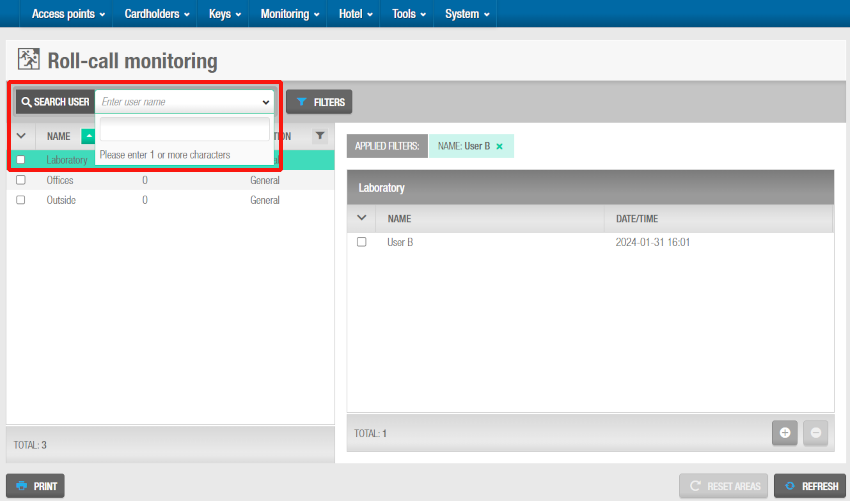 Locating a user in a roll-call area
You can also add filters when searching for a user. For example, you could filter your search by Access levels or by General purpose fields that have already been configured from the Users tab in General options.
Adding users
You can manually add users to a roll-call area. Typically, this is only done when you need to amend the number of users recorded in a roll-call area. For example, if five users enter the laboratory roll-call area together but only the first user presents a key, the system only records that one user has entered the area. To correct this, you can manually add the additional four users to that roll-call area.
To add a user to a roll-call area, do the following:
- Select Monitoring > Roll-call monitoring. The Roll-call monitoring screen is displayed.
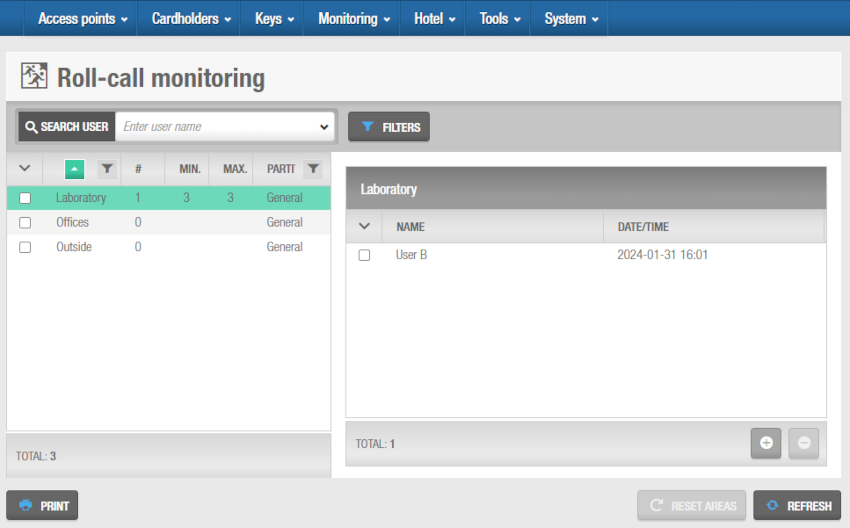 'Roll-call monitoring' screen
Select the roll-call area to which you want to add the user.
Click the add (+) button. The Add dialog box, showing a list of users, is displayed.
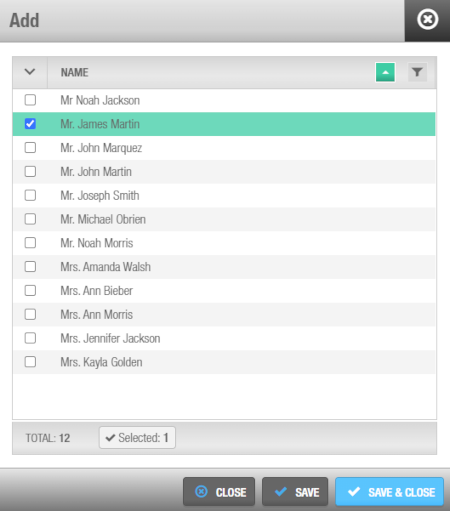 Select a user in the 'Add' dialog box
- Select the required user and click Save & close. The selected user is now added to the roll-call area.
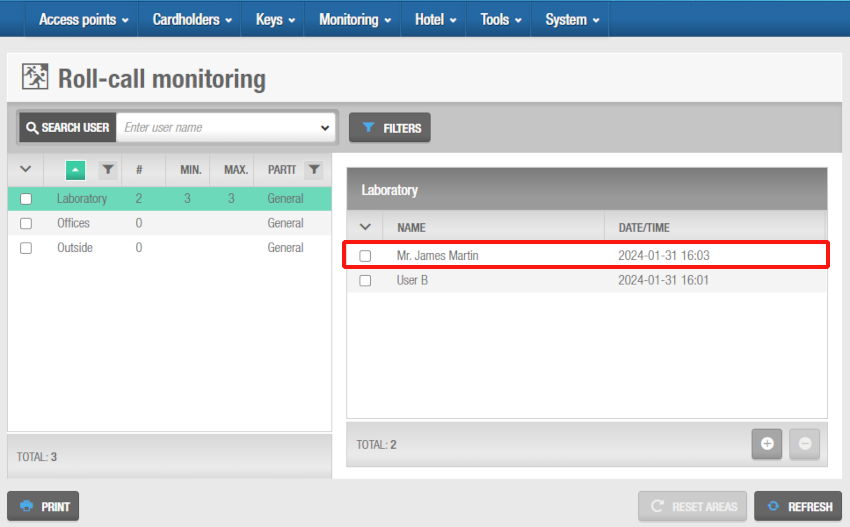 Selected user added to the roll-call area
Removing users
You can manually remove users from a roll-call area. For example, if, at the end of a working day, all users have physically exited a roll-call area but the system shows users still in that area, you can remove users accordingly.
To remove a user from a roll-call area, do the following:
Select Monitoring > Roll-call monitoring. The Roll-call monitoring screen is displayed.
Select the user in the corresponding roll-call area.
Click the delete (-) button.
Confirm the deletion in the Warning dialog box. The user is removed from the roll-call area.
You can also remove all the users from one or more roll-call areas at once by selecting the checkboxes of the corresponding roll-call areas and clicking on the Reset areas button.
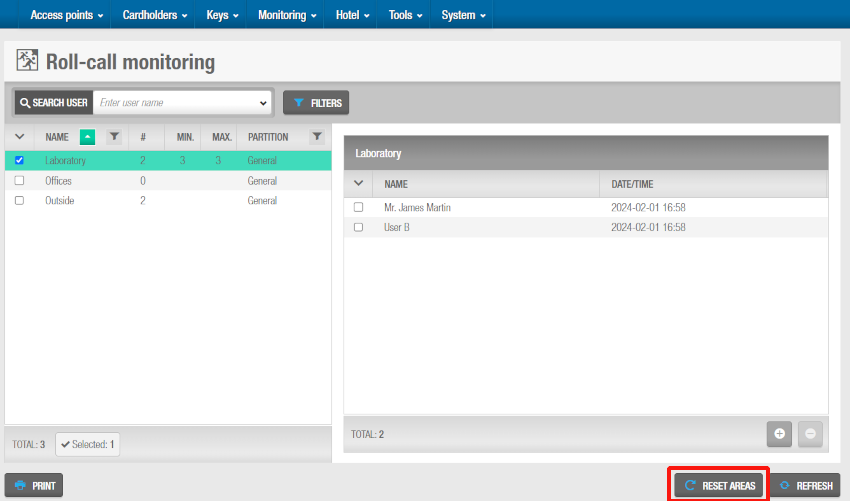 Click on the 'Reset areas' button to reset roll-call areas
Refreshing the roll-call areas screen
To refresh the roll-call monitoring screen with updated data, click on the Refresh button.
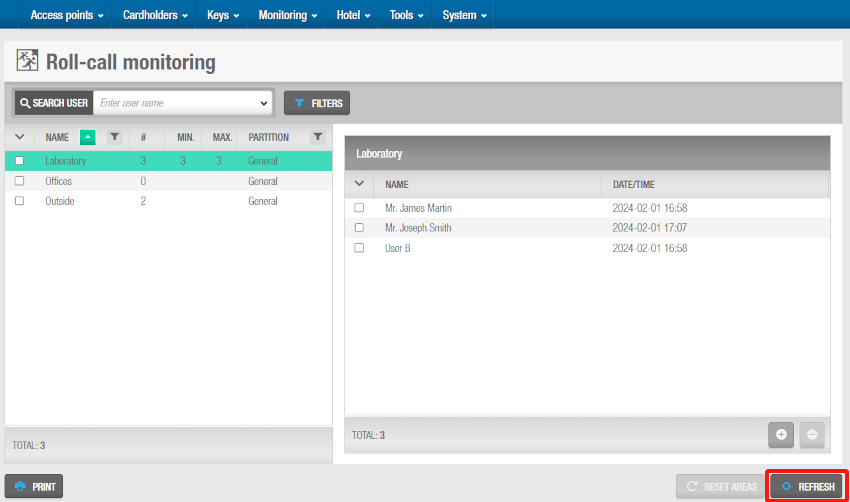 Click on the 'Refresh' button to update the roll-call monitoring screen
Printing user names
You can print a report listing all user names, their roll-call area, and the time and date each user entered the roll-call area.
To print a report, follow the steps below:
Select Monitoring > Roll-call monitoring. The Roll-call monitoring screen is displayed.
Click Print. The Print dialog box displays.
Select the report type and the format.
You can preview the report (only if you select PDF) or directly click on Save. The roll-call monitoring report will be saved on your computer and will be ready to be printed.
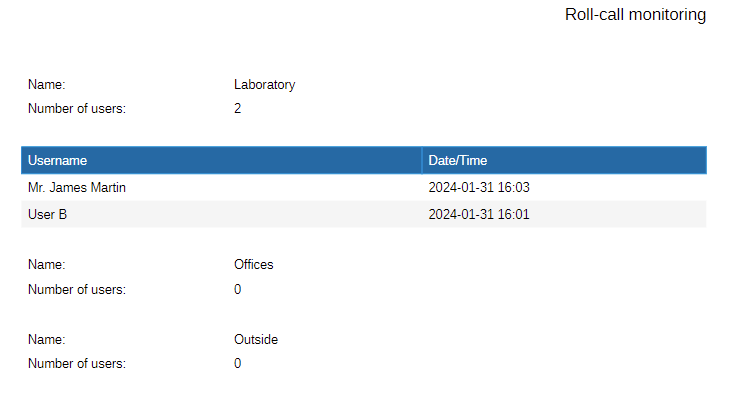 An example of a roll-call monitoring report
 Back
Back
