Multiple rooms and suites in Space
Overview
Space allows you to create multiple rooms or suites all in one go, if required. This might be useful in medium-sized to big hotels where there are a large amount of rooms with associated Salto devices.
Creating multiple rooms
To create multiple rooms, do the following:
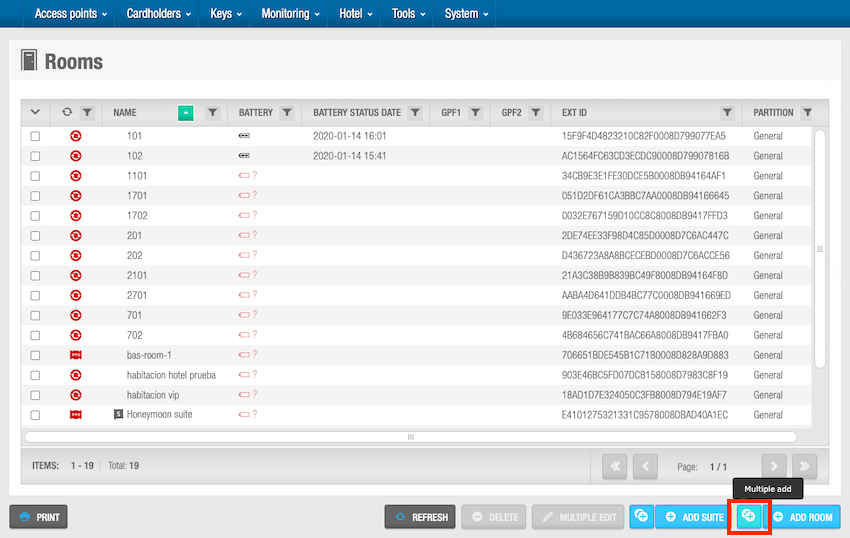
- Select Access points > Rooms. The Rooms screen is displayed.
 Use the 'Multiple add' button to create multiple rooms
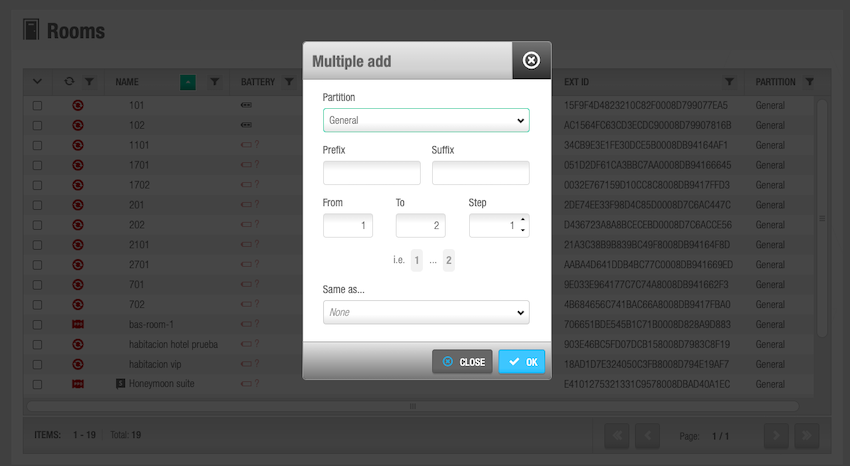
- Click the Multiple add option. The Multiple add dialog box is displayed.
 Multiple add dialog box
- Select the appropriate partition from the Partition drop-down list, if required. See Partitions for more information.
Note that the partitions functionality is license-dependent. See Registering and licensing Space for more information.
Type a prefix in the Prefix field if required. This is included at the beginning of the new room names. For example, if you type 9 in the Prefix field, and create two rooms, the rooms are named 91 and 92 respectively. You can change individual room names by amending the text in the Name field on the Room information screen, if required.
Type a suffix in the Suffix field if required. This is included at the end of the new room names. For example, if you type 9 in the Suffix field, and create two rooms, the rooms are named 19 and 29 respectively.
Type the required numbers in the From and To fields. The numbers in these fields define the number of rooms that will be created. For example, if you select 1 in the From field and 3 in the To field, three rooms are created. The number of each room is included in the room name by default. In this example, if you have not entered a prefix or a suffix, the rooms are named 1, 2, and 3 respectively.
Select the appropriate number by using the up and down arrows in the Step field, if required. This allows you to more accurately define what rooms are created within the number range you have selected in the From and To fields. For example, if you select 2 in the Step field, rooms are created for every second number within the specified range.
Select the appropriate room from the Same as drop-down list, if required. If you select a room from the drop-down list, the configuration settings of the new rooms are the same as the room you select. See Rooms for more information and a description of the steps you should follow. The default option is None. If you select None, multiple rooms are created, but you must define the configuration settings for each one.
Click OK when finished.
Creating multiple suites
The process for creating multiple suites is the same as for creating multiple rooms. See Creating multiple rooms for a description of the steps you should follow.
Editing multiple rooms and suites
You can edit multiple rooms or suites in one go by using the Multiple Edit button. This button is enabled when you select more than one room or suite on the Rooms screen. It allows you to enter the appropriate identification and configuration details on the Multiple edit screen. The details are then applied to all of the selected entries. See Configuring rooms and Configuring suites for more information about the configuration settings for rooms and suites.
Room and suite icons
When you create rooms and suites, different icons are displayed on the Rooms screen. These icons vary, depending on the battery status of room and suite doors and whether they need to be updated.
The icons are described in the corresponding table in the doors section of the operator user guide.
Checking room and suite availability
See the section on how to check room and suite availability within Room status.
Checking ESD status
You can click the Show ESD button to see the ESD status on the Room status information screen. Click the Hide ESD button to hide the ESD column. A green dot is displayed in the ESD column if the ESD is online and communicating correctly with its controller. If a communication issue occurs, a red dot is displayed. When a user or guest activates an ESD using their key, a key icon and the name of the user or guest are also displayed in the column.
See ESDs and Associated device lists for more information about ESDs.
 Back
Back
