Locations/Functions tab in Space General options
Overview
Locations and functions allow you to give users access to large areas of designated access points and specific categories of permissions within them. This enables easier access management in large installations. You can add groupings for locations and functions by using the Locations/Functions tab. This is not mandatory. However, it is recommended that you do this to organize your locations and functions. For example, if an organization has multiple offices in Melbourne, Sydney, and Perth, you can create a separate grouping for all of the offices in each of these cities.
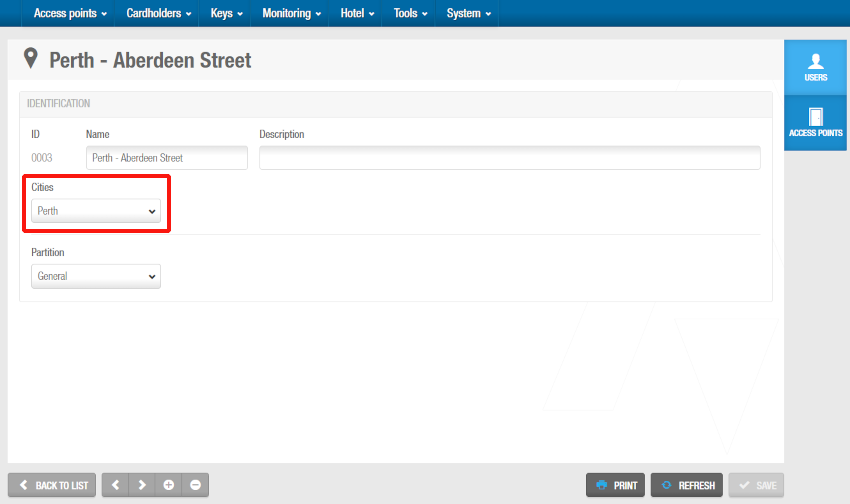
When you add a location grouping, a Location grouping drop-down list is displayed on the Access points > Location information screen. You can select a group from the list to add the location to the specified group.
Similarly, when you add a function grouping, a Function grouping drop-down list is displayed on the Function information screen. You can then select a group to which you want to add the function.
See Locations and Functions for a definition and information about how to create and associate a location and a function.
Note that the locations and functions functionality is license-dependent. See Registering and licensing Space for more information or contact your Salto representative.
Adding location/function groupings
To add a location/function grouping, do the following:
- Select System > General options > Locations/Functions.
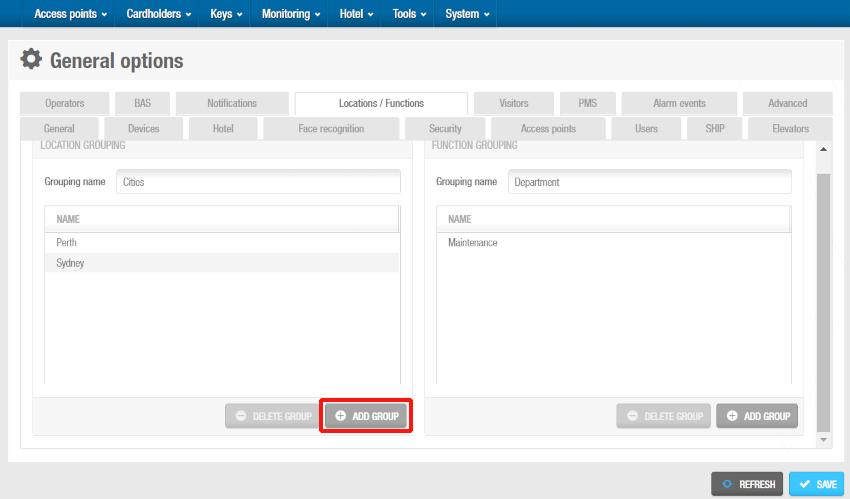
 'Locations/Functions' tab
- Type a name for the location/function grouping in the Grouping name field. This name is applied to the drop-down list that is displayed on the Location or the Function information screen.
 Grouping name 'Cities' for the drop-down list displayed on the 'Location' information screen
Click Add group to add a new group. The Location group or Function group dialog box is displayed.
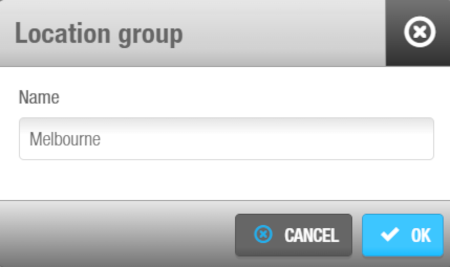
Type a name for the new group.
 Type a name for the new location group in the dialog box
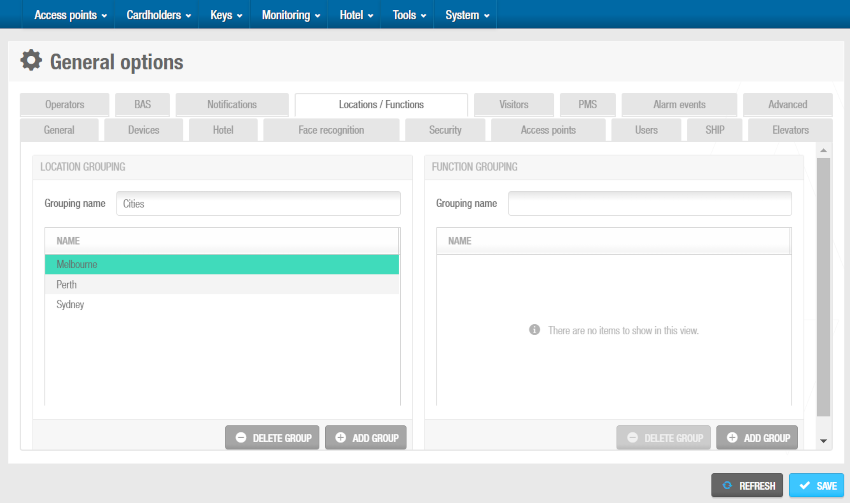
- Click OK. The group is added to the Location grouping or Function grouping list on the Locations/Functions tab. You can rename the group by double-clicking the name of the group and modifying the name from the Location group or Function group dialog box. Click Delete after having selected a specific group to delete it.
 'Melbourne' group has been added to the **Location grouping** list
- Click Save when you have finished adding all the required groups.
 Back
Back
