Visitors in Space
Overview
Visitors is the term used to describe cardholders who require temporary access to an installation that uses Salto Space. An example of a visitor might be an engineer carrying out site maintenance work for a short period of time. The engineer can be given access to specific areas of the installation for a specified time period. When the time period expires, they can no longer access the installation.
If someone needs to visit the site on a regular basis, they can be more permanently included in the system as a visitor and an operator can check them in and out as applicable. However, they have access permissions only during the time period specified. If the appointment is a one-off visit, the operator can delete the visitor from the database once the specified check-out time has expired.
Note that the visitors functionality is license-dependent. See Registering, licensing and downloading Space for more information.
The information contained in this section applies to non-hotel installations only. Visitors should not be confused with guests: guests are applicable to hotel installations only. See the section on guests for more information about how to manage hotel guests.
About visitor configuration
You must perform certain configuration tasks for visitors in General options. You can activate or amend options for visitors by using the Visitors tab. See Visitors tab for more information.
Visitors process
Visitors are generally created and managed by an operator with admin rights. Throughout this section, references are made to the admin operator. However, this can refer to any operator that has been granted admin rights.
The following example shows a simple way to complete this process:
- Visitor access levels created and configured.
The admin operator creates a visitor access level and configures the visitor access level options.
- Visitor access levels associated.
The admin operator associates access points, zones, and outputs with the specified visitor access level.
- Visitor check-in created.
The operator enters the check-in information.
- Visitor check-out created.
The operator enters the check-out information.
- Visitors list managed.
The operator views the list of visitors and deletes visitors whose visits have expired.
Visitor access levels
You must define a visitor access level to group together visitors who require access to similar access points. For example, you can create a meeting room access level for a group of visitors who are attending the same meeting. You must define the visitor access levels before checking in visitors.
Creating visitor access levels
To create a visitor access level, do the following:
- Select Cardholders > Visitor access levels.
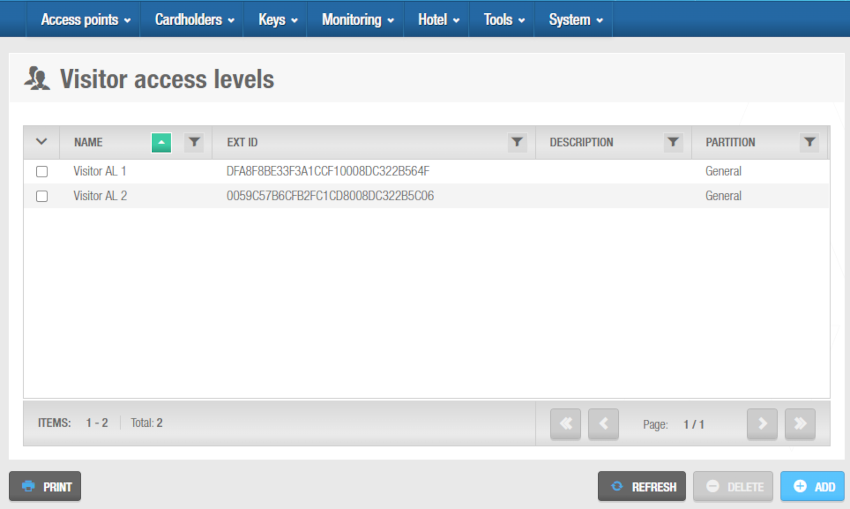
The Visitor access levels screen is displayed.
 'Visitor access levels' screen
- Click Add.
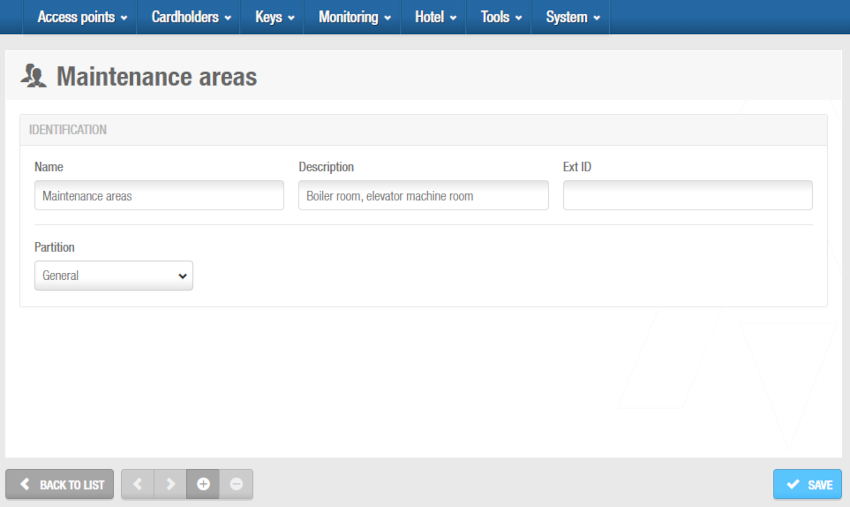
The Visitor access level information screen is displayed.
 'Visitor access level' information screen
Type a visitor access level name in the Name field.
Type a description for the visitor access level in the Description field.
Select the relevant partition from the Partition drop-down list, if required. See Partitions for more information.
Click Save.
Associating visitor access levels
After you have created a visitor access level, you must associate access points, zones, outputs and destinations with the specified visitor access level. This section describes how to associate visitor access levels with the various entities.
Access points
See Access points for definitions and information about how to create and configure the various types of access points.
The maximum number of doors to which a visitor can be granted access is 96.
To associate a visitor access level with an access point, do the following:
Select Cardholders > Visitor access levels. The Visitor access levels screen is displayed.
Click on the visitor access level that you want to associate with an access point. The Visitor access level information screen is displayed.
Click Access points in the sidebar. The Access points dialog box is displayed. Note that the dialog box will be blank because you have not yet associated an access point with this particular visitor access level.
Click Add. The Add dialog box, showing a list of access points, is displayed.
Select the required access point.
Click Save. The visitor access level is now associated with the access point.
To assign a timetable to an existing visitor access level or specify whether access is optional, follow the steps below:
Select the access point in the Access points dialog box.
Click Edit. The Edit dialog box is displayed.
Select the appropriate cardholder timetable using the drop-down list. You can also select the Always or Never drop-down list option, if required.
The Always option is selected by default. This means that the cardholder associated with the specified visitor access level always has access to the access point, as you have not specified a timetable. Access permissions are granted 24/7 but never longer than the expiration date as specified by the check-in. Note that the system calendars do not apply if the Always option is selected. If you select Never, the access point cannot be used by the visitor at any time.
- In the Optional field, select Yes or No as appropriate.
If you select Yes, operators can decide whether or not to grant access when they check in a visitor. If you select No, access is granted to visitors by default. Note that if you specify an access point as optional, it is displayed as a checkbox option on the Visitor check-in screen. See Visitor check-ins for more information.
Zones
See Zones for a definition and information about how to create and configure a zone.
To associate a visitor access level with a zone, do the following:
Select Cardholders > Visitor access levels. The Visitor access levels screen is displayed.
Click on the visitor access level that you want to associate with a zone. The Visitor access level information screen is displayed.
Click Zones in the sidebar. The Zones dialog box is displayed.
Note that the dialog box will be blank because you have not yet associated a zone with this particular visitor access level.
Click Add. The Add dialog box, showing a list of zones, is displayed.
Select the required zone.
Click Save. The visitor access level is now associated with the zone. Note that you can select a cardholder timetable to be used and specify whether access is optional.
See Access points for more information and a description of the steps you should follow.
Outputs
See Outputs for a definition and information about how to create and configure an output.
To associate a visitor access level with an output, do the following:
Select Cardholders > Visitor access levels. The Visitor access levels screen is displayed.
Click on the visitor access level that you want to associate with an output. The Visitor access level information screen is displayed.
Click Outputs in the sidebar. The Outputs dialog box is displayed. Note that the dialog box will be blank because you have not yet associated an output with this particular visitor access level.
Click Add. The Add dialog box, showing a list of outputs, is displayed.
Select the required output in the left-hand panel.
Click Save. The visitor access level is now associated with the output.
Note that you can specify whether access is optional. For example, you can enable elevator access so that a user can access Floor 1 and Floor 3 of a building, but not Floor 2. See the section on access points for more information and a description of the steps you should follow.
Destinations
This option is license-dependent. See Registering and licensing Space for more information on licensing options.
To associate a destination with a visitor access level, do the following:
Select Cardholders > Visitor access levels. The Visitor access levels screen is displayed.
Click the visitor access level that you want to associate with a destination. The Visitor access level information screen is displayed.
Click Destinations in the sidebar. The Destinations dialog box is displayed. Note that the dialog box will be blank if you have not yet associated a destination.
Click Add. The Add dialog box, showing a list of destinations, is displayed.
Select the required destination.
Click on Save & Close. The visitor access level is now associated with the destination.
To dissociate a destination from a visitor access level, from the Destinations dialog box of the specific visitor access level, do the following:
Select the destination to be dissociated.
Click on Delete and confirm the action in the Warning dialog box.
Visitor check-ins
To check in a visitor, do the following:
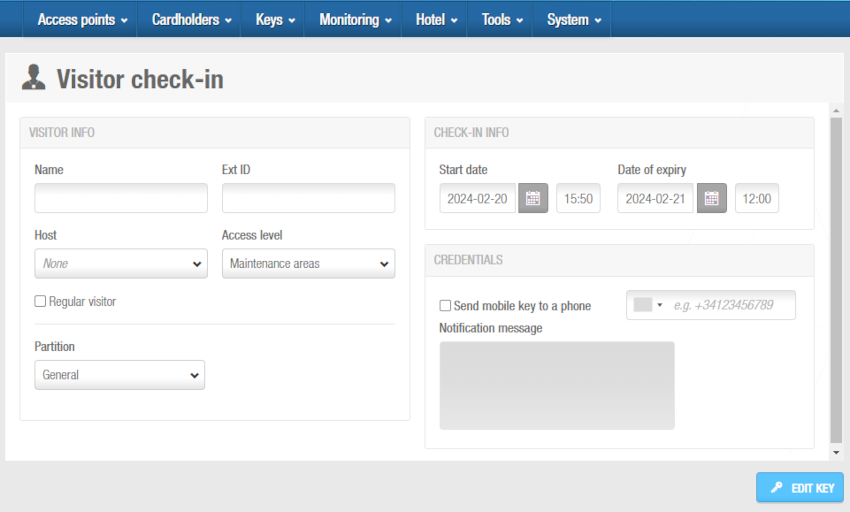
- Select Keys > Visitor check-in. The Visitor check-in screen is displayed.
 'Visitor check-in' screen
Type the visitor's name in the Name field.
Define general information about the specific visitors using the General Purpose Fields, if necessary. See Visitors tab for more information.
Select the appropriate access level in the Access levels drop-down list.
See Creating visitor access levels for more information about setting up visitor access levels. Also configure the Host responsible of the visitor: this concept is defined in order to relate a visitor to a user introduced in the database. This means it's possible to check all the visitors who have visited a specific user, from Visits history reports. See Visits history for more information.
If the visitor is a regular visitor, activate the Regular visitor checkbox. If you define a visitor with this option, that visitor won't be deleted, independently of the expiration time of the visitor's key. This can be used for recurring visitors who will return to be registered. See Visitors tab for more information.
Select the relevant partition from the Partition drop-down list, if required. See Partitions for more information.
Enter the appropriate check-in information. See Visitor check-in information for more information about filling in these fields.
Select the appropriate optional facilities if required.
Note that the details entered in the previous check-in for a given visitor are remembered and pre-populated in any following check-ins for the same visitor.
In the Credential field you can activate a digital JustIN Mobile key. To do so, check the Send mobile key to a phone option. The area code has to be entered first, according to the country the phone line is from.
Click the Edit key button if you want to assign the visitor a physical key like a keycard or wristband. A pop-up is displayed asking you to place the key on the encoder.
Place the key on the encoder when the LED light begins to flash. A pop-up is displayed informing you that the check-in is completed.
Click OK.
If required, you can add an Additional data field to the Visitor check-in screen using General options. To enable the field, you must select Track #1, Track #2, or Track #3 from the Save additional data on… drop-down list in System > General options > Visitors. See Visitors tab for more information.
Visitor check-ins with JustIN Mobile
For JustIN Mobile keys, the data sent over the air (OTA) to a mobile phone has to be encrypted. To send data this way, a Salto Ethernet encoder has to be used as a dongle.
See the Devices tab in System > General options for more information as well as the section on assigning a JustIN Mobile key.
The visitor's phone has to be online so it can receive the access data information.
Visitor check-in information
The visitor check-in information options are described in the following table:
| Option | Description |
|---|---|
| Start date | Date on which the visitor arrives at the installation. |
| Date of expiry | Date on which the visitor will leave the installation. |
| Start date time | Exact time when the key becomes valid. |
| Date of expiry time | Exact time when the key expires. |
The default check-out time is 12:00. If required, you can change this in General options in the Default checkout time field in System > General options > Visitors. See Visitors tab for more information. The default maximum number of days for which a visitor can be granted access is 30. If required, you can change this in General options in the Maximum number of days field in System > General options > Visitors.
Managing visitor lists
Viewing visitors
You can view a list of visitors by selecting Cardholders > Visitors. By default, visitors remain on the database and are displayed in the visitors list for 120 days after the visit expires.
To change the default display time, you can adjust the value in the Keys expired X days ago will be removed automatically field in System > General options > Visitors. See Visitors tab for more information.
Printing the visitor list
You can print the list of visitors or export it to an external document such as an Excel file.
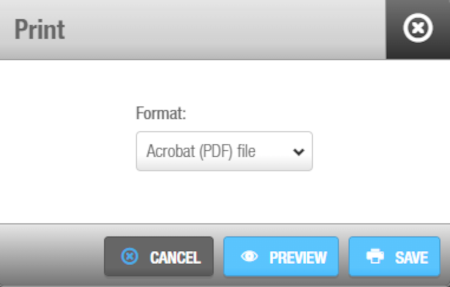
To print the list of visitors, click Print. The following screen is displayed.
 Printing the visitor list
To export the list, click on the Save icon. The list can be exported to PDF, Excel, or CSV format.
Select the format and click Save.
Deleting expired visitors
It is recommended to delete visitors as soon as their visit has ended in order to conserve system memory space.
To manually delete a visitor from the list of visitors, do the following:
Select Cardholders > Visitors. The Visitors screen is displayed.
Select a visitor name.
Click Delete. The visitor is removed from the visitors list.
If you delete visitors after their visit expires, their keys are not sent to the denylist. You can opt to select if visitor keys will be sent to the denylist when visitors are deleted before their visit expires. To activate this option, you must enable the MORE_THAN_64K_USERS advanced parameter in General options. See Advanced tab for more information. See also Managing denylists for more information.
 Back
Back
