Limited occupancy groups in Space
Overview
A limited occupancy group is a group of users who require access to a specified limited occupancy area, for example, a restricted car park.
The limited occupancy functionality is license-dependent. See Registering and licensing Space for more information.
Creating limited occupancy groups
To create a limited occupancy group, do the following:
- Select Cardholders > Limited occupancy groups. The Limited occupancy groups screen is displayed.
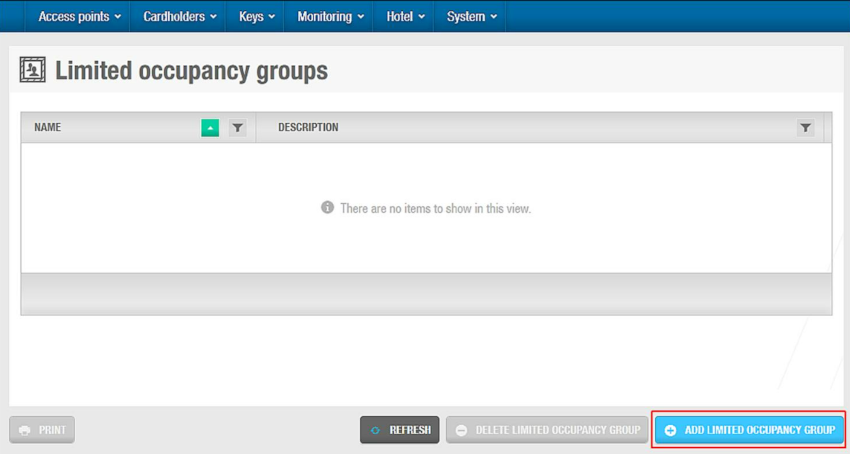 Limited occupancy groups screen
- Click Add. The Limited occupancy group information screen is displayed.
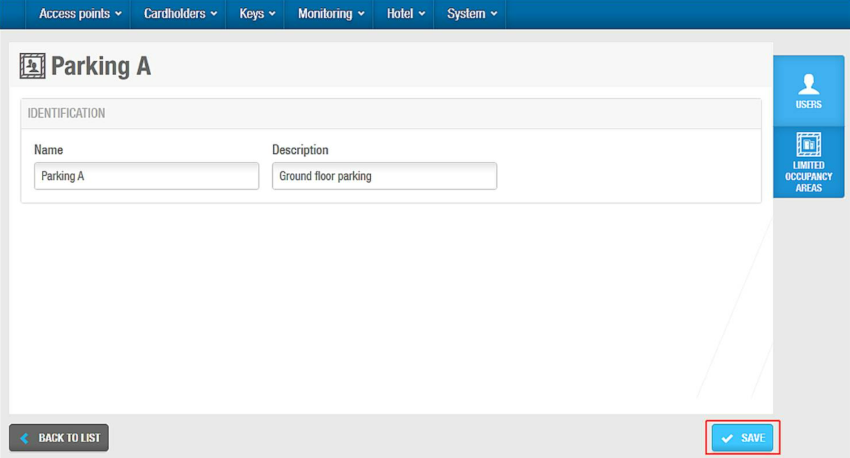 Limited occupancy group information screen
Type a name for the limited occupancy group in the Name field.
Type an optional description for the limited occupancy group in the Description field.
Save the changes.
Associating limited occupancy groups
Once you have created a limited occupancy group, you must associate users and limited occupancy areas with that limited occupancy group. The following sections describe how to associate limited occupancy groups with the various elements.
Users
To associate a user with a limited occupancy group, follow the steps below:
Select Cardholders > Limited occupancy groups. The Limited occupancy groups screen is displayed.
Click the limited occupancy group that you want to associate with a user. The Limited occupancy group information screen is displayed.
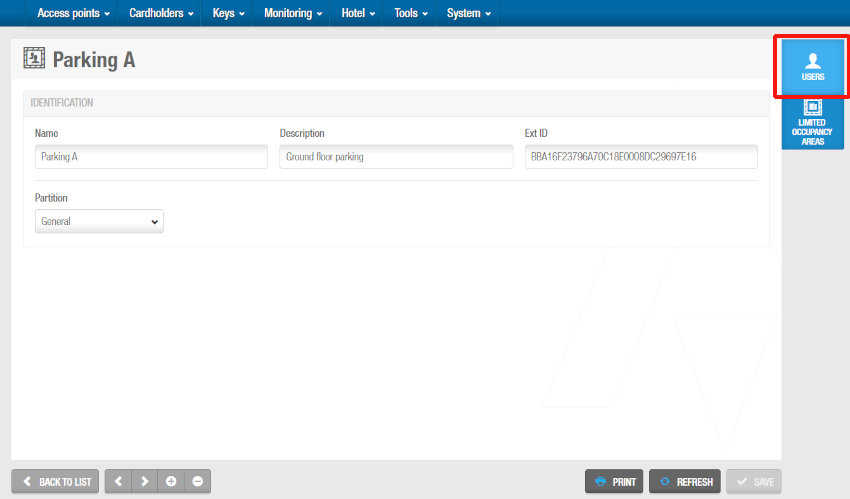 'Limited occupancy group' information screen
- Click Users in the sidebar. The Users dialog box is displayed. Note that the dialog box will be blank if you have not yet associated a user with this particular limited occupancy group.
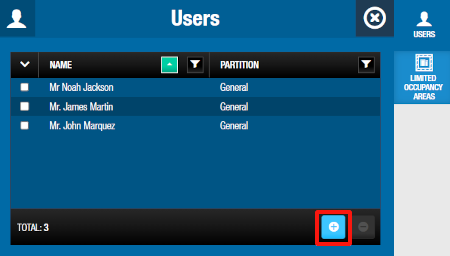 Click 'Users' in the sidebar
Click Add. The Add dialog box, showing a list of users, is displayed.
Select the required users.
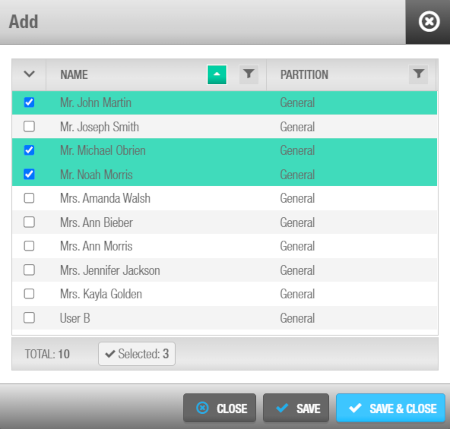 'Add' dialog box showing a list of users
- Save the changes. The limited occupancy group is now associated with those users.
You can also add users to limited occupancy groups by selecting the required limited occupancy group in the Limited occupancy group panel on the User information screen.
To dissociate a user from a limited occupancy group, from the Users dialog box of the specific limited occupancy group, follow the steps below:
- Select the user to be dissociated.
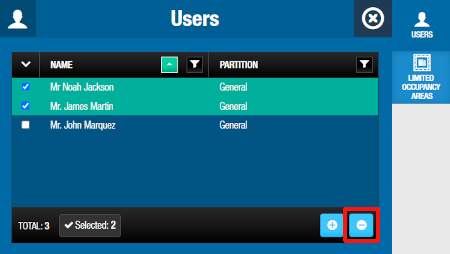 Users to be deleted using the 'Delete' button
- Click on Delete and confirm the action in the Warning dialog box.
Limited occupancy areas
To associate a limited occupancy area with a limited occupancy group, do the following:
Select Cardholders > Limited occupancy groups. The Limited occupancy groups screen is displayed.
Click the limited occupancy group that you want to associate with a limited occupancy area. The Limited occupancy group information screen is displayed.
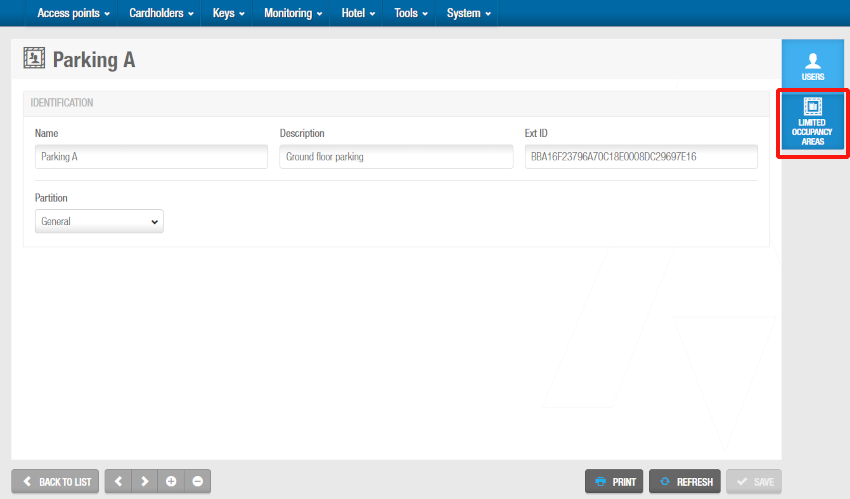 'Limited occupancy group' information screen
- Click Limited occupancy areas in the sidebar. The Limited occupancy areas dialog box is displayed. Note that the dialog box will be blank if you have not yet associated a limited occupancy area with this particular limited occupancy group.
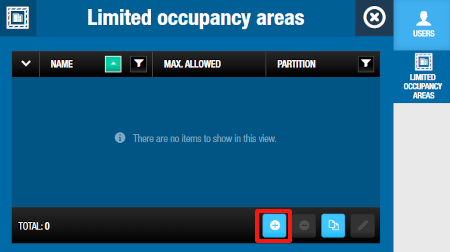 Click 'Limited occupancy areas' in the sidebar
Click Add. The Add dialog box, showing a list of limited occupancy areas, is displayed.
Select the required limited occupancy area.
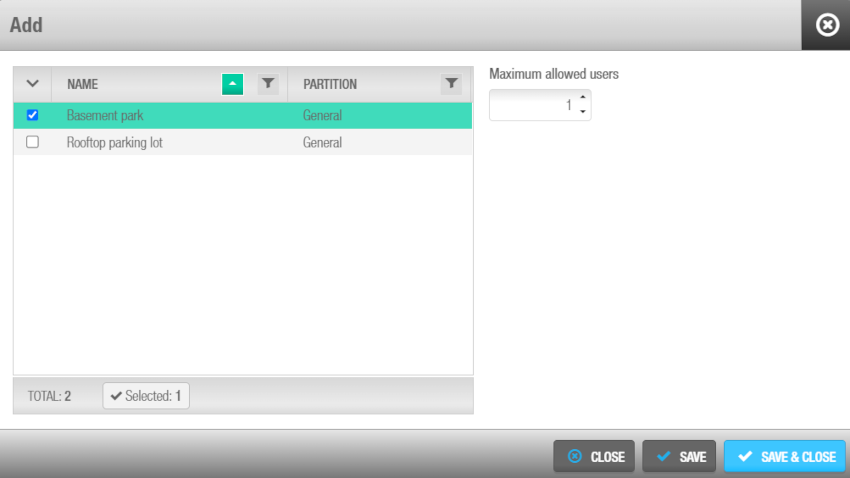 'Add' dialog box showing a list of limited occupancy areas
Save the changes. The limited occupancy group is now associated with the limited occupancy area.
Select the limited occupancy area in the Limited occupancy areas dialog box if you want to change the maximum number of users allowed in the area. The default number of users is 1.
Click Edit. The Edit dialog box is displayed.
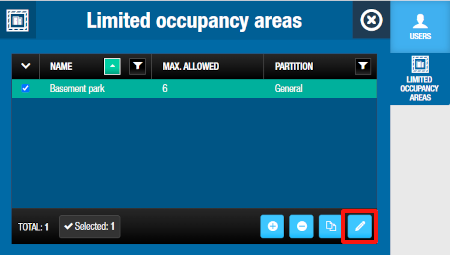 Click 'Edit' to change the maximum number of users allowed in the area
Select the maximum number of users allowed using the up and down arrows. You can also type the appropriate number in the Maximum allowed users field.
Click Save.
To dissociate a limited occupancy area from a limited occupancy group, from the Limited occupancy area dialog box of the specific limited occupancy group, follow the steps below:
- Select the limited occupancy area to be dissociated.
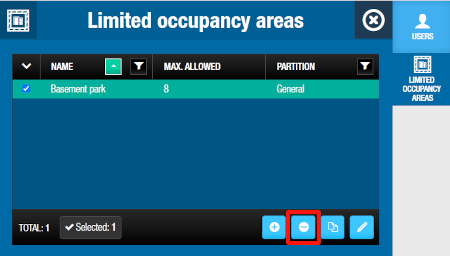 Limited occupancy area to be deleted using the 'Delete' button
- Click on Delete and confirm the action in the Warning dialog box.
 Back
Back