Áreas de ocupación limitada en Space
Introducción
En Space, un área de ocupación limitada es un área con un número máximo especificado de usuarios permitidos. Por ejemplo, si un aparcamiento contiene 20 plazas, el sistema cuenta el número de plazas que están ocupadas. Cuando 20 usuarios han ocupado las plazas de aparcamiento disponibles, al siguiente usuario se le denegará el acceso, incluso si tiene una llave válida.
Utiliza la funcionalidad de áreas de ocupación limitada en Space para designar el área aplicable y para especificar el número de usuarios permitidos. A continuación, puedes utilizar la opción Supervisión de ocupación limitada para generar una lista de nombres de usuario individuales dentro de cada área de ocupación limitada.
Ten en cuenta que la funcionalidad de ocupación limitada depende de la licencia. Consulta Registro y obtención de licencias de Space para obtener más información.
Creación de áreas de ocupación limitada
Para crear un área de ocupación limitada, haz lo siguiente:
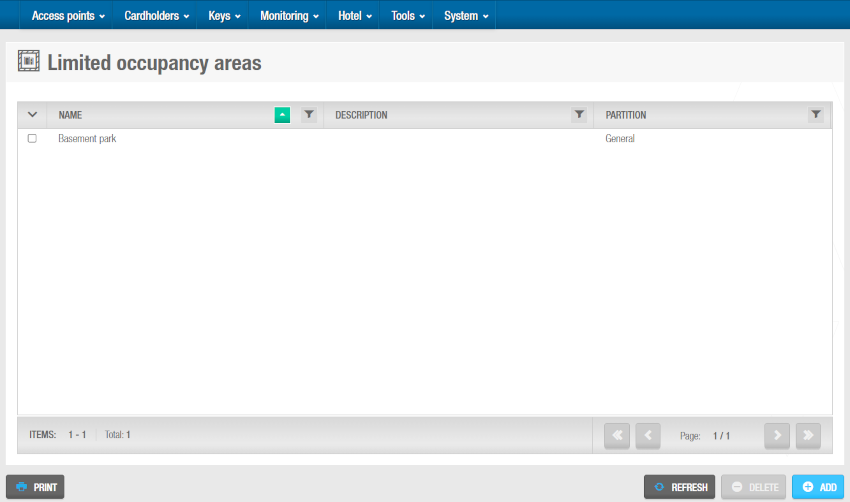
- Selecciona Puntos de acceso > Áreas de ocupación limitada. Se muestra la pantalla Áreas de ocupación limitada.
 Pantalla 'Áreas de ocupación limitada'
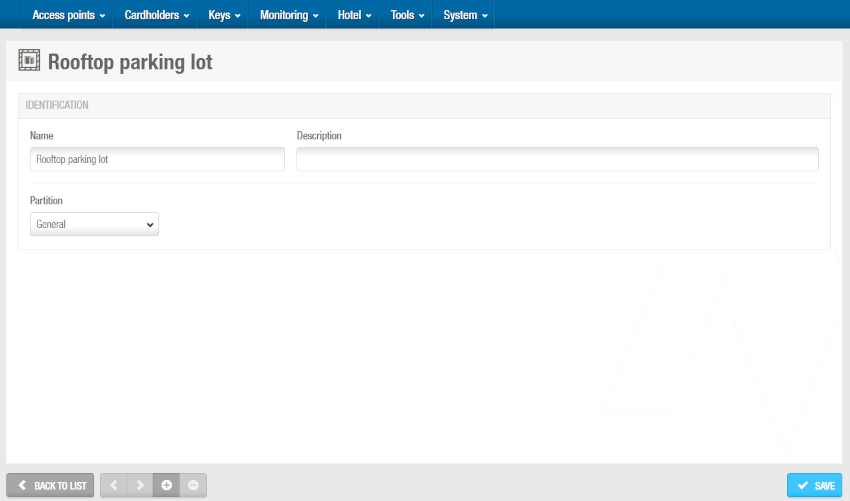
- Haz clic en Añadir. Se muestra la pantalla de información Área de ocupación limitada.
 Pantalla de información 'Área de ocupación limitada'
Escribe un nombre para el área de ocupación limitada en el campo Nombre.
Escribe una descripción para el área de ocupación limitada en el campo Descripción.
Haz clic en Guardar.
Asociación de áreas de ocupación limitada
Una vez que hayas creado un área de ocupación limitada, debes asociar puntos de acceso en línea y grupos de ocupación limitada con esa área de ocupación limitada. En las siguientes secciones se describe cómo asociar áreas de ocupación limitada con las distintas entradas.
Puntos de acceso
Para asociar un punto de acceso con un área de ocupación limitada, sigue los pasos que se indican a continuación:
Selecciona Puntos de acceso > Áreas de ocupación limitada. Se muestra la pantalla Áreas de ocupación limitada.
Haz clic en el área de ocupación limitada que quieres asociar con un punto de acceso. Se muestra la pantalla de información Área de ocupación limitada.
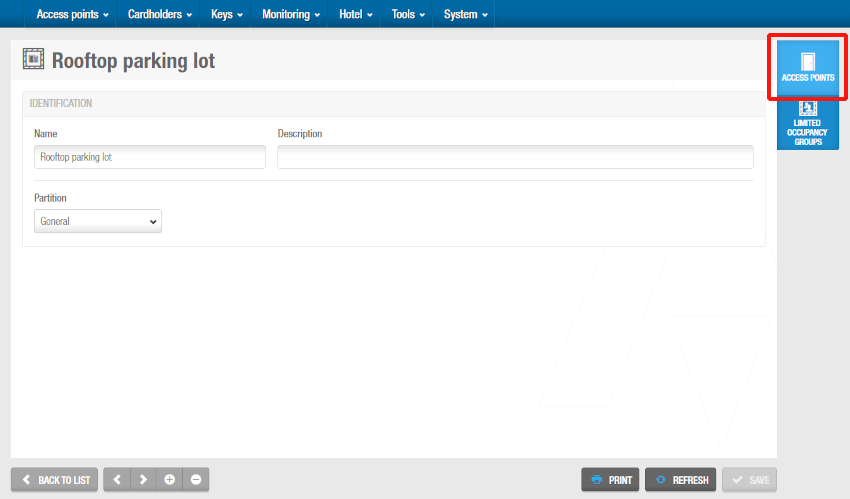
 Botón 'Puntos de acceso' en la pantalla de información 'Área de ocupación limitada'
Haz clic en Puntos de acceso en la barra lateral. Se muestra el cuadro de diálogo Puntos de acceso. Ten en cuenta que el cuadro de diálogo estará en blanco si aún no has asociado un punto de acceso con esta área de ocupación limitada en particular.
Haz clic en Añadir. Se muestra el cuadro de diálogo Añadir, que muestra una lista de puntos de acceso.
Selecciona el punto de acceso requerido.
Haz clic en Guardar y cerrar. El área de ocupación limitada ahora está asociada con el punto de acceso.
Grupos de ocupación limitada
Un grupo de ocupación limitada es una forma más fácil de agrupar a los usuarios que requieren acceso a un área de ocupación limitada específica en lugar de añadirlos uno por uno. Un usuario solo puede pertenecer a un grupo y este grupo puede tener acceso a varias áreas de ocupación limitada. Consulta Grupos de ocupación limitada para obtener más información.
Para asociar un grupo de ocupación limitada con un área de ocupación limitada, sigue los pasos que se indican a continuación:
Selecciona Puntos de acceso > Áreas de ocupación limitada. Se muestra la pantalla Áreas de ocupación limitada.
Haz clic en el área de ocupación limitada que quieres asociar con un grupo de ocupación limitada. Se muestra la pantalla de información Área de ocupación limitada.
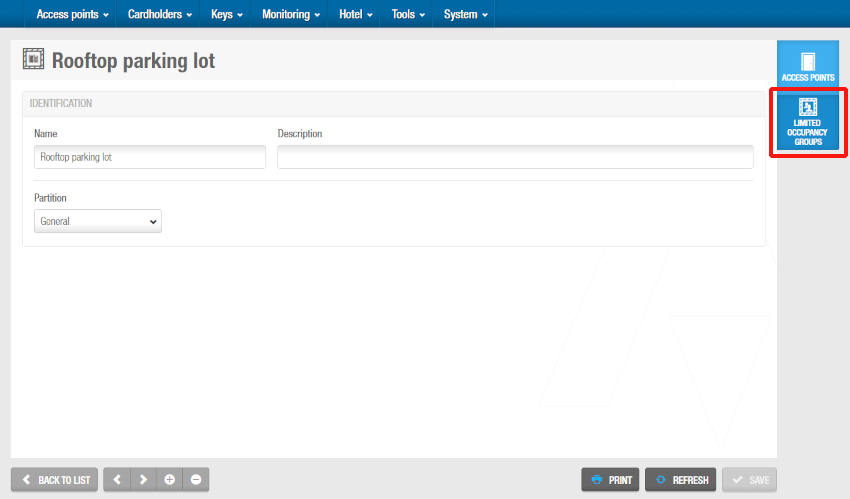
 Botón 'Grupos de ocupación limitada' en la pantalla de información 'Área de ocupación limitada'
Haz clic en Grupos de ocupación limitada en la barra lateral. Se muestra el cuadro de diálogo Grupos de ocupación limitada. Ten en cuenta que el cuadro de diálogo estará en blanco si aún no has asociado un grupo de ocupación limitada con esta área de ocupación limitada en particular.
Haz clic en Añadir. Se muestra el cuadro de diálogo Añadir, que muestra una lista de grupos de ocupación limitada.
Selecciona el grupo de ocupación limitada requerido y el número máximo de usuarios permitidos.
Haz clic en Guardar y cerrar. El área de ocupación limitada ahora está asociada con el grupo de ocupación limitada.
 Atrás
Atrás