Destinations in Homelok
Overview
Destinations represent secured points of entry or exit within an installation that can only be accessed by users with appropriate permissions. The primary use case is elevator control (where presenting a key to a reader activates only the buttons for floors the user has access to), however destinations could also represent any access-controlled output that requires selective activation based on user credentials.
How destinations work in Salto Homelok
- Functionality: In an elevator scenario, users present a key at a reader, which is attached to a controller. The system then, based on their permissions (which can be time-dependent, based on schedules), enables access to specific destinations by enabling or illuminating corresponding buttons on the elevator panel.
- Entities affected:
- Destinations: The actual locations (first floor, second floor, garage, attic). Destinations could also be 2 exit or entry points on the same floor (for example, second floor, exit A and second floor, exit B).
- Access: Permissions granted to users. These include destinations in addition to "traditional" doors.
- Access destination: The link between an access and a specific destination.
Destinations work with the BLUEnet Controller range of devices.
Technical implementation details
- Controllers: These devices are central to how destinations work. A controller with relays is used. Each relay can correspond to an elevator button, which in turn is a destination.
- Hardware configuration:
- A controller has a master board (for example, the BLUEnet Controller standard unit has 2 relays and 2 programmable inputs on its master board).
- Output expansion units (standard expansion boards) can be added (up to 16), each providing additional relays (typically 4 per expansion unit). This allows for a large number of destinations (typically up to 66 or 68, depending on the master board).
- Exit reader units can be added as needed for additional reader points, enabling separate entry and exit control with a second wall reader. Although an exit reader unit has its own relays, it doesn't provide an additional door or destination access point.
- Installation distance: the controller's master board and each output expansion unit or exit reader unit must be installed within 1 meter of each other, since they communicate over a serial bus.
- DIP switches: Installers need to physically configure DIP switches on the expansion boards sequentially (0000, 0001, 0010, 0011, and so on) as they are added, with switches numbered 1 to 4 for easy identification.
Output expansion units and exit reader units are accessories added to an existing controller, not device types you create separately in the Devices section.
Relay assignment logic
A controller can manage either one door or multiple destinations, but not both simultaneously.
- If you choose a door, Homelok web disables the other relay assignments and expansion controls.
- If you choose a destination, multiple destinations can be linked to the available relays.
See the relay settings section in the controllers guide for how to make this choice per relay.
If you change the purpose of a controller from enabling destinations to doors or vice versa, you must reset and reconfigure the controller.
- Managing doors and destinations:
- Doors can either be created implicitly (that's to say, at the same time as when you create the associated electronic lock) or in a separate section if they are to be associated with controllers.
- In the Settings section of Homelok you can manually create and manage both doors and destinations as separate entities, before associating them with access. This differs from creating doors implicitly when creating electronic locks.
The passcodes feature of Homelok is not currently supported with destinations. Users cannot use readers fitted with keypads to access destinations at the moment.
BLUEnet Controller settings
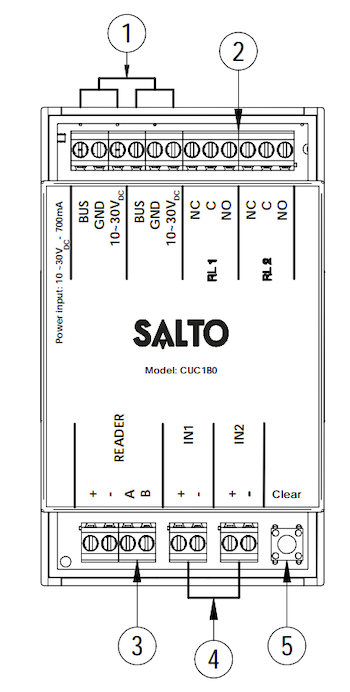 To use the destinations feature, you need to configure a BLUEnet Controller device
Legend
- Input/Output: power input/output and proprietary serial bus for communication with expansion boards. There are two groups of connections that are identical.
- Relay outputs: (1A/30VDC).
- Connection with the reader: consult the reader installation guides for more detailed information about the type of recommended wiring, connections and maximum distances.
- Inputs: inputs for external configuration (default, IN2, tamper).
- Clear button: short press (< 3 seconds) to pair with the connected wall reader and discover and pair devices on the proprietary serial bus.
Creating destinations
To create a destination go to Settings > Destinations and select Create.
You only need to enter a name for the destination. For example, First floor, Second floor, Garage, etc.
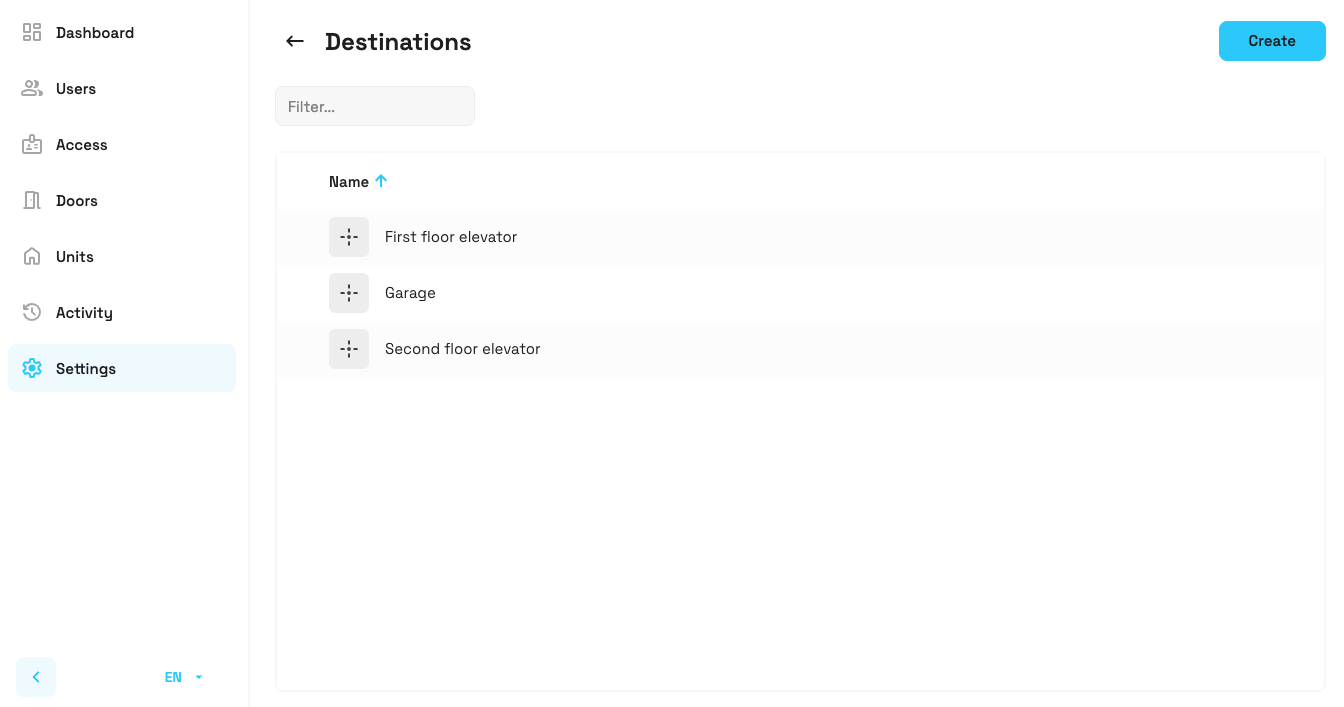 An example of destinations created in the 'Settings' section
Associating destinations to controllers
Once you have created a destination, you can associate it with a controller's relays during the controller setup process. To do this, you need to create a controller first.
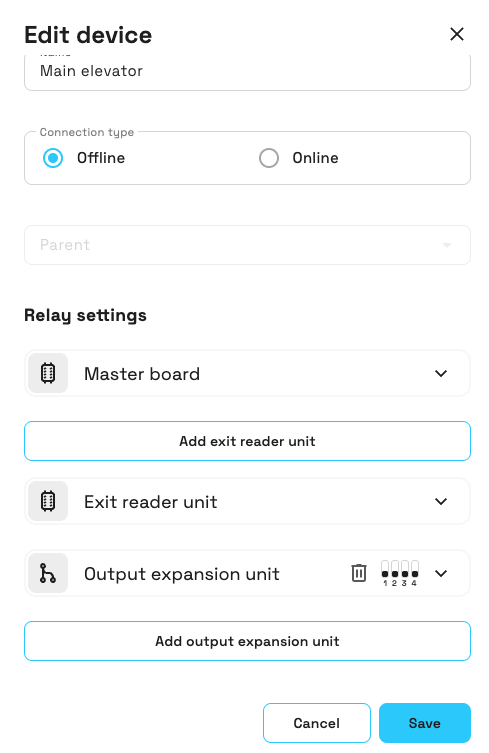 Associating destinations with a controller
For more information on how to create controllers and associate the controller's relays to destinations, see the section on configuring controllers.
Creating doors
If you also only want to associate a door - rather than destinations - to the controller, first you need to create the door in the Doors section. After that, you can associate the door with the controller's relay in a similar way as you would with destinations.
The BLUEnet Controller device currently allows you to associate one door per controller.
See the section on creating doors for more information.
 Back
Door groups
Back
Door groups Emergency keys