Transferring installation ownership in Homelok
Overview
This section describes how to transfer the ownership of an installation to another user. Transferring ownership of an installation means that you give full permissions to another user to manage a Salto Homelok installation by assigning them the role of owner. This feature is intended to be used for the following types of use cases:
- Salto partner transfers an installation to the end customer. In this situation, the partner creates and sets up the installation, including the installation of hardware, before transferring over the ownership to the customer.
- Installation user transfers ownership to another installation user. This could happen, for example, if an employee with the owner role leaves the company and needs to transfer the ownership to another employee.
Only users with the owner role can transfer the ownership of an installation to another user.
Transfer ownership
Before transferring ownership be aware of the implications. The management of all of the access control elements of the installation (users, devices, doors, access, etc.) will be transferred to another user. Once the transfer is confirmed, the current owner will no longer have access to manage Homelok.
To transfer installation ownership go to Settings > Danger zone and select the Transfer ownership option.
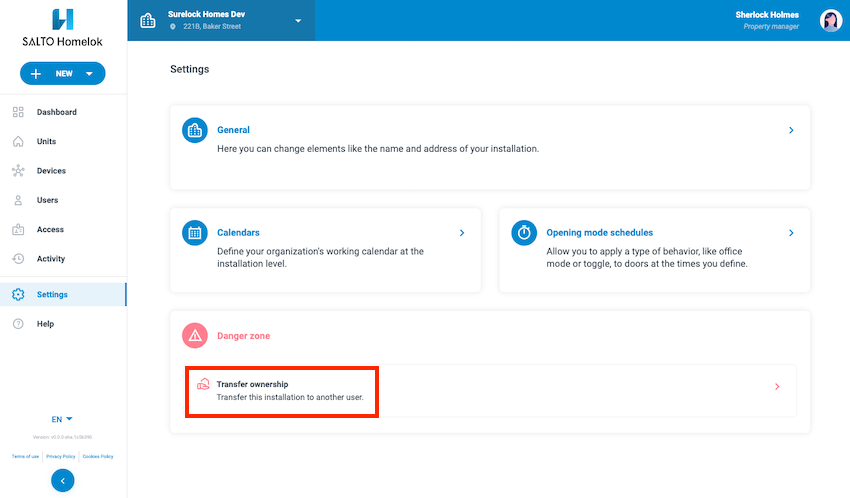 The 'Transfer ownership' option is only available to installation owners
This displays a new window which allows you to transfer the ownership of the installation either to an existing installation user, or a new user.
If you are transferring to an existing user, you can search for and select the user from the drop-down menu. If you're transferring to a new user you'll need to add a valid email address for that user before validating and confirming the transfer.
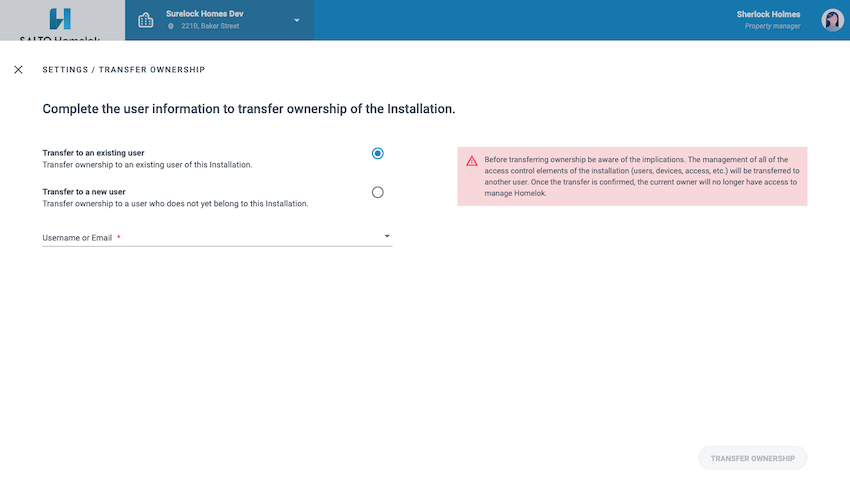 You can transfer the ownership of an installation to either an existing installation user, or a new user
If the existing user you're transferring the installation to doesn't have an email address, you'll be prompted to add one when you select that user.
New owner
Once you've confirmed the transfer, the new owner will receive an email with details explaining how to accept the ownership transfer. The new owner then needs to sign in to Homelok with the same email address used for the transfer and confirm that they accept the transfer.
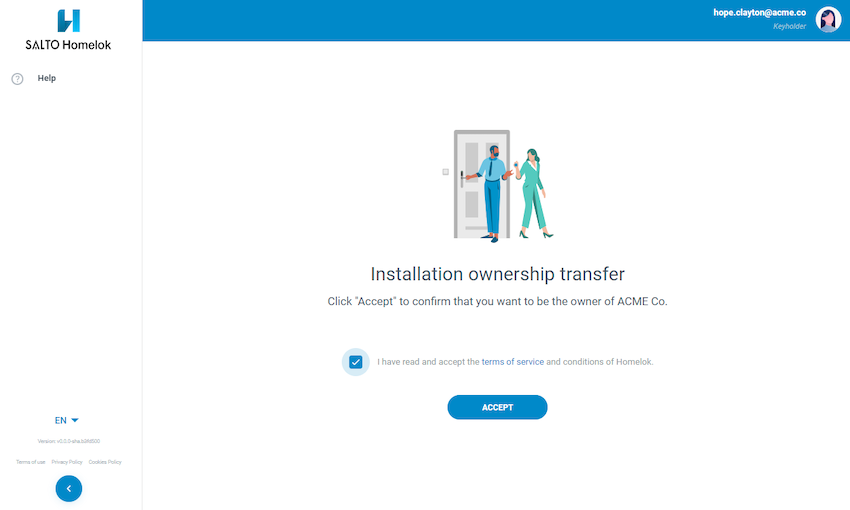 The new owner must accept the ownership transfer for the transfer to complete successfully
The transfer will not be completed until the new owner confirms the transfer.
Billing details
Upon accepting the transfer, the new owner must fill out the billing details of their property.
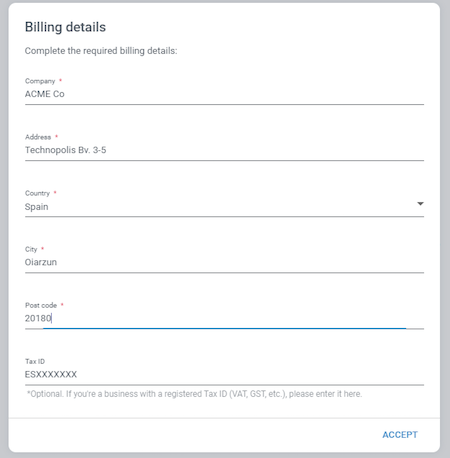 The new owner must fill out billing details
See also the section on subscription payment details.
Once you've entered the billing and payment details, click Accept to finish the ownership transfer process.
Accept transfer
Until the green Ownership transfer completed notification displays, the previous owner remains the sole installation owner and the transfer is marked as Pending.
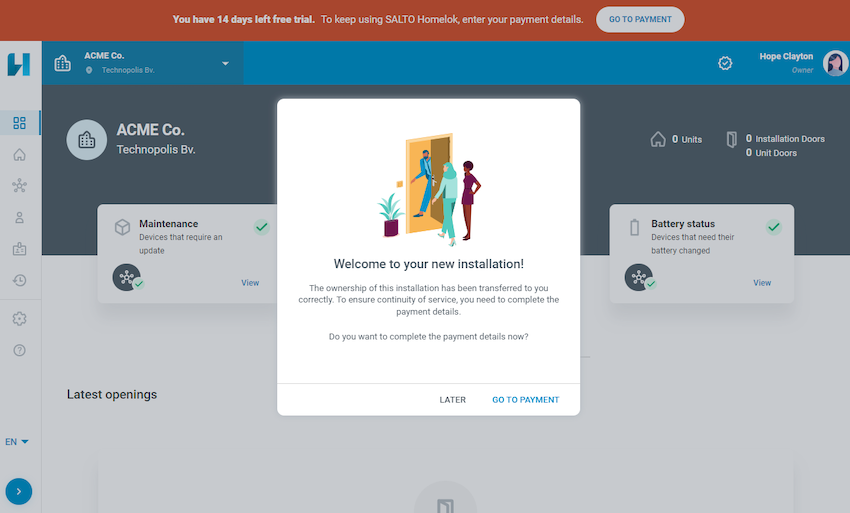 Upon accepting the transfer, the above screen displays if payment details still need to be entered
The previous owner loses management access to Homelok once the ownership transfer is completed. However, they remain as a keyholder in the system and you can change their role if required. For example, you may want to change the user's role to that of property manager if they are to continue to manage elements of your installation. You can also delete the user if there is no longer a requirement for them to have access to the software.
There can only ever be one user with the role of owner in an installation.
For more information on the owner role, see the corresponding section on user roles in Homelok.
 Back
Back
