Creating installation users in Nebula Beta
Introducción
In Salto Nebula there are generally two types of users.
- Users who require access to and within your installation
- Users with management roles
Typically a user is a person who requires access to and within your installation. Users gain access using a key and to give access to these users you need to assign them access rights.
The other type of user is one with a management role. This user has the ability to manage different elements of the software. These elements can be other users, the access rights of those users or the access points associated with those access rights, for example. Users with management roles can differ from one another by the type of role that you assign them. Note that users with management roles can also be users of keys.
This section relates to creating users at the installation level. It does not contemplate creating users at the unit level.
Selecting Users on the left menu bar lists the users that have been created within the current installation. Si no aparece ningún usuario, puedes crear nuevos usuarios como se detalla a continuación.
Cómo crear un usuario
Para crear un usuario, haz lo siguiente:
- Selecciona Usuarios en el menú de la izquierda
- El menú Usuarios se muestra en pantalla
- Select Create and fill out the fields as detailed below
Nombre
El nombre se compone de dos campos: Nombre y Apellidos.
El Nombre es el nombre del usuario. First name is not used for this field because the given name is not placed first in some cultures. En este campo también se puede incluir el segundo nombre.
Los Apellidos son los apellidos del usuario. Last name is not used for this field because the family name is not placed last in some cultures. This field can also contain more than one surname so that both matrilineal and patrilineal surnames can be included in one place.
The display name shown within Nebula, for example in the user listings, is formed by concatenating the Given and Family name fields.
Al rellenar estos campos, ten en cuenta que no puedes utilizar nombres que ya existen en tu instalación. If you try to create a user with an existing name then the error message "Entity already exists" will display.
This field is only required if the user being created needs to manage permissions within the system or will receive a key via the Salto Nebula app.
Al emitir una llave app se solicita una dirección de correo electrónico, ya que el sistema envía una notificación por email al usuario para que pueda recibir la llave a través de la aplicación en su teléfono móvil. If the user is being assigned a physical key such as a card, fob or wristband, and will not be managing other users in the system - that is, they only need to unlock electronic locks - you do not need to add their email address.
Email addresses must be unique per installation or unit. That's to say, you can't have more than one user with the same email address in an installation or unit.
User validity
You can give users time-limited access to the system using the Valid from and Valid until fields. You can delay the time when a user becomes valid by setting the valid from date to a future date. You can also set users to be valid until a specified day, or set the user to always be valid by selecting the Always option.
Note that users remain valid until midnight on the day specified in the Valid until field. Una vez que pase la medianoche, ya no podrán seguir usando las llaves para acceder a tu instalación.
See also the sections on blocking users and canceling keys for more information about giving users time-restricted access to the system as well as the dedicated section about validity and expiration.
Upload user profile photo
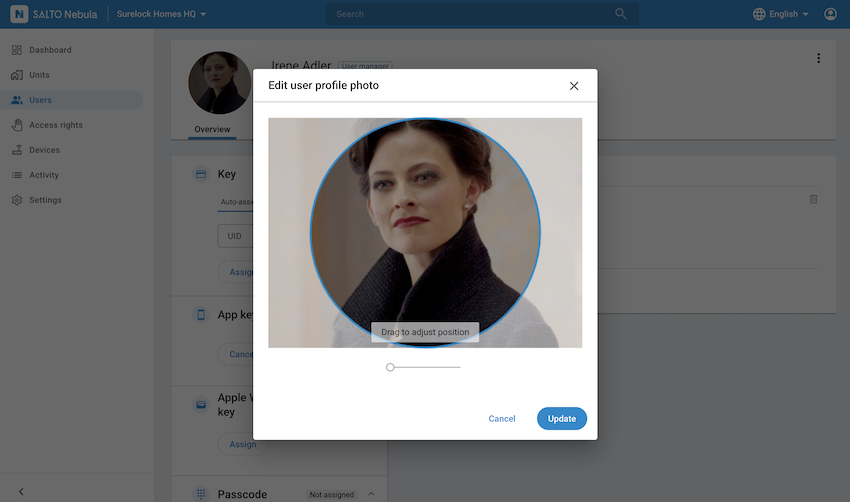
Once you've created a user you can upload a photo of them. This photo replaces the avatar which is automatically generated when you create a user. You can do this from the individual user information screen.
Select the avatar beside the user's name and you'll see the option to either take a photo, or choose an existing one that you already have on your device or computer. Note that you may need to enable access to the camera to be able to take a photo.
Once you've uploaded or taken the photo you can edit it using the photo editing tool.
 Editing a user profile photo
Las fotos de perfil de usuario deben tener los siguientes atributos:
- Tamaño mínimo de 400×400px
- Peso máximo de 10 MB
- Formato JPEG o PNG
