OpenDevice translator (accessory add-on)
Overview
The OnGuard OAAP program allows third-party manufacturers (OAAP partners) to interface their products with the OnGuard software platform. The OpenDevice APIs allow manufacturers of access control, elevator, fire, intrusion, central station receiver, life safety, and intercom systems to communicate with OnGuard.
To use the APIs, partners need to develop a translator DLL that implements a set of COM interfaces published by LenelS2 for the API that is specific to the third-party product type.
Translator installation
The OAAP partner receives the enrollment kit, which includes OnGuard, the OnGuard Software Development Kit (SDK) and a license file. Then, the OAAP partner completes the development of the translator DLL and sends a copy of the translator DLL to LenelS2.
LenelS2 creates and sends an accessory add-on for the panel type being integrated to the OAAP partner. This is a small installation program that installs the translator DLL and any dependent DLLs, as well as publishing the new panel type in the OnGuard database.
Installing the accessory add-on allows users of OnGuard to use the BlueConn OpenDevice translator in their installation. After installing it, the panel type will be displayed and available to the user and new locks can be assigned to it.
To begin the installation, click on the setup file, as indicated below:
 Run the 'setup' file to get started
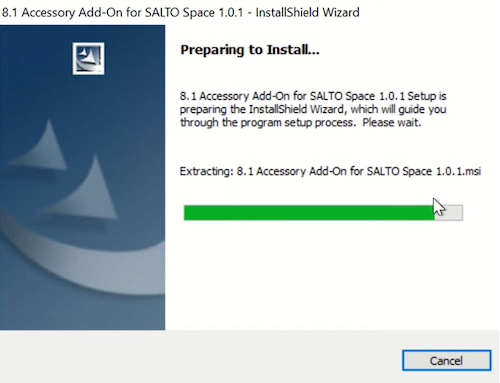 OpenDevice translator installation wizard
During the installation, the following information panel will display. Ensure you have previously installed the BlueConn configurator before continuing.
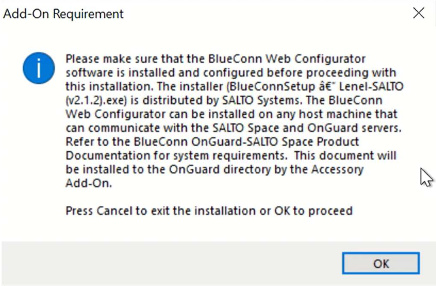 Make sure you've installed the BlueConn configurator before continuing
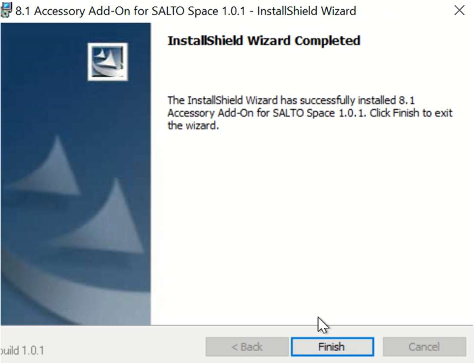 If the installation is successful, the following screen displays
updatedatabase.exe is only used to create the database record in Windows Enterprise.
To verify that the translator is correctly installed, check that the file LnlBlueVonnTranslatoru.dll is correctly installed in the OnGuard installation folder, as indicated below.
 Make sure the translator file is correctly installed
Once the add-on is installed, you need to create a new panel in OnGuard.
 Panel creation button
 Panel creation
Please be aware of the following details when creating a new panel:
- Other panel is shown when the Salto Space license is listed in OnGuard
- Add button of panel is only active when the translator is installed successfully
Under Access panel type select Salto Space.
Lenel panels are not synchronized and only Salto readers created in Lenel can be synchronized from OnGuard to Space.
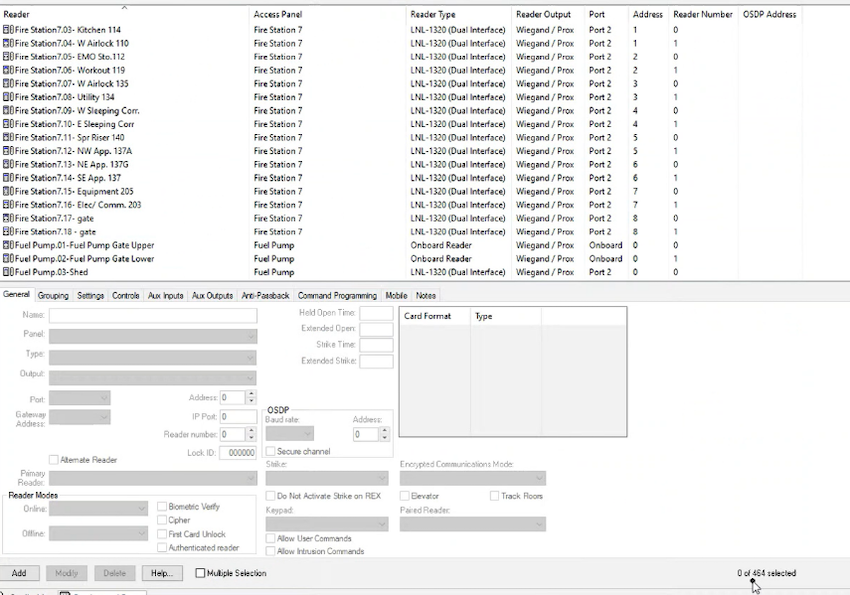 Only Salto readers created in Lenel can be synchronized
And after this you need to restart the Lenel Service Communication Server (or restart the Lenel service).
 Restart the Lenel Service Communication Server
After this operation, check that this folder is correctly created in the Lenel server:
C:\PROGRAMDATA\SALTO\BLUECONN\
To verify that the translator is correctly installed, you need to check that the BlueConn folder is created in C:\PROGRAMDATA\SALTO since the folder is automatically created after the translator installation.
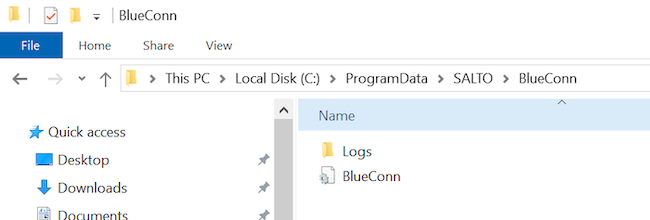 BlueConn folder location
If you get a "failed to login" error, like the one below, during the installation of the translator then check the permissions for the application installation.
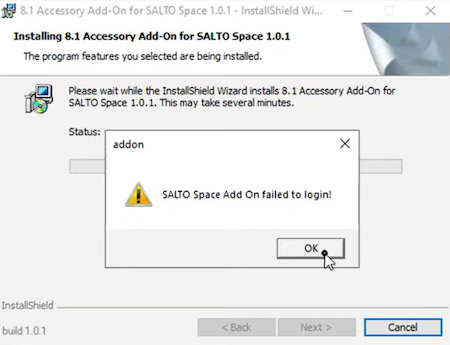 Check the permissions if you receive this kind of error
If the installer cannot be installed, it is not possible to create Salto panels in OnGuard, synchronize doors from OnGuard to Salto, or manage Lenel OnGuard Alarm Monitoring.
Translator configuration
The BlueConn OpenDevice translator uses a configuration file to store options related to BlueConn API settings, event sync options and logging options.
This file is always stored at C:\ProgramData\SALTO\BlueVonn\BlueConn.ini.
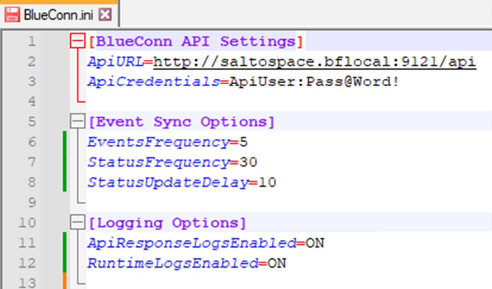 Check the file path for the installation file is correct
Make sure you stop/start the translator for any changes to take effect.
Important: also make sure that the API credentials and password are the same in the following three places: this BlueConn.ini file, the Space Alarm setup, and in the configurator.
BlueConn API settings
The BlueConn OpenDevice translator connects to BlueConn Events API in order to retrieve the latest events generated in Space. For this it needs to provide valid credentials to connect to the API. Note that these settings must match those added in the BlueConn Web Configurator.
These are the following:
- Username: Enter the username used to connect to BlueConn Events API.
- Default:ApiUser
- Password: Enter the password for the BlueConn Events API user account.
- Default:Pass@Word!
Event sync options
The OpenDevice translator works by invoking the Lnl_PollPanelForEvents method.
This is a polling mechanism native to the translator which runs several times per second.
By providing these sync options, you prevent the translator from querying the BlueConn API too often, and it gives flexibility on how often new events should be fetched.
Currently, the following 4 event types are tracked:
- Card event: Granted Access
- Card event: Denied Access
- Device event: Communications Lost
- Device event: Communications Restored
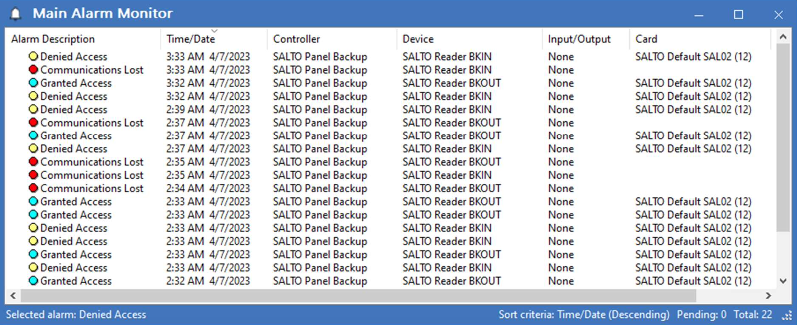 Alarm monitor example
Events frequency
Defines how often the translator will query the BlueConn API to check if there are any new events generated in Space that still need to be processed. If any events are found in the queue, the translator converts those Space events into OnGuard alarms depending on the event type. For card events, OnGuard alarms are generated at that same moment. For device events, a status update gets triggered so that the real-time status of the device is retrieved from Space.
Status frequency and update delay
Whenever a device event is received, the status of the device is not at that same moment updated (mainly to avoid issues with alarms being generated before the status gets updated). Instead, the Status update delay setting is used, so the sync process waits for a short number of seconds before calling the BlueConn API to get the most up-to-date status of the devices. A new OnGuard alarm will only be generated if the status has changed since the last time. The alarm is skipped if the status is the same.
Even when Space events trigger a status update, sometimes these alarms are not sent or received by the BlueConn API. Status frequency provides a way to update the status of the devices given a certain frequency, to be sure that the statuses of the devices are always up to date.
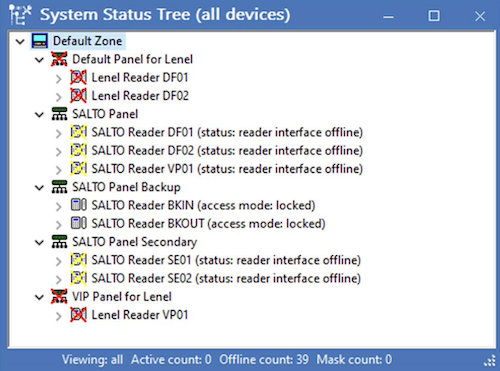 System status tree
Logging options
By default, the BlueConn device translator stores error logs related to runtime exceptions or BlueConn API errors in a logs folder.
Logs are always stored at C:\ProgramData\SALTO\BlueConn\Logs.
API response and runtime logs enabled
If you want to log every time the translator runs or every time it receives an API response, enable/disable these settings by using ON/OFF. When enabled, the translator will generate these log files:
BlueConn_ApiResponses_YYYYMMDD.logBlueConn_Runtimes_YYYYMMDD.log
These logs are only recommended for debugging purposes, and they can grow large if they run for too long. Make sure to turn the setting back to OFF or clean older log files manually.
The following screenshot is an example of how a real customer is listed:
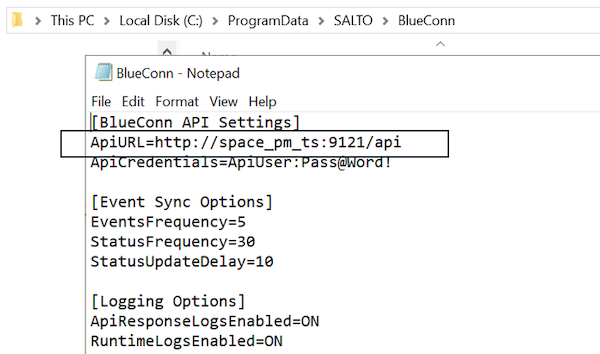 Real customer listing
Note: Access to Salto server URL is space_pm_ts but this is written http://space_pm_ts:9121/api
Space alarm events configuration
To enable the BlueConn OpenDevice translator to receive events from Salto Space, you need to configure an alarm event webhook which will forward all events to the BlueConn API.
To configure an alarm event, go to Salto Space > Tools > Alarm events, and click on Add.
Add a representative name (for example: "BlueConn Alarm Webhook"). In the Trigger section, click on the Edit button, choose Audit trail event from the Trigger type dropdown and leave the default options as they are. Then, click on OK.
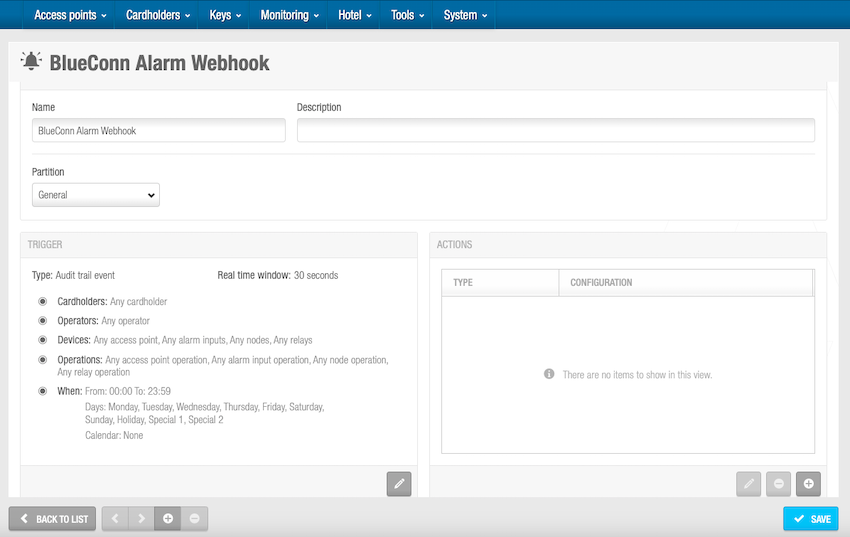 Creating a new alarm event in Space
In the Actions section, click on Add, choose Make web request from the Type dropdown.
In the URL field add http://{SERVERNAME}:9121/api/Events where {SERVERNAME} is the name of the host where BlueConn Web Configurator was previously installed.
Next, choose POST as Method, and application/json as Content-Type. To authenticate to the BlueConn API, you need to choose Basic authentication, and use the credentials defined previously using the Events API Settings section of the BlueConn Web Configurator.
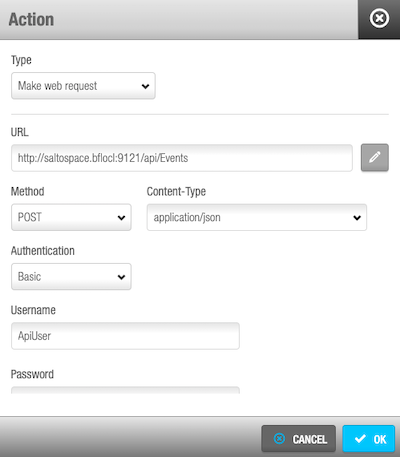 Choose the correct options in the 'Action' section
To finish, paste the following configuration into the Body field in JSON format:
{
    "CardId": "(trigger.Card.ID}",
    "DoorId": "itrigger.Door.Gpf2",
    "DoorExtId": "{trigger.Door.ExtId}",
    "DoorName": "{trigger.Door.Name}",
    "UserExtId": "(trigger .User.ExtId}",
    "UserName": "{trigger.User.Name}",
    "CardNumber": "{trigger.User.Gpf4}",
    "IssueCode": "{trigger.User.Gpf5)",
    "EventType": "{trigger.EventType}",
    "OperationID": "{trigger.Operation.ID}",
    "EventUtcDate": "{trigger.UtcDate; format="yyyy-MM-dd HH:mm:ss"}"
}
After you've entered the configuration details, click OK.
Make sure that all the details for the alarm event are correct, and click on Save. When this is enabled, Space will forward all alarm events to the BlueConn API, which will be available for the BlueConn OpenDevice translator to generate alarms in OnGuard.
To check that event alarms are being correctly sent to the BlueConn API, go to the Web Configurator dashboard, scroll down to Alarm Event Sync Logs, and check that events that are triggered by locks in Space are shown here.
Make sure that the general purpose fields (GPF4 and GPF5) in the Space Users tab (System > General options > Users) are defined as below:
- Enable field 4: CardNumber
- Enable field 5: IssueCode
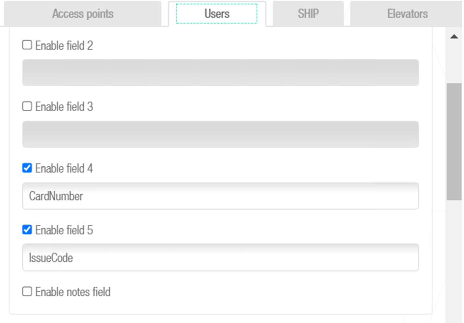 Ensure the correct fields are defined in the 'Users' tab in Space
Meanwhile, in the Space Doors tab (System > General options > Doors), the GPF2 field should be defined as below:
- Enable field 2: DOORID
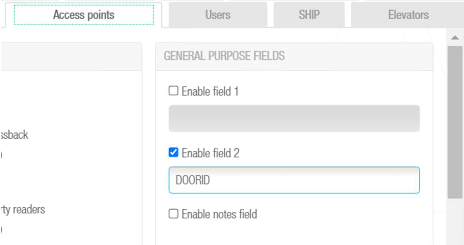 Ensure the correct field is defined in the 'Doors' tab in Space
 Atrás
Atrás
