Installing the Space components
About installing
Before reading this guide you should first make sure you have read and understood the section on system requirements and considerations for installing Space.
This section contains a step-by-step guide on how to install and configure the software components required to access and use Space. You need to carry out two separate installation processes:
- ProAccess Space (which includes the installation of the Space service and the ProAccess Space Configurator)
- Local IO Bridge (which you can download from within the Space software once you've finished installing it)
Install the Local IO Bridge only if you are going to use USB devices, such as encoders or PPDs connected via USB.
Installation process
The installation process should be made in the following order by an systems administrator with admin rights in Space. This role is referred to here as the admin operator:
Installation prerequisites are checked
The admin operator checks that the correct hardware and software requirements are met before beginning the installation process.
Space installation files are obtained
- The admin operator (or other appropriate manager) selects the appropriate licensing options as part of purchasing Space.
- The admin operator registers the Space serial number on the Salto website.
- The admin operator downloads the software.
Space software components are installed
- The admin operator installs ProAccess Space.
- The admin operator installs the Local IO Bridge.
Installing the Space components
To set up Space, you need to install two separate files:
Setup_ProAccessSpace.exe: This installs ProAccess Space, the ProAccess Space Configurator, and the Space service.Setup_SaltoLocalIOBridge: This installs the Local IO Bridge.
Installing Space
ProAccess Space, the Space service, and the ProAccess Space Configurator are installed together from the one installation file. The Space installation procedure covers the installation for all of them.
To install Space, do the following:
Unzip the ProAccess Space installation file.
Right-click the
Setup_ProAccessSpace.exefile.
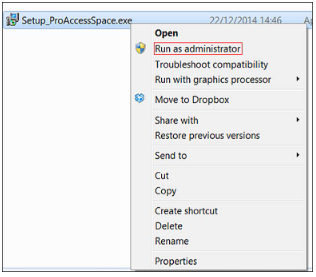 Run as administrator
Select Run as administrator.
Click Yes when prompted with the following message:
- "Do you want to allow the following program from an unknown publisher to make changes to this computer?" The initial installation dialog box is displayed.
Click next. The license agreement dialog box is displayed.
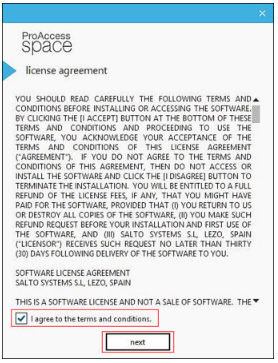 'License agreement' dialog box
- Select "I agree to the terms and conditions" and click next. The destination folder dialog box is displayed.
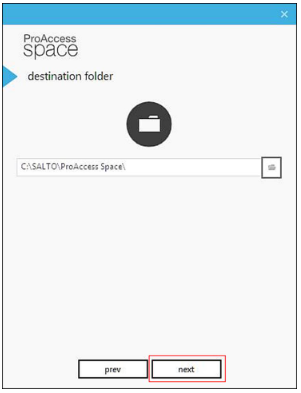 'Destination folder' dialog box
Choose a different location or accept the suggested installation destination folder.
Click next. The configure data backend dialog box is displayed.
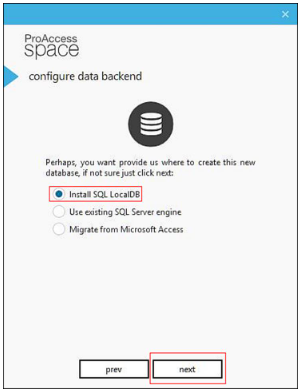 'Configure data backend' dialog box
- Select Install SQL LocalDB.
In these steps, it is assumed that you are installing Space for the first time and that you are selecting the default option of using the SQL LocalDB. However, if you are intending to select an alternative database (or create a new one) from an existing SQL Server engine as part of the installation process, see Using an existing SQL server engine for more information.
If you are intending to migrate data from a Microsoft (MS) Access database as part of the installation process, see Migrating data from a Microsoft Access database for more information.
- Click next. The activate software dialog box is displayed.
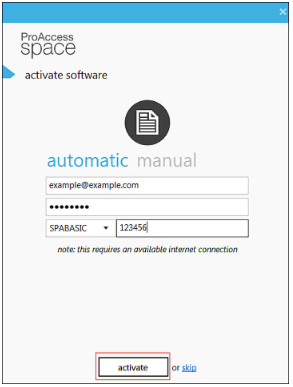 'Activate software' dialog box
- Type the email address and password you used to register.
You can activate your version of Space using the manual tab if you have already received the license data (.dat) file.
Select your license type from the drop-down list (SPABASIC, SPAONLINE, etc.).
Type your serial number.
Click activate. The Well done! screen, confirming that Space has been installed, is displayed.
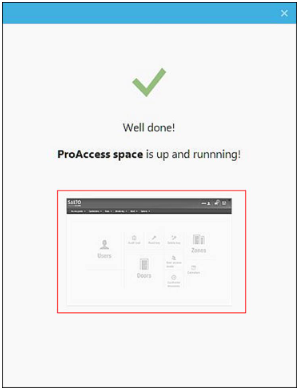 'Installation confirmation' screen
You can click the quick-access tile to start using Space.
Using an existing SQL server engine
After you select the installation destination folder in step 7 of Installing Space, the configure data backend dialog box is displayed.
You can choose to use an existing SQL server engine in one of two ways:
- Use an existing database for the installation.
- Create a new database for the installation.
Using an existing database
To install Space using an existing database, do the following:
- Select Use existing SQL Server engine.
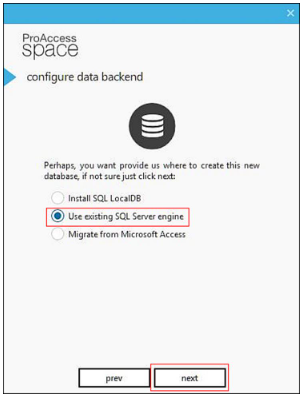 Use existing SQL Server engine
- Click next.
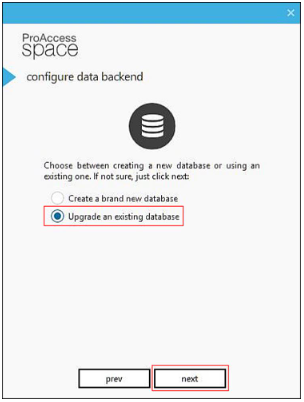 Upgrade an existing database
- Select Upgrade an existing database and click next.
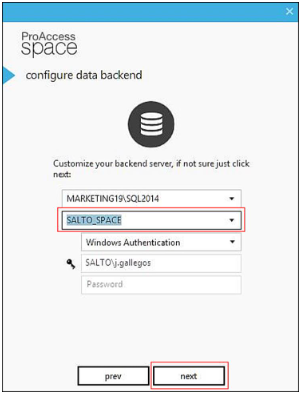 Select the SQL database
Enter the appropriate SQL server, the new SQL database and the authentication method details.
Click next.
Follow step 10 in Installing Space to continue with the installation.
Creating a new database
To install Space using a new database, do the following:
- Select Use existing SQL Server engine.
 Use existing SQL Server engine
- Click next.
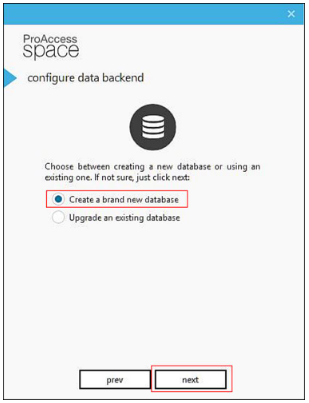 Create a brand new database
- Select Create a brand new database and click next.
 Existing SQL database details
Enter the appropriate SQL server, the new SQL database and the authentication method details.
Click next.
Follow step 10 in Installing Space to continue with the installation process.
Migrating data from a Microsoft Access database
After you select the installation destination folder in step 7 of Installing Space, the configure data backend dialog box is displayed.
To install Space by migrating data from a Microsoft Access database, do the following:
- Select Migrate from Microsoft Access.
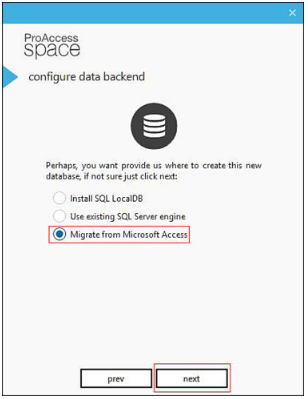 Migrate from Microsoft Access
- Click next.
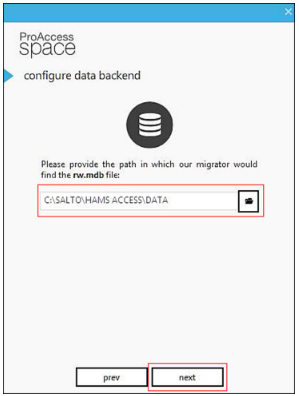 'RW.mdb' file location
Select the location of the
rw.mdbfile by clicking the folder icon.Click next.
Follow step 10 in Installing Space to continue with the installation process.
Installing the Local IO Bridge
The Local IO Bridge must be installed on any client PCs you intend to use with a USB encoder or PPD. The Local IO Bridge allows USB devices to be used with Space by creating a link between the USB device and the browser.
To install the Local IO Bridge, you must first log in to Space as an operator with admin rights. See Logging in for information about how to log in to Space. You can install the Local IO Bridge from within Space in two ways:
Installing from the 'Settings' screen
To install the Local IO Bridge from the Settings screen, do the following:
- Click admin (or other appropriate operator login) on the top right-hand side of the home screen. The Settings screen is displayed.
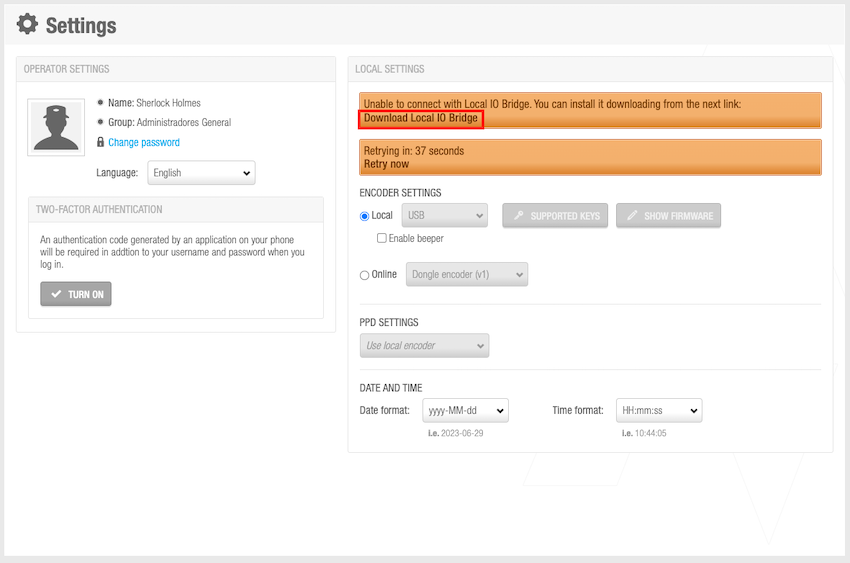 Settings screen
Click Download Local IO Bridge.
Click Save when prompted with the following message:
- "Do you want to run or save
Setup_SaltoLocalIOBridge.exe?"
- "Do you want to run or save
Save the
Setup_SaltoLocalIOBridge.exefile to your computer and right-click it.Select Run as administrator.
Click Yes when prompted with the following message:
- "Do you want to allow the following program from an unknown publisher to make changes to this computer?"
The initial installation dialog box is displayed.
- Click next. The license agreement dialog box is displayed.
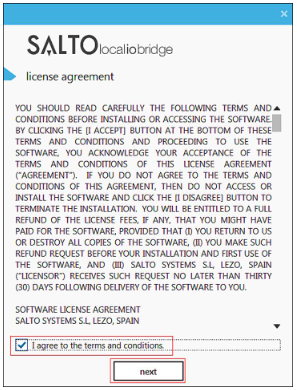 'License agreement' dialog box
Select I agree to the terms and conditions.
Click next. The destination folder dialog box is displayed.
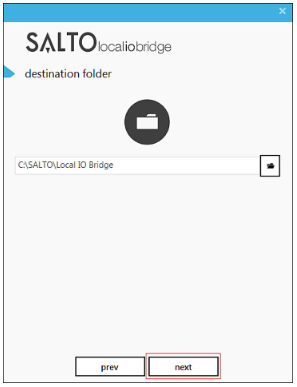 'Destination folder' dialog box
Choose a different location or accept the suggested installation destination folder.
Click next. The succeeded dialog box, confirming that the Local IO Bridge is installed and asking you to unplug and plug back in any Salto USB devices, is displayed.
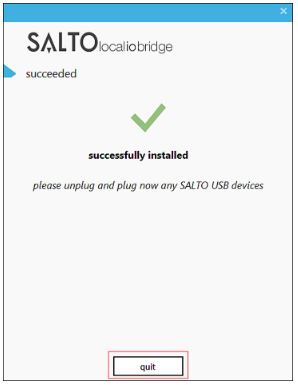 Installation confirmation
- Once you have unplugged and plugged back in the required Salto USB devices, click quit.
Installing from the 'About' dialog box
To install the Local IO Bridge from the About dialog box, do the following:
- Click the About icon on the top right-hand side of the home screen. The About dialog box is displayed.
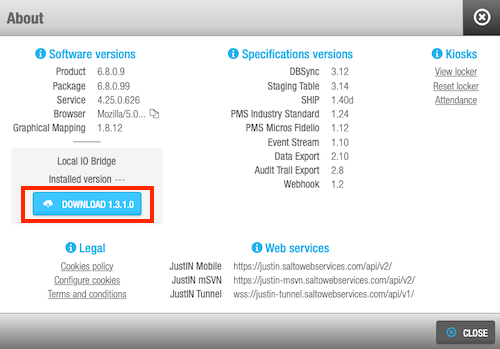 'About' dialog box
- Click Download.
Note that the text of the Download button varies slightly to reflect the latest available version of the Local IO Bridge which corresponds to the installed Space version.
Click Save when prompted with the following message:
- "Do you want to run or save
Setup_SaltoLocalIOBridge.exe?"
- "Do you want to run or save
Save the file to your computer and follow the steps in Installing from the Settings screen.
 Back
Back
