Configure Microsoft Entra ID for SSO and user import
This guide explains which services to create and which settings to configure in the Azure portal to enable single sign-on (SSO) and import Microsoft Entra ID (formerly Azure Active Directory) users as Salto IDM users.
Instructions
Follow these instructions to create an app registration and configure it correctly in Salto IDM.
Step 1: Register the application with your Microsoft Entra ID tenant
Navigate to the Azure portal - App registrations page.
Either pick an existing application on the All applications tab or select New registration.
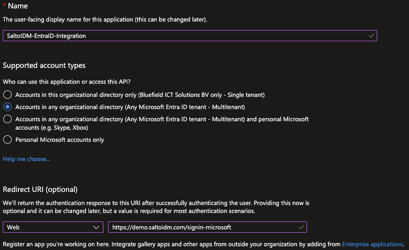
When the Register an application page appears, enter your application's registration information:
- In the Name section, enter a representative name (for example,
SaltoIDM-EntraID-Integration). - In the Supported account types section, select one of the following:
- To allow external users and accounts from different domains and tenants, select Accounts in any organizational directory (Any Microsoft Entra ID tenant - Multitenant).
- To allow only internal users and accounts from your own domain and tenant, select Accounts in this organizational directory (Your Tenant Name only - Single Tenant).
- In the Redirect URI (optional) section, select Web from the dropdown and enter the following URL:
https://HOSTNAME:PORT/signin-microsoft
- In the Name section, enter a representative name (for example,
Select Register to create the application.
For the Redirect URI, ensure that you use HTTPS (not HTTP) and replace HOSTNAME and PORT with the actual host and port where the application will be running.
When the production environment runs on the default HTTPS port (443), you do not need to add the port (for example, https://demo.saltoidm.com/signin-microsoft).
To keep your registrations clean and isolated, which allows easier debugging and problem-solving, create separate app registrations for different environments (for example, Localhost, Production, Staging).
Step 2: Configure application authentication
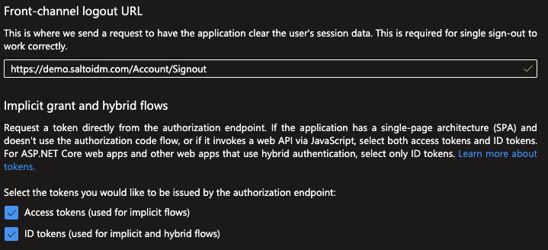
After navigating to the app registration page, select the Authentication tab.
Update your Front-channel logout URL to point to
https://HOSTNAME:PORT/Account/Signout.Select the following checkboxes so the authorization endpoint can issue the correct tokens:
- Access tokens (used for implicit flows)
- ID tokens (used for implicit and hybrid flows)
Step 3: Configure the application secret
Select the Certificates & secrets tab and select New client secret.
Add a representative Description to your secret, and choose an Expiration according to your own security and maintenance rules.

Once you create the secret, copy the Secret Value (not the Secret ID) and store it in a safe place, such as a password manager. Once you leave this page, you will not be able to see the value again, and if you do not save it, you will need to re-create the secret.
After the secret expires, SSO will not work. You must create a new secret and update its value in Salto IDM.
Ensure you have a mechanism in place to alert you when the secret is about to expire to avoid login issues in production environments.
Step 4: Configure application claims
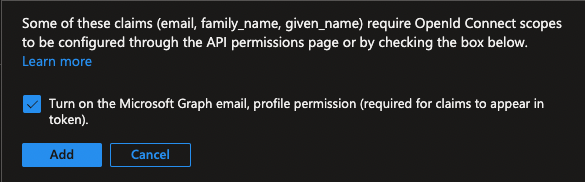
Select the Token configuration tab and select Add optional claim.
For Token type, choose ID, and check the following claims:
- Given name
- Surname
- Object ID

Select Add. A pop-up appears, requesting access to turn on the required API permissions to read those claims. Check the checkbox, and then select Add.
Step 5: Configure API permissions
Select the API permissions tab and ensure that the following permissions were automatically added in the previous steps.
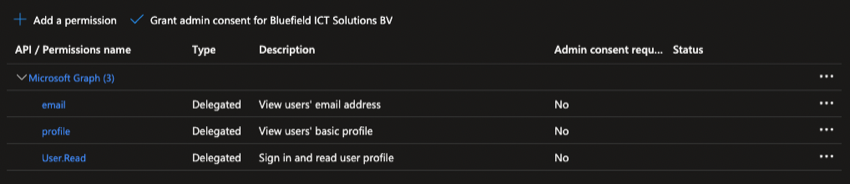
Select Add a permission, choose Microsoft Graph, then Application permissions, search for and check
User.Read.Allunder User rights. Select Add permissions.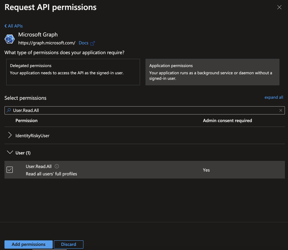
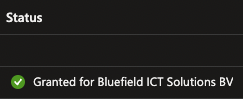
Lastly, provide admin consent to those permissions by selecting the button above the permission table. Once you grant permission, a checkmark is added to the permissions.
Step 6: Add the app registration settings to Salto IDM
In Salto IDM, ensure that your license has the Microsoft Entra ID integration on. Contact our support team if your installation does not have the integration.
Log in as an app user with rights to update Microsoft Entra ID.
Navigate to Administration > Settings. Choose Microsoft Entra ID from the menu on the left.
Ensure that the Use Microsoft Entra ID Single Sign-on option is on.
Fill in all the values according to your app registration IDs in Azure and the previously stored secret:
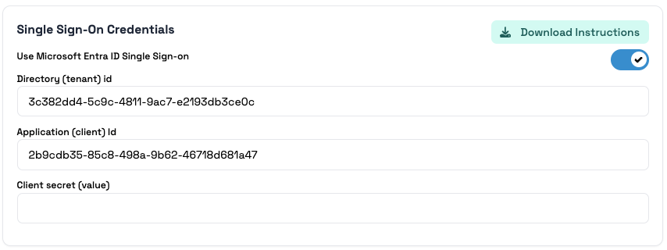
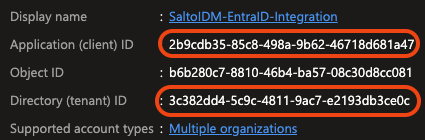
You can find the Directory (tenant) ID and Application (client) ID on the Overview page of your app registration in Azure.
Once you save the values, the Client secret (value) field is empty. This is not a mistake. It is made to prevent exposing your secrets in the frontend.
When saving new values, if you change the secret, it is automatically updated. If you leave it empty, it is not replaced.
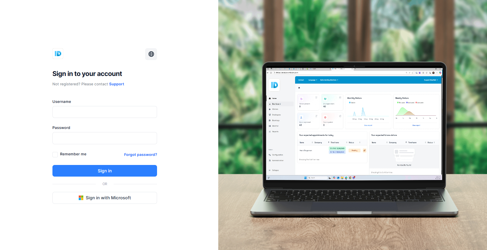
Step 7: Log in using Microsoft Entra ID SSO
Once this option is on and correctly configured, you can log in using your Microsoft account.
Navigate to the login page and choose Sign in with Microsoft.
Follow the usual steps required to log in to your account. Once you are redirected back to Salto IDM, confirm that you are linking your Microsoft account with a Salto IDM application user:
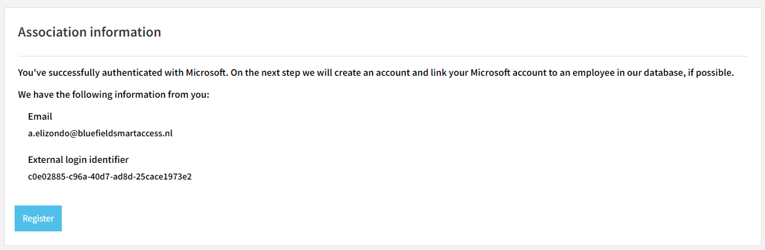
After this, you can log in to Salto IDM as a limited user. Ask your administrator to assign the correct roles and rights to your application user so you can use the required features.
Step 8: Import Microsoft Entra ID users as Salto IDM users
Go to Administration > Automations and create a new automation. Select the Microsoft Entra ID Import option, and use the Credentials tab on the right to add the saved credentials.
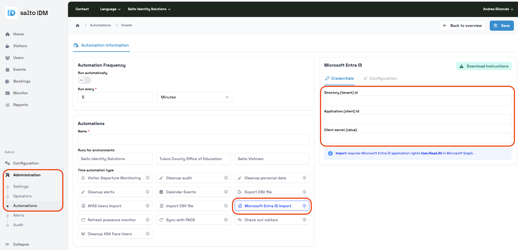
Save the automation, and use the Configuration tab to fully adjust the import according to your needs.
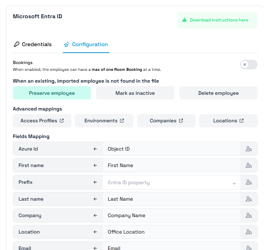
After the automation is done, for example by running it manually, you can see the created users as Users in Salto IDM.
