Server Virtualisation
Hyper-V is a native hypervisor for Windows that allows you to create and manage virtual machines on a Windows host.
These steps cover enabling Hyper-V on Windows 11 Pro and setting up a virtual machine to be an XS4 Face Server.
Prerequisites:
- A machine running Windows 11 Pro that:
- Meets the XS4 Face system requirements.
- Has hardware virtualization enabled in the BIOS/UEFI.
- Has local administrator access to turn Windows features on.
- Download the latest XS4 Face Server Installer ISO.
Enable Hyper-V
Open the Start menu and search for Turn Windows features on or off, then open it.
In the Windows Features dialog, find Hyper-V and tick the box to enable it. Ensure both sub-components are also selected.
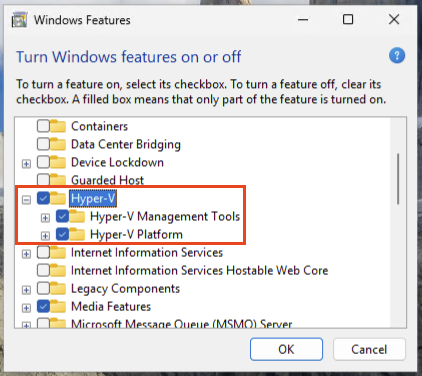
Select OK. Windows will install the components.
When prompted, restart Windows to complete the installation.
Setup Hyper-V
Create an External Virtual Switch
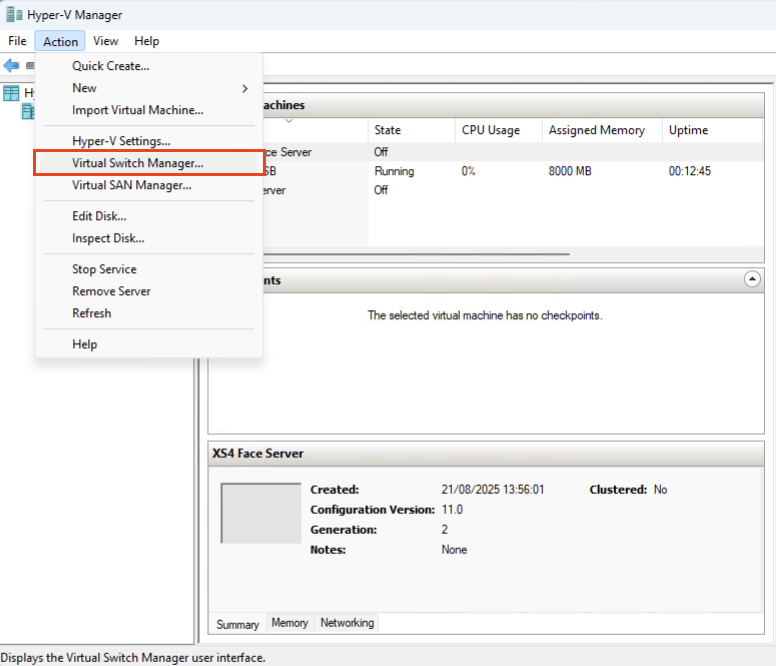
Open Hyper-V Manager.
In the Actions pane, select Virtual Switch Manager.
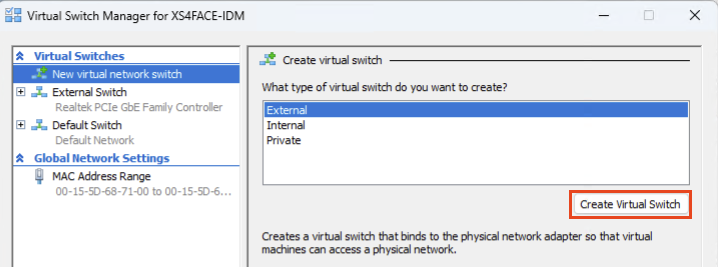
Choose External and select Create Virtual Switch.
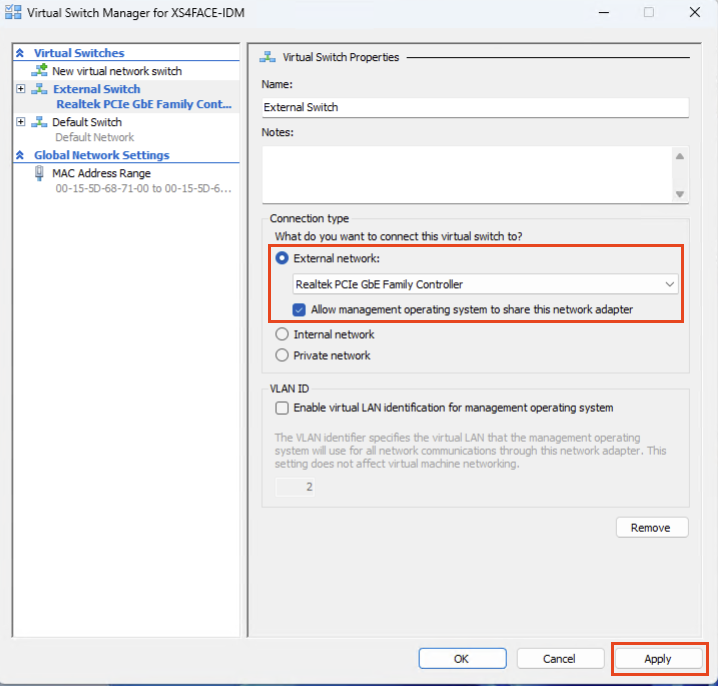
Enter a name and choose the physical network adapter that connects to the network which the XS4 Face Server should use. Leave Allow management operating system to share this network adapter enabled, and click Apply.
Create a Virtual Machine
In Hyper-V Manager, select New > Virtual Machine.
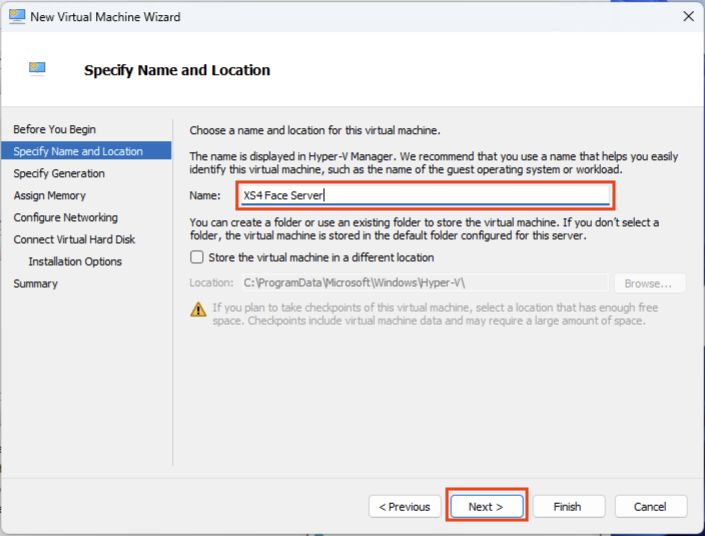
Create a name for the virtual machine, and click Next.
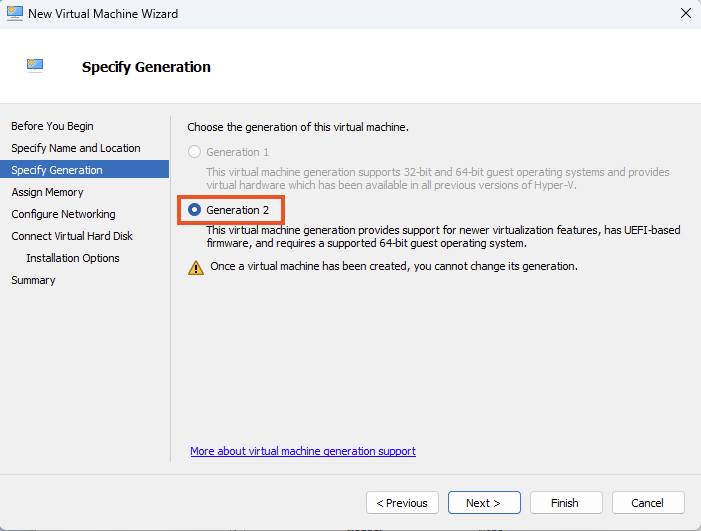
Select Generation 2, then click Next.
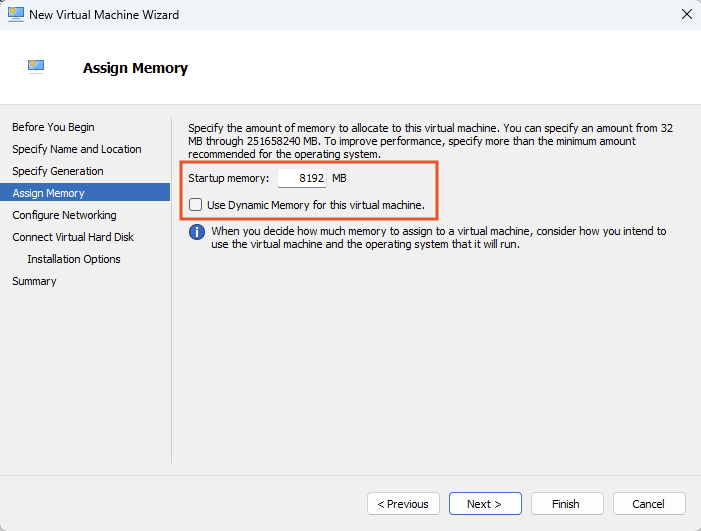
Set Startup memory to meet the system requirements and untick Use Dynamic Memory for this virtual machine, and click Next.
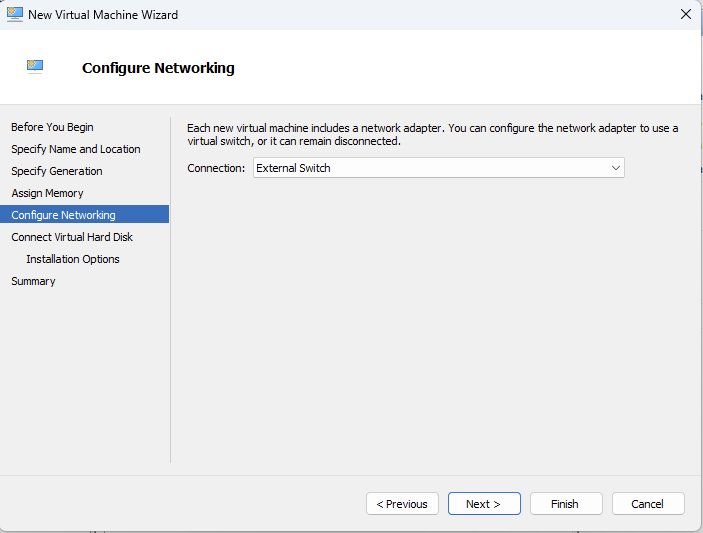
Select the virtual switch you created earlier from the Virtual switch and click Next.
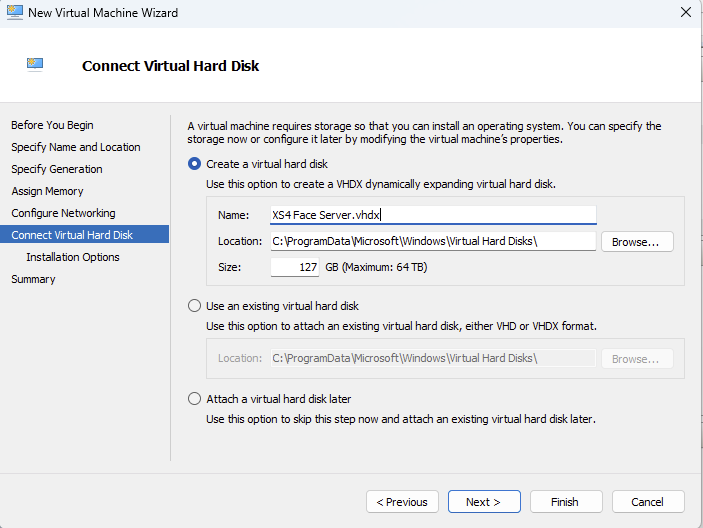
Create a virtual hard disk and set the Size to meet system requirements and click Next.
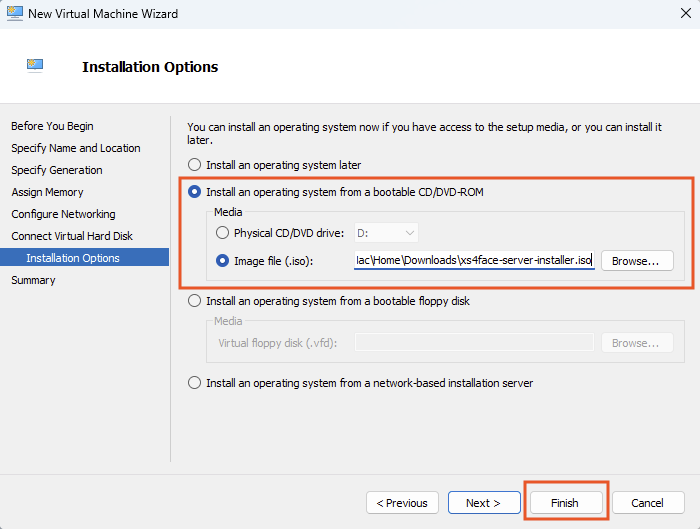
Select Install an operating system from a bootable CD/DVD-ROM. Locate and select the XS4 Face Installer ISO you downloaded earlier as the Image file. Click Finish.
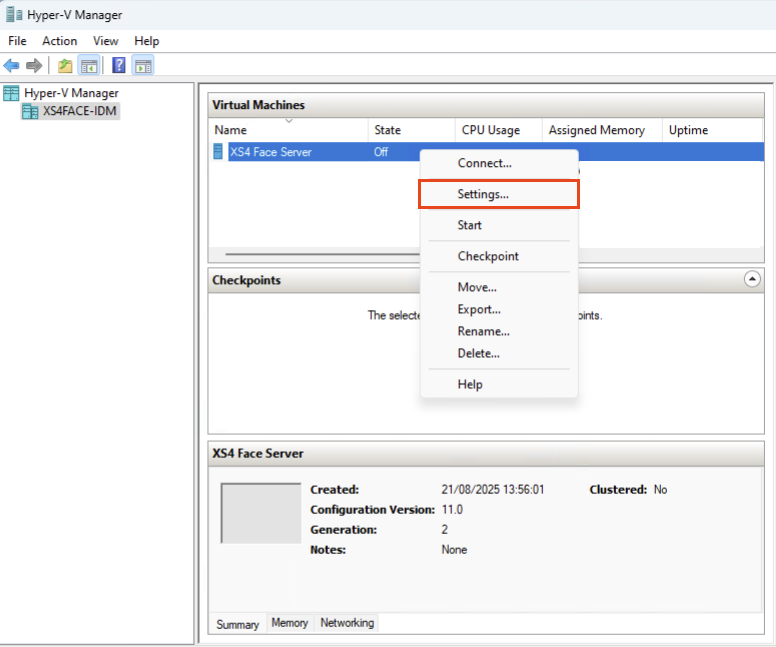
Right-click the virtual machine you've just created from the list, and select Settings.
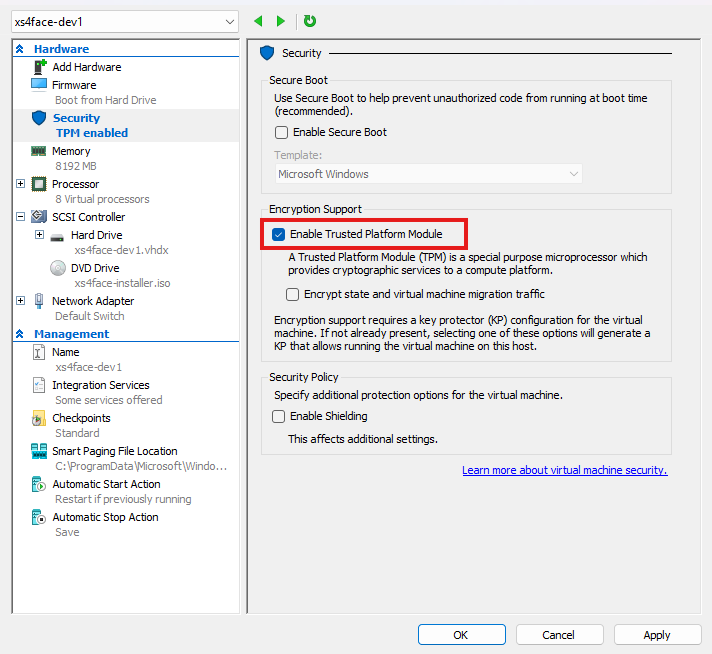
Under Security, uncheck Enable Secure Boot.
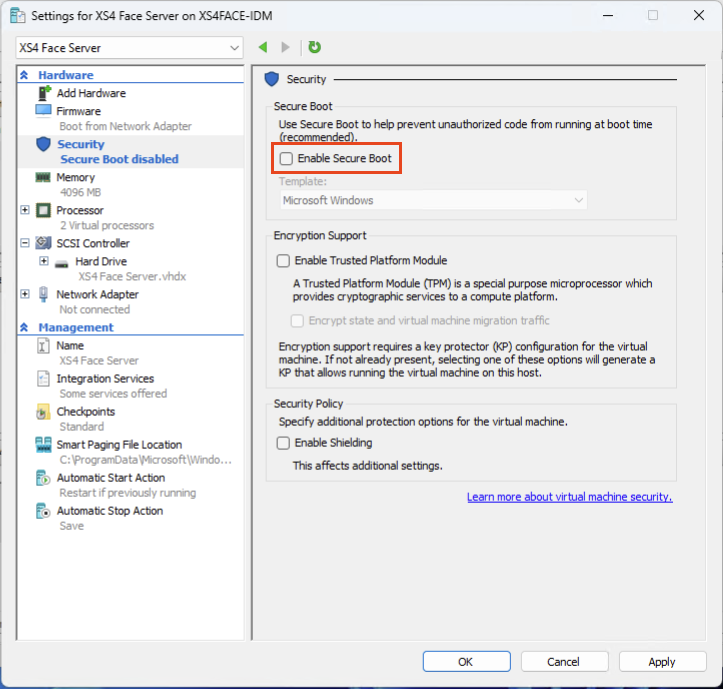
Select Enable Trusted Platform Module.
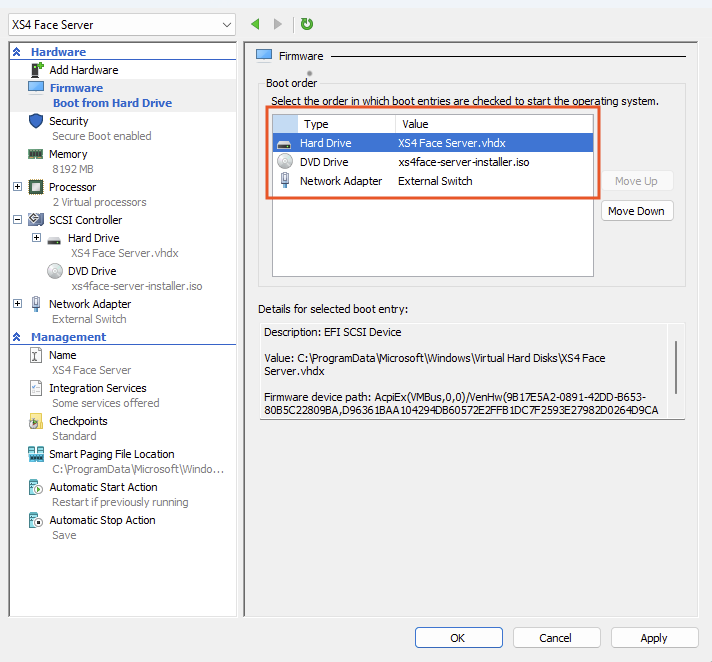
Select the Hard Drive and click Move Up to move this entry to the top of the boot order menu.
Click Apply to save the settings. You can now close the settings window, right-click the virtual machine, and select Start to power it on.
Install XS4 Face Server
Refer to the XS4 Face Server Installation Guide to complete the installation of XS4 Face Server on your virtual machine.