Installing Ubuntu server for XS4 Face
The system administrator should prepare for the XS4 Face Server software by building a new server on the access control VLAN with a base build of Ubuntu 24.04 Server using the minimized installation option. This guide provides the necessary steps.
Please note that the Ubuntu version we install in this guide is command-line only. The arrow keys and enter are needed to navigate and select options in the installer. This is also true for the OS post-install.
You can download Ubuntu 24.04 LTS from the Ubuntu website.
Ensure you are using the Ubuntu Server image and not the Ubuntu Desktop image.
The simplest and most common way to boot the installer is to create a bootable USB stick to boot from (tutorials for other operating systems are also available).
If encountering difficulties during these instructions, refer to Ubuntu's official installation instructions.
Once the image is mounted on the server, the installation can begin.
- Select Try or Install Ubuntu Server.

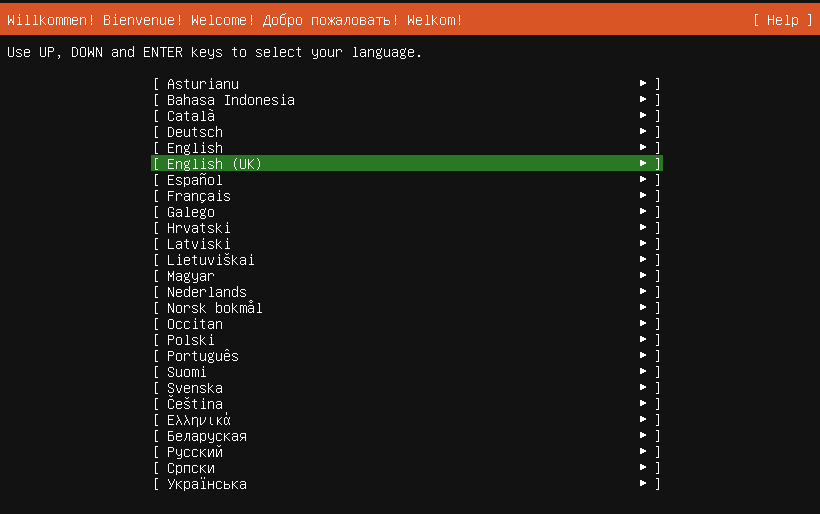
- Select a preferred language. This guide uses English (UK). The XS4 Face Server software will not be affected by the Operating System's language.
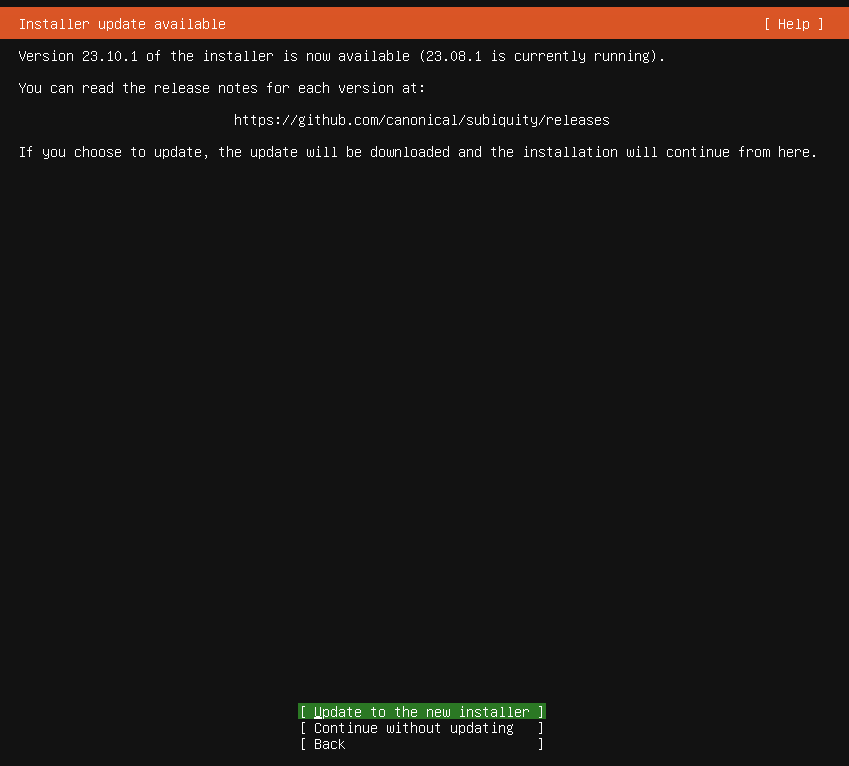
- If the next screen is "Installer update available", select Continue without updating.
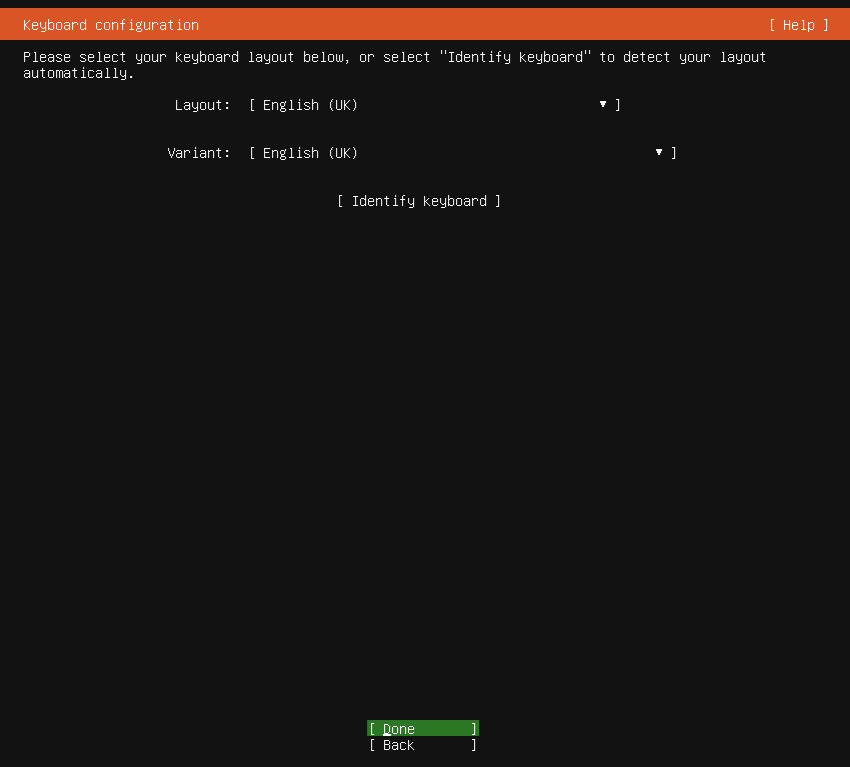
- Select a preferred keyboard layout. This guide uses English (UK).
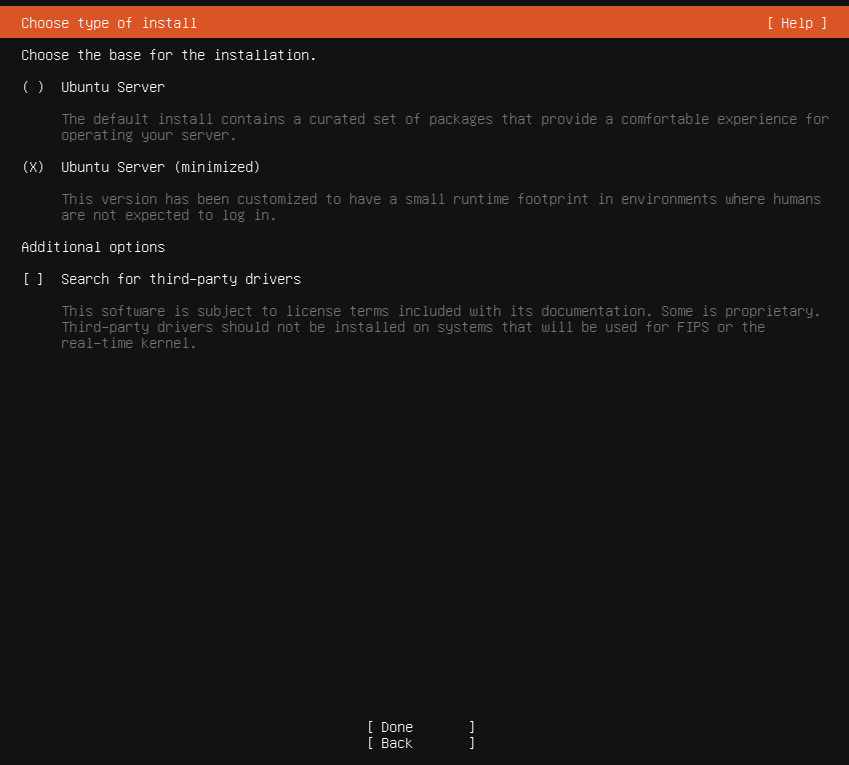
- Select Ubuntu Server (minimized)
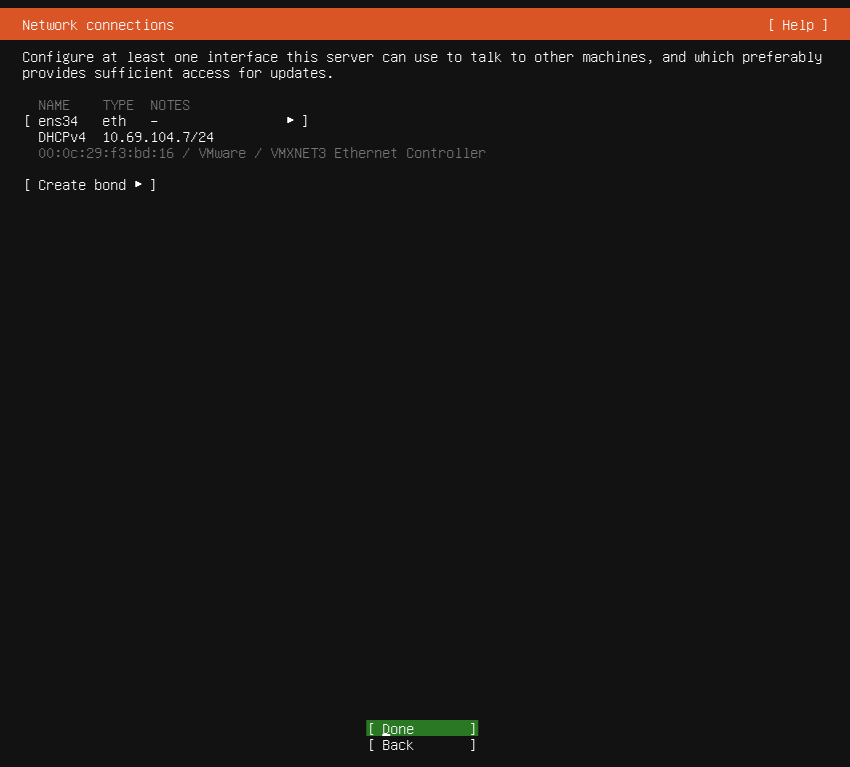
- After a brief moment, DHCPv4 is followed with an IP from your DHCP Server.
If the server has a wired connection at the time of install, use the following options.
- Select the eth driver
- Select Edit IPv4
- Select Manual
- Input values from your configured network here that will allow the server to communicate with other XS4 Face Devices, ACS and the internet.
- The IP address set here must not be changed from this value after installing your XS4 Face Server.
- Reserve the IP address for this server on your DHCP server.
If there is no network connection, or the only available option is wireless, the eth0 connection must be configured after the Ubuntu install, but before the XS4 Face Server install. That process is not covered in this guide. Warnings from step 4 still apply after that has been configured.
- Configure a proxy if the network requires one. Please be aware that this is not officially supported, but shouldn't cause issues due to the outbound-only nature of the XS4 Face Server's communication.
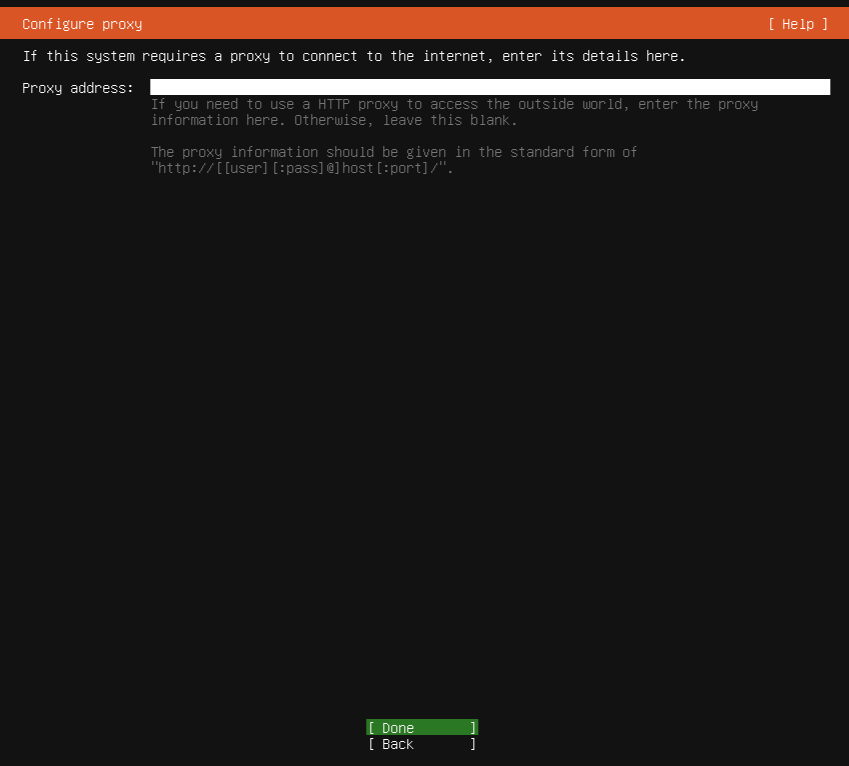
- Give it several seconds to fetch the package lists, then just hit Done.
The address on this screen may differ if the installation image was acquired by a mirror and not the link above. Provided it is an officially recognized mirror, this is OK.

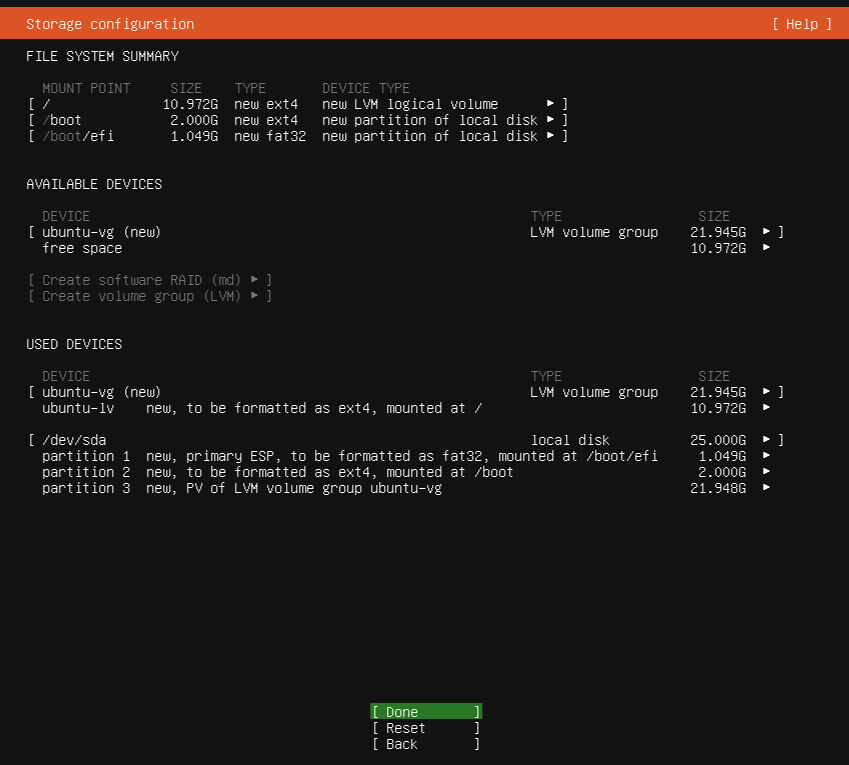
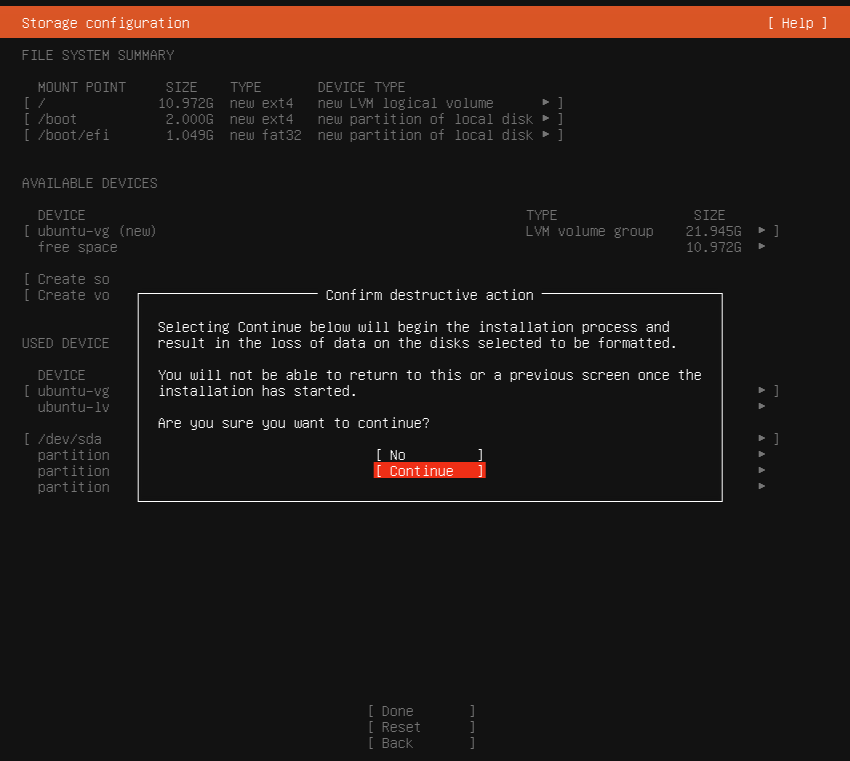
- We strongly recommend using encryption to reduce the risk of such data being compromised.
- If the server is in a virtual machine, and the underlying disk is already encrypted, encryption may not be required at this point.
- Please consult the customer's data protection policy and procedures.

- Check and confirm the storage configuration, then hit Done and Continue.
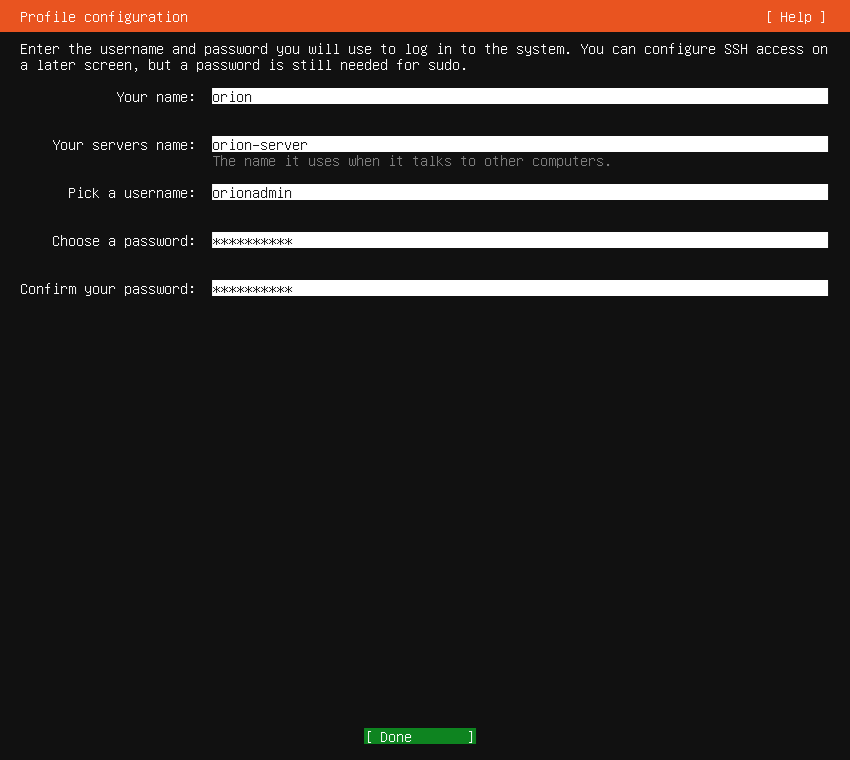
- Choose a name, server name, username and password that conforms to high standards of security.
- Two-factor authentication is not possible for operating system authentication, so this should be a unique and highly secure password.
- The username and password are needed to login for the software installation command, at a minimum.
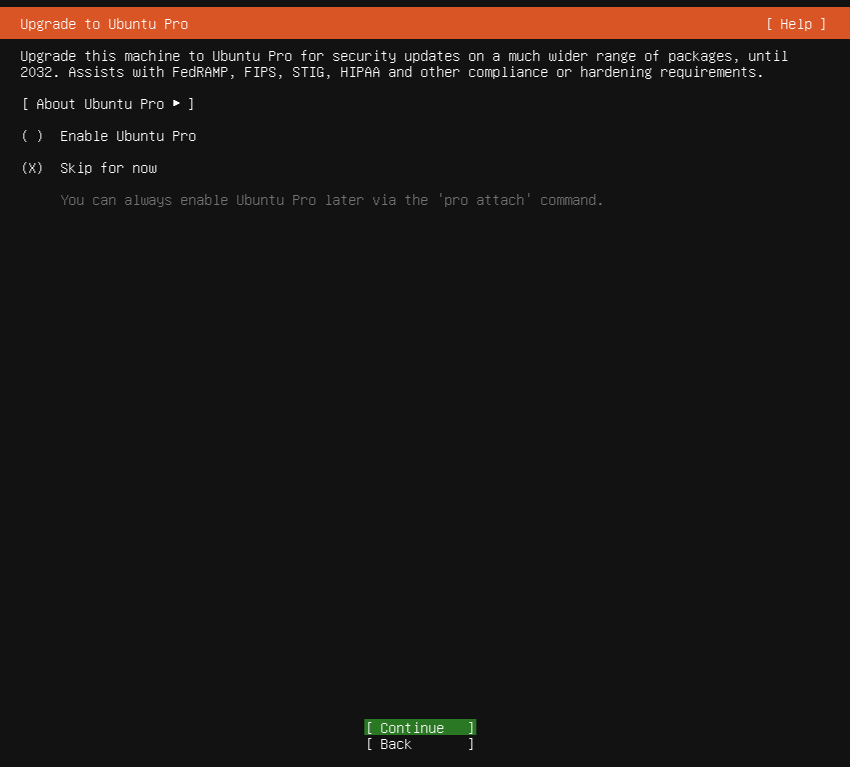
- Select Skip for now in the Enable Ubuntu Pro screen.
- Installing an OpenSSH server is not recommended. This is an access control product and therefore it is best to keep all ports closed without good reason.
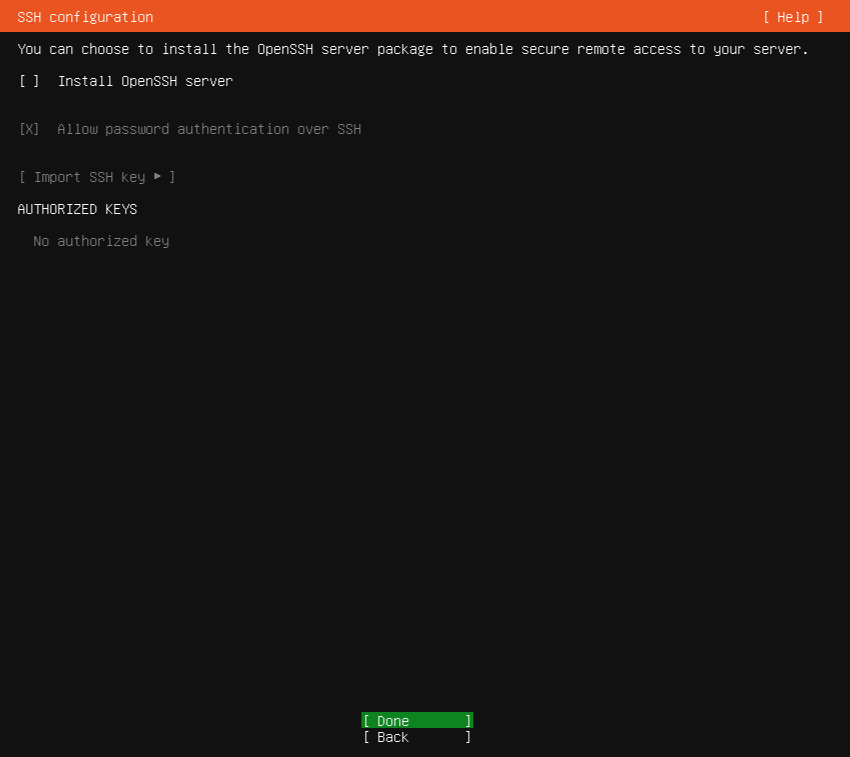
- Leave all additional features blank and skip to Done.
Ignore the ticks and crosses during this screen. These are related to the availability of the packages and not whether they have been selected. All spaces between the square brackets [ ] must be empty.
- At this stage, the installation itself takes place. Installation time depends on internet connection speed and server performance. It is completed when the button Reboot Now appears.

- Remove the installation medium (such as USB stick) and press enter. The system then reboots into a freshly installed Ubuntu OS.

- After the system reboots, the login screen appears.