Monitoring an Orion Site
The Orion Console is available through modern desktop and mobile browsers, allowing system administrators to securely and conveniently monitor an Orion Site from anywhere in the world. This page enables system administrators to manage and maintain Orion effectively.
Accessing a site
The Admin Operator receives a welcome email when the Salto partner provides access to their site within the Orion Console. The email contains a link to the correct console for their region.
Available Regions are: EU, UAE
Log in to the Orion Console for the correct region using a Microsoft account.
Select the site from the drop-down menu in the left-hand pane.
Status checks
With a site selected, the following tile displays quick information about server status. In each case, green means the server is online and red means that the server is disconnected.
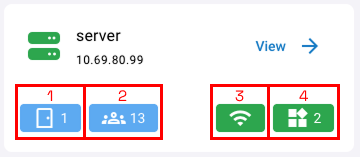
The icon in the upper left-hand corner shows the status of the server itself and its IP address. Then, from left to right:
- Number of currently connected Orion Devices.
- Number of enrolled users.
- Server status.
- Access Control System status
- Connectivity between this site and the Orion Enrollment Service.
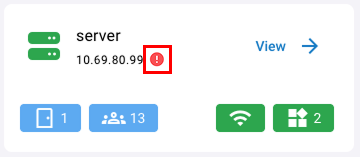
An indicator will show next to the IP address of the server if the server detects that its IP address has changed from the one it was added to the console with.
Server
Click View -> from the site page for more information about the server.
The information available in the Details tab is the same as the summary tile, with the addition of Last Seen showing when Orion Connect last heard from this server.
Logging
Unless SSH access is enabled during the installation process, Orion Servers are locked down from inbound access as a strict security measure. Orion Devices are always locked down from SSH even if enabled on the server. These access and event logs are the primary way of determining system activity and diagnosing problems that may occur.
Event logs are accessible within the server, whereas Access logs are accessible for the selected site.
Event logs
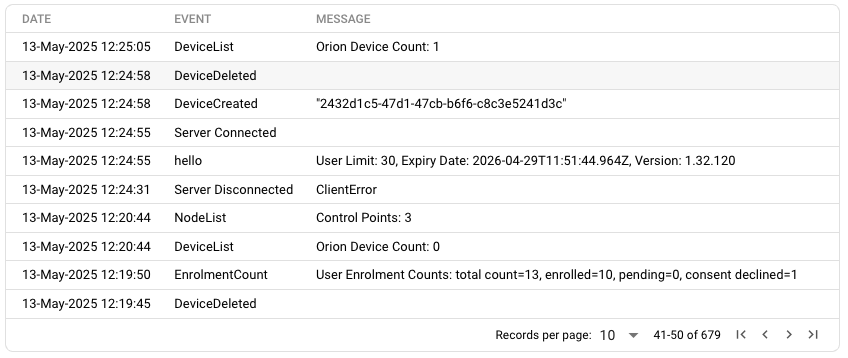
The Event logs tab contains a log of communications between all parts of the system. These vary in severity, from minute-by-minute status checks to major errors.
From left to right:
- The Date/Time that the event was first registered
- The Event code is a unique identifier that can be used to escalate problems to support, if necessary.
- Door name, with a link to any other Orion Devices commissioned to the same door. Only appears if the event comes from an Orion Device.
- Message always relates to the Event code, but with more details. For example, the event EnrolmentCount may have the message User Count:15
Pending messages
Pending messages is empty almost all of the time. It contains events that are waiting in Orion Connect to be sent to a server. All events pass through here. However, an event only remains in the case of server connection issues.
Server configuration
To simplify installation and re-installation of Orion software, everything is provided through single-use scripts that are generated in Orion Connect upon request.
Server install script
Clicking on Generate Build Command under Server Install Script pops up the following window for choices between 3 different forms of installation:
- Full Build - Generate a script similar to the one used during the installation guide. This should only be run on a fresh Ubuntu server. Do not use this option if the server is being restored from a backup.
All commissioned Orion Devices need to be recommissioned after a full build.
- Resync - If an Orion Server is no longer connecting or it is being re-used from a previous Orion Server installation, or if the network configuration has been changed, use the Resync option. The script updates certificates on the server enabling the server to authenticate with both Orion Devices and Orion Connect, which in turn also acquires updates to the latest release.
- Build and Restore from Backup - The restore script builds the Orion server but leaves it ready for a data backup to be restored. Using this option ensures that all Orion devices continue to operate without needing to recommission them.
When the relevant option has been selected, click the green Generate Build Command button. Provided is a command that can then be copied and pasted into the Ubuntu server to download and run the script.
Dashboard
Click Dashboard in the left-hand pane to find important information for this site. This is where viewing and updating licenses takes place.
Site Overview
Here you can view the selected site details and licensing limits.
- Installation Date: displays the date the site was created.
- Expiration Date: displays the date the site license expires.
- User Limit: displays the maximum number of users that can be enrolled for the site.
Upon expiry, the Status of the site will be disabled.
An indicator will appear next to the Expiration Date if the site license will expire within 30 days.
To extend your license Expiration Date or increase User Limit, please contact your Salto Partner to request a Voucher Code which can be entered by clicking the Update License button.
Partner Contact Information
Here you can view your Salto Partner Installer and their contact details, including Contact Number and Email. These can be used to request a license update.
Devices
The Devices tab can be found on the left-hand pane and provides the current status of all doors connected for the selected site. The Devices for each Orion Server can also be found by viewing the server.
Available here for each Orion Device is:
- MAC Address for network diagnosis.
- Door name, with a link to any other Orion Devices commissioned to the same door.
- Status of the device.
- Server the device belongs to.
Possible statuses are:
- Ready - Alive and waiting for access attempts.
- Fault - An error has occurred, or the device has not sent a message in a long time.
- Commissioning - The Orion Device has made first contact and is currently commissioning with the server.
- Decommissioning - The Orion Device disconnects from the server and is soon unregistered from this door.
- Actions - Currently, just the Delete button from decommissioning Orion Devices.
There is also Show Test Code, which displays a QR code that can be presented to any Orion Device to test its connectivity to the server, camera, sensor and LEDs. The lights turn green when this code is presented and the Device is running correctly. Otherwise, red LEDs indicate a fault.
Click Add Orion Device to commission a new Orion Device to an already existing door in the connected ACS using a unique QR code.
When using a commissioning QR code, it must be shown to the respective Orion Camera. As such, it is recommended to only use this button on mobile devices.
Integrations
The Integrations section can be found on the left-hand pane and provides a comprehensive hub for connecting our platform with third-party tools and services.
Orion Enrollment Service Configuration
The company in charge of the site must be named correctly and the privacy policy linked must contain explicit usage descriptions of the biometric data that is being processed by Orion. This information is provided to any user of the system upon first accessing their OES account.
If there is any doubt about the contents of a privacy policy suitable for Orion, please contact Salto for guidance.
ProAccess Space
Contains tools to integrate Orion with ProAccess Space.
Space Server Details
Update connection details for the ACS here by changing the IP Address, Port, Name, or refreshing the SHIP API key.
These values must only be changed to match the ACS's network configuration. Changing them to something else breaks the connection.
Space's relevant configuration can be found in the ProAccess Space Configurator and the SHIP tab of General options.
Space Configuration
Contains the Space install script and Orion API key to configure a Windows Space Server to communicate with the Orion Server.
Space install script
There is only one install script for Salto Space and it can be run on any Powershell window, running as administrator, on a Windows machine with Space installed. If Salto Space is not the correct ACS, ignore this box and command.
Orion API key
This API key must be provided to the ACS during installation to allow for secure communication between systems via HTTPS. Refresh at any time if there is a security concern, but administrators must ensure that the ACS is updated with the new value as well. In Space, the API key can be updated in the Face recognition tab of General Options.
Access Logs
The Access Logs for the selected site can be found on the left-hand pane and show details for every access attempt from an Orion Device to an Orion Server. No personal details are available through these logs.
In the top left, filter by date for historical access checks. Below that, each access request is a row in the table. From left to right:
- The + shows a time split between recognition time and ACS permissions check in MS.
- The Date/Time that the access request was first initiated.
- Door name, with a link to any other Orion Devices commissioned to the same door. To filter by a door, use the dropdown on the column heading.
- A summary Message of the access request.
This is the primary source of feedback in case of issues.
By default, only Access Granted and User not permitted logs are displayed.
To filter messages, use the dropdown on the column heading.
Some common examples of feedback are:
- Access granted: This person was recognized and allowed through this door.
- The face detector can't find the face on the image: No face was seen during this access attempt.
- This face was not recognized: A face was seen, but not recognized.
- Image is not live: The anti-spoof detection suspects usage of a picture of a person.
- The face is too close to one or more image borders: The face in the picture is too close to the edge and should be positioned more centrally.
- The facial area is not big enough for the analysis.: The face in the picture is too far away.
- Total Time (ms) - How long the access request took to complete entirely in milliseconds.
Each time the Orion Device senses a presence, there can be up to 3 access requests shown here.
Tools
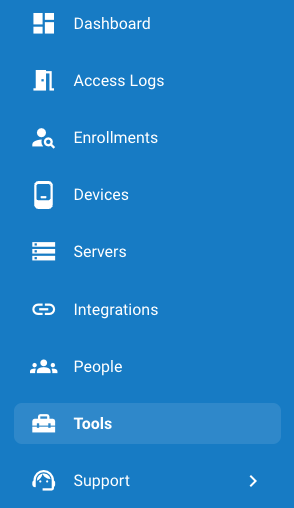
The Tools section can be found in the left-hand pane and contains general purpose utilities that can apply to any server or device.
Trusted root certificate
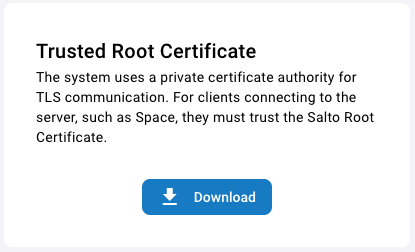
To allow an ACS to trust connections to and from the Orion Server, download the root certificate from this tile. All Orion Servers and Orion Devices use a certificate that is part of this certificate chain to prove their legitimacy. Once downloaded onto the ACS, install the certificate by double clicking it on Windows and Install Certificate….
This step is included in the installation process as standard.