Orion server installation
Pre-requisites
- Ensure your hardware meets all of the System requirements.
- Ensure that the server's OS is prepared correctly. If necessary, please refer to our guide for installing Ubuntu 24.04 LTS Minimized.
- Please note that this server will contain sensitive biometric information. As such, it must be kept in a physically secure location and installed on encrypted storage within the server.
Required information
- The following information on-hand:
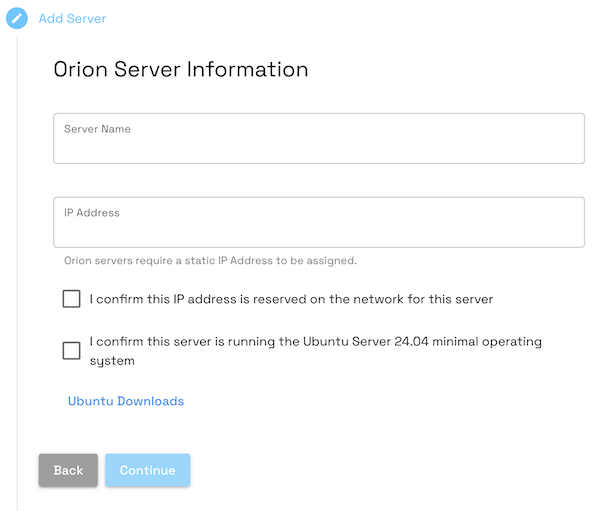
- Ubuntu Server IP - This is the network location of the machine being configured as an Orion Server.
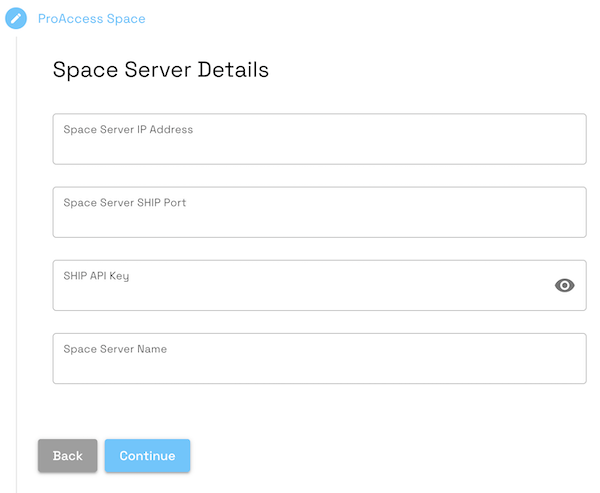
- Space Server IP - This can be found in the Space Configurator.
- Space Server Port - This can be found in the Space Configurator.
- SHIP API Key - This can be found in Salto Space's General Options.
- Space Server Name - This can be found in "view your PC's name" section of Windows.
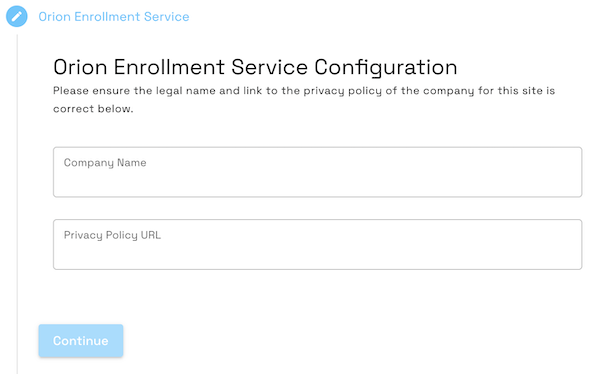
- Company Name - This is the name of the company that the Orion Server is being installed for.
- Privacy Policy URL - This is the URL of the company's privacy policy.
- Access to the shell on your prepared Ubuntu server, with
sudoprivileges. This can be via SSH access or natively. If you are controlling the server via SSH, the install script automatically keeps the SSH port open for server management. - Access to Powershell (not cmd) on your Space server, running as administrator.
Step-by-step
The admin operator will have received a welcome email when the Salto partner provided them access to their site within the Orion Console. The email will contain a link to the correct console for their region.
Available Regions are: EU, UAE
- Log in to the Orion Console for the appropriate region.
- Select the site from the drop-down in the left-hand pane.

- Click the + Add Server tile to be taken to the installation wizard. Through this wizard, you can provide some information for the Console to generate an all-in-one installation script for your prepared Ubuntu server.

- Enter the company name and privacy policy for the site.
- In the respective fields of the Space Server Details screen, enter the details of the Space server and, if Space is not already using HTTPS, enter the hostname of the machine running Space in Space Server Name.
- In the Orion Server Information screen, enter an appropriate label for the server in the Server Name field, and the Ubuntu Server IP in the Server IP field. Check both boxes and Continue.
- Ensure that Space service is running on HTTPS, and on the Space server run the Space Install Script in an Administrator Powershell terminal. Ensure the Face recognition section of Space General Options matches the displayed fields. This will allow comminication between the Space Server and the Orion Server.
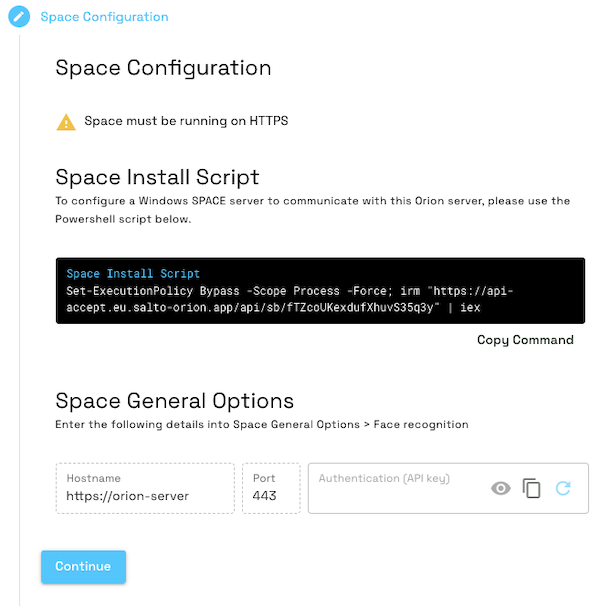
Some AnitVirus software my trigger the script to report an error, however, it will have created the entry in the hosts file and inserted the Salto Root Certificate.
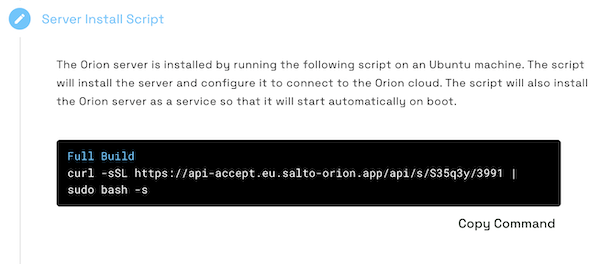
- Copy the command provided on the Server Install Script screen and run it in the terminal of the Ubuntu server. Answer the questions as they appear in the terminal, and the server will begin to install.
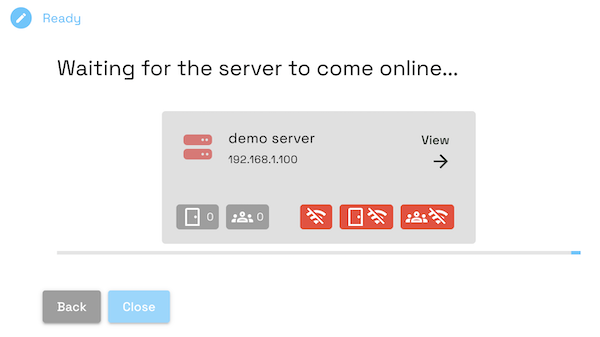
- The final screen is informational and updates in real time. When the server has completed installing and is online, the server icon will become green and you can close the window.
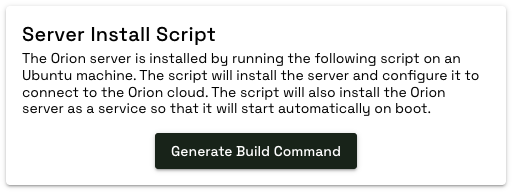
Install commands
To simplify installation and re-installation of Orion software, everything is provided through single-use scripts. Install commands can be found in the Configure tab of the server page.
Clicking on Generate Build Command pops up the following window for choices between 3 different forms of installation:
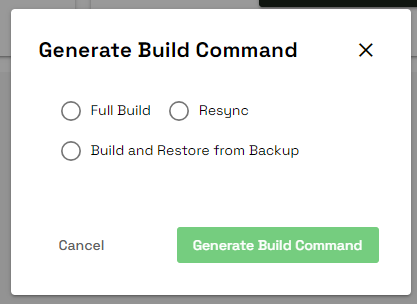
Full Build - Generate a script similar to the one used during the step-by-step process. This should only be run on a fresh Ubuntu server.
All commissioned Orion Devices need to be recommissioned after a full build.
- Resync - Generate a script which will resynchronize the Orion Server with Orion Connect. The script updates the credentials used by the server to communicate with Orion Connect and ensures the server is updated to the latest release.
- Build and Restore from Backup - The restore script builds the Orion server but leaves it ready for a data backup to be restored. Using this option ensures that all Orion devices continue to operate without needing to recommission them.
When the relevant option has been selected, click the green Generate Build Command button. Provided is a command that can then be copied and pasted into the Ubuntu server to download and run the script.