How to create an XS4 Com site
Creating a site
To create a new XS4 Com site, you must go to the XS4 Com web application and click the Sites tab on the left-hand side bar. This will take you to the Sites page. By clicking the Create New button, you will initiate the process of creating a new site, going through a series of windows with the required steps.
The first step is to create a new site. For this, you will need to:
- Add a site Name.
- Add a site Type (residential and/or company).
- Add a site Address, which will automatically fill out the time zone field below.
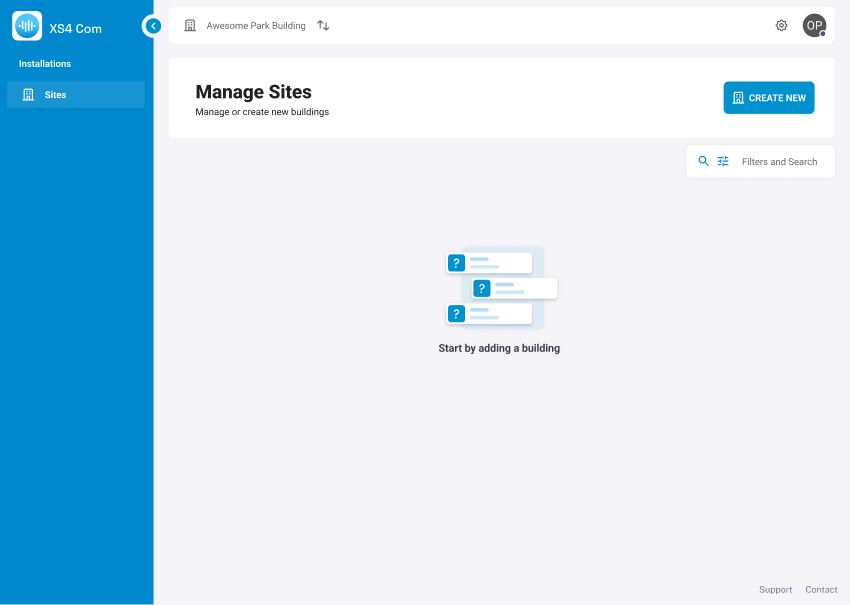 An overview of the manage sites page
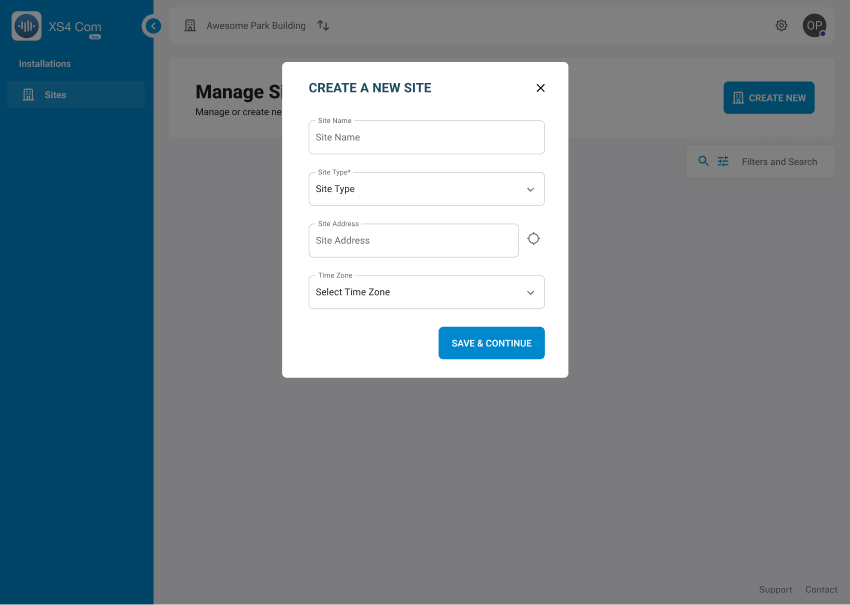 A look at the pop-up window when creating a site
Add entrance | access control integration
The second step is to select the access control integration. From the drop-down menu, you will select the Salto access control solution that is being integrated with XS4 Com: Salto KS or Salto Homelok.
The XS4 com integration must first be enabled on the Salto KS or Salto Homelok web application, as indicated in the previous step.
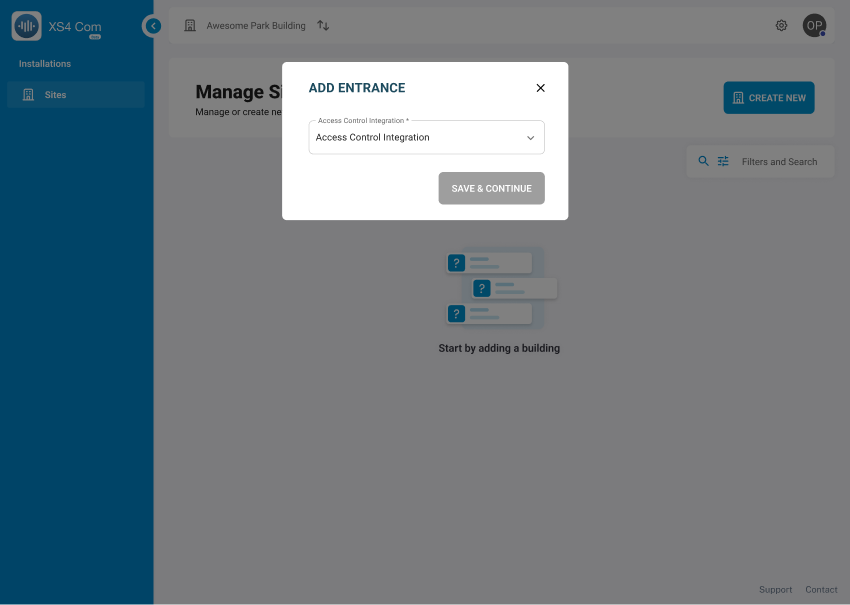 Adding an entrance to an XS4 Com site
Add entrances | site, unique intercom code, entrance name & lock
The third step is to select the site and enter the unique intercom code, an entrance name and lock.
From the drop-down menu, you will select the site that is being commissioned. Notice that to see the locks that belong to the KS or Homelok site, you need to make sure they are part of that site.
After selecting the site, you will need to fill out the following fields within the highlighted section titled Entrance 1:
- Unique Intercom Code, which can be done by scanning the QR code or manually inputting the number found printed on the plate. This corresponds to the QR-code based version, XS4 Com iGO.
- Enter an Entrance name.
- Select a lock. From the drop-down menu, you will select the lock that will be associated with the QR plate that is being entered.
In this step, the installer will also have the option to enable geofencing and set the desired radius.
You can choose to click Save and Continue or Add another entrance in the same flow. It is also possible to add another entrance later.
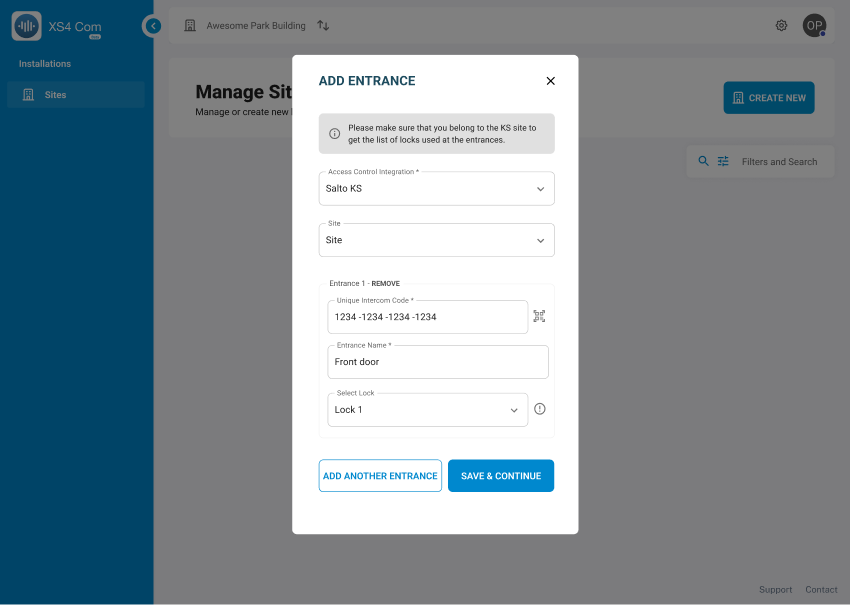 The different fields required to add an entrance in XS4 Com
Invite the site owner
The fourth step is to invite the site owner.
The installer will enter the details of the site owner they wish to invite to the XS4 Com site. This includes:
- The email address of the site owner.
- First name of the site owner.
- Last name of the site owner.
After the installer clicks Save and Continue, a notification will be sent to the email that has just been entered, asking the site owner to complete the invitation process.
Once the site owner accepts the terms of service, the installer will no longer have access to the XS4 Com site.
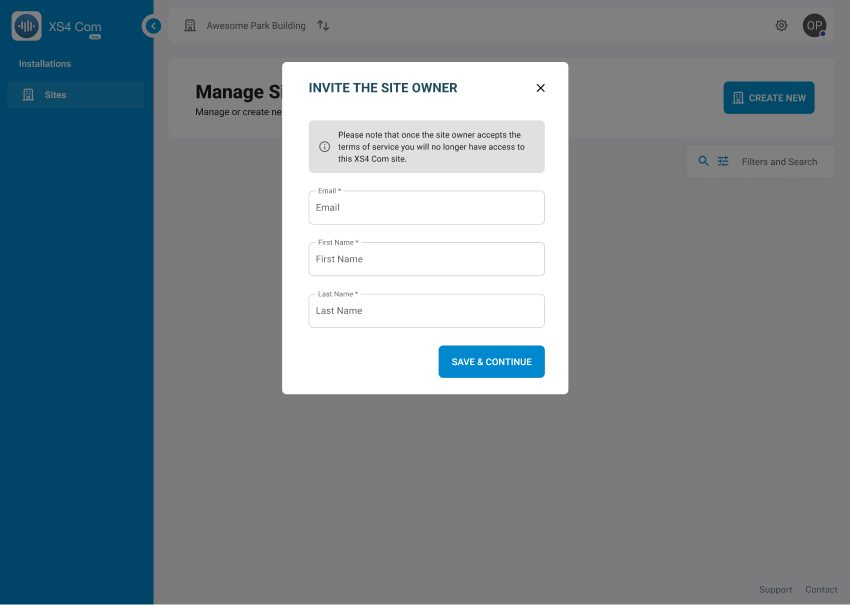 The required fields to add a site owner
 Back
Back
