Creating and moving in units in Nebula Beta
Overview
You must have a system manager or owner role to be able to create a unit.
To create a unit, go to the Units section in the main navigation bar.
- Select Create and enter the name of the unit, for example "Apartment 3-B"
- Check the Privacy checkbox, if required. See the section on unit privacy for more details.
- Once created, you can navigate to the specific unit view within your installation
If you have access to multiple units, these are listed when you select the Units section on the main navigation bar.
Moving in units
Once you've created the unit, you can add the other access control elements that belong to it. In general, this consists of creating access rights and moving in users.
 You can move in a unit directly from the unit list view, or from the main unit view
You cannot add users to a newly-created unit until you move in that unit using the Move in button.
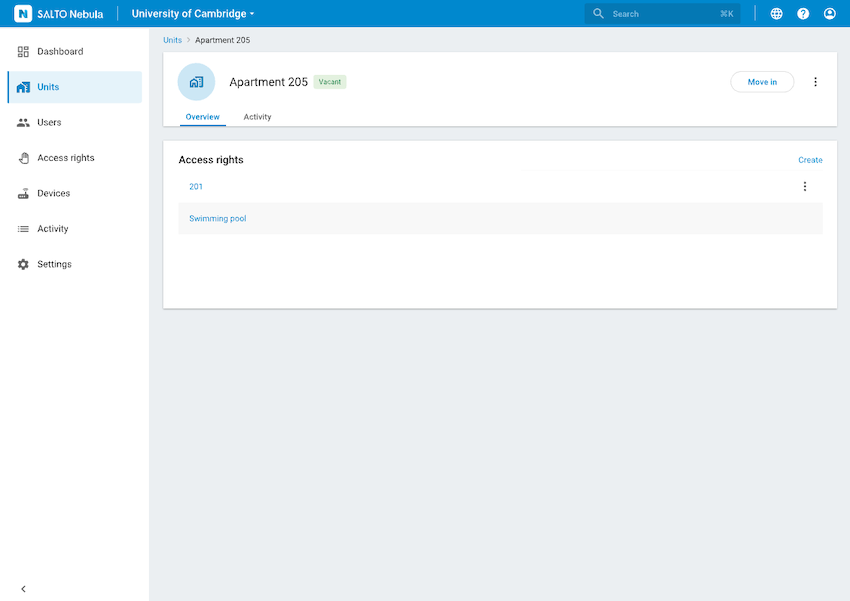 Once you've created a unit, you can create access rights and move in users
The unit view also allows you to view specific unit activity. You can tell which unit you're currently operating in via the unit-specific breadcrumb indicator at the top of the screen.
Unit status
Units can have the following statuses:
- Vacant: This status is displayed on units that have not been moved in. That's to say, no users or keys belong to the unit.
- Occupied: This status means that users have been added to the unit.
Units can also either have the Unit privacy feature turned on or off. See the section on unit privacy for more details.
Creating unit users
You can create unit users in two different ways:
- By moving in the unit. In vacant units this is the only way to create users.
- By creating users in an occupied unit that has already been moved in. This is similar to creating users at the installation level.
You can add multiple users to your unit at the same time by using the Move in functionality. Click on the Move in button either on the list view or inside the unit itself. Once the Move in screen displays, use the Add user button to add users to the unit. Users added to the units display in the Added users panel.
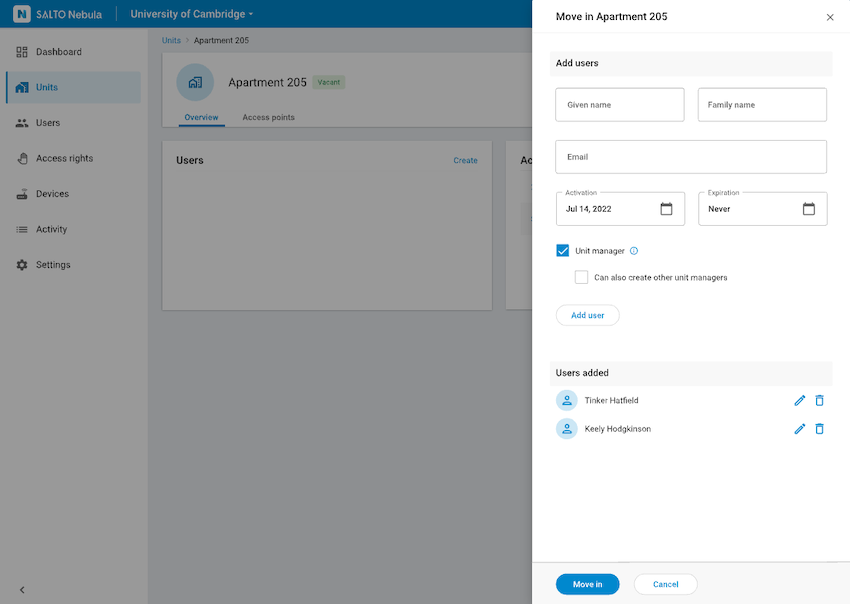 You can add users to the unit using the 'Move in' functionality
You can only move in a maximum of 10 users.
When adding users, you can define whether the user is a unit manager - in other words, whether they'll have admin permissions at the unit level. This is done by marking the Unit manager checkbox.
At the unit level there are two types of users:
- Unit manager: can manage elements of Nebula at the unit level. Note: there are two types of unit managers.
- Keyholder: user who only unlocks access points with a key
All managers at the unit level are always holders of keys.
In general, as a system manager it's expected that you'd add at least one unit manager as well as access rights at the unit level, although this may differ depending on your use case. Note that access rights which you create in the unit can include access points that are both communal (installation and unit level) as well as access points at just the unit level.
Once you've moved in a unit and created a unit manager, it's expected that you'd 'hand off' the unit to the unit manager so they can create other users that belong to their unit.
The unit manager has practically the same role at the unit level as that of a property manager at the installation level. However, bear in mind that there are two types of unit manager.
- Unit managers who can create other unit managers.
- Unit managers who cannot create other unit managers.
If you mark the checkbox "Can also create other unit managers" when creating a unit user, the unit manager will not only be able to create keyholders within the unit, but also other unit managers.
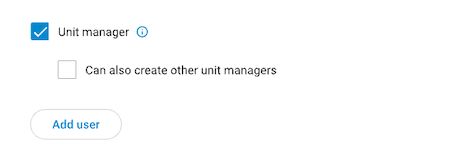 You can use the unit manager checkbox to define the role you want the unit user to have
In some situations, units may not have users with any management roles, for example a hotel. For these cases, as a system manager, you have to manage the access rights and assignment of keys for these keyholders. You wouldn't 'hand off' the unit to a unit manager.
Regardless of whether a user has already been created at the installation level, you still need to create them at the unit level too.
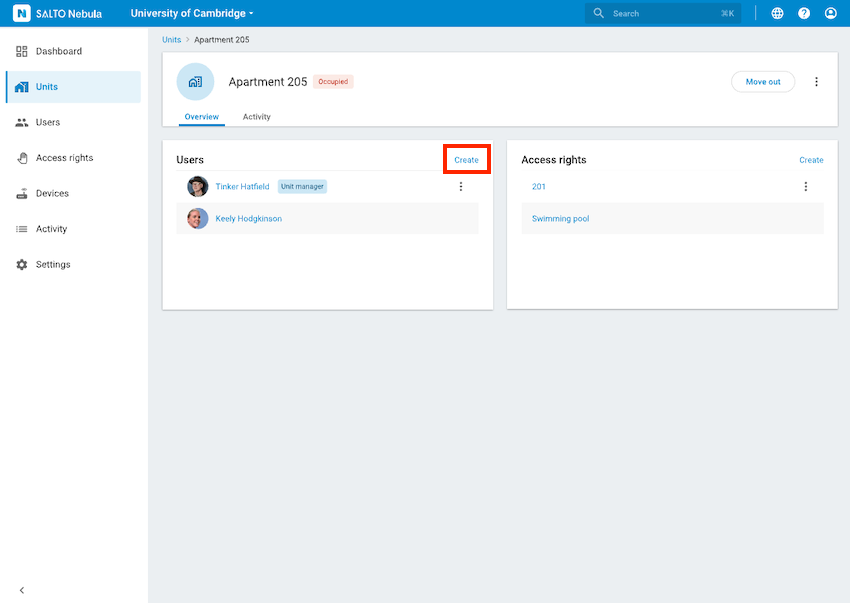 If a unit is already occupied, you can add more users to it using the 'Create' button
For more on creating users and keys at the unit level see the section on unit user management.
Creating access points
Only users with management roles at the installation level can create unit access points. A unit manager cannot create access points.
To create access points at the unit level, you need to follow the same process as you would for creating access points at the installation level.
The difference at the unit level is that if your installation has units, a Unit field will display in the create access point screen.
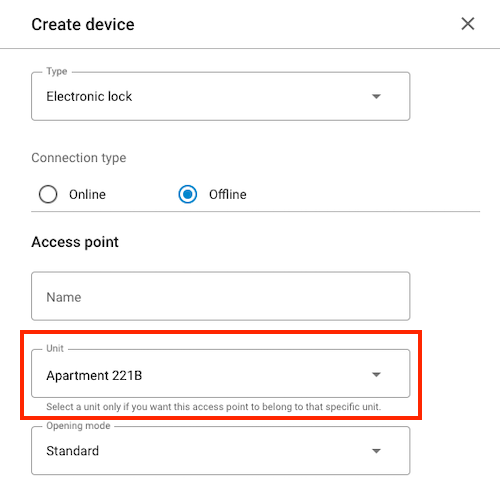 The 'Unit' field will only display on the 'Create device' screen if your installation contains units
One of the main advantages of creating access points at the unit level is when it comes to moving out a unit. In this case, users can be removed and their keys invalidated, but the access rights and their associated access points that belong to the unit remain.
Note that you can also use previously created access point groups at the unit level too.
See also the section for installers on configuring devices.
Creating access rights
You must create at least one access right in the unit before moving it in.
You create access rights for units in the same way as you would create access rights within an installation. The list of associated access points or access point groups you see in the drop-down list can be at both the installation and the unit level.
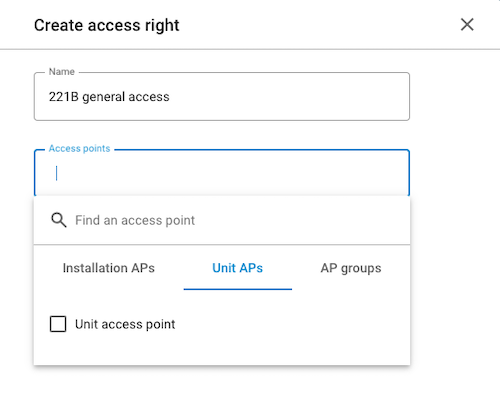 When creating access rights for units, you can add unit-specific access points, as well as access point groups
You can separate out access rights into those that relate to communal access points and those that are unit-specific. This will give the unit manager more granular control when it comes to giving access to unit users.
See also creating access rights for more details.
Access right schedules
At the unit level, schedules can only be the same or more restrictive than those assigned by a system manager to a unit manager. For example: if the tenant of the apartment (a unit manager) has only been given access to the swimming pool from 08:00 to 20:00, the tenant cannot invite other users to the swimming pool 24 hours a day.
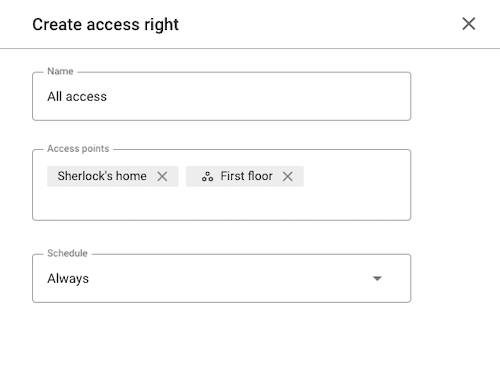 You can only add one schedule to an access right at the unit level
You can only apply one schedule per access right in a unit.
See also the section on managing unit access from the perspective of a unit manager.
Assigning keys
You assign keys to unit users in the same way as you assign keys at the installation level.
See also the section on assigning keys to users in units.