Email calendar invitations
How to configure Email Calendar Invitation for Azure Outlook in Salto IDM
In order to configure the Email Calendar Invitation Configuration to use Outlook, you will need to create a new App Registration in Azure, provision it with permissions and then fill in the credentials back into Salto IDM.
Step 1: Creating an Azure App Registration on your Azure AD tenant
Navigate to the Azure portal - App registrations page.
Either pick an existing application on the All applications tab, or select New registration.
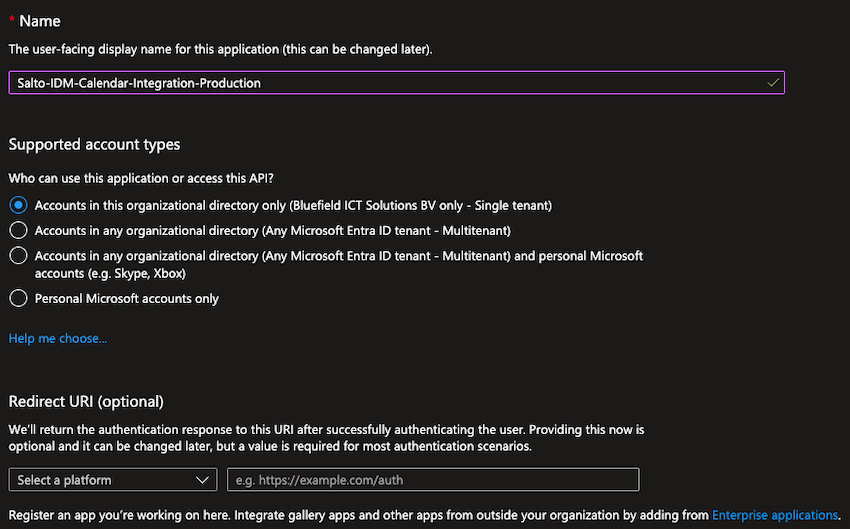
When the Register an application page appears, enter your application's registration information:
- In the Name section, enter a representative name (for example Salto-IDM-Calendar-Integration-Production)
- In the Supported account types section, select Accounts in this organizational directory only (Your Tenant Name only - Single tenant).
- The Redirect URI (optional) section can be left empty, as our environment handles the redirection automatically.
Click on Register to create the application.
To keep your registrations clean and isolated (which allows easier debugging and problem solving), please create separate App Registrations for different environments (for example Localhost, Production, Staging, etc.).
Step 2: Provisioning permissions on your App Registration
- Navigate to the API Permissions page within the App registration
- Click on Add a Permission
- On the panel that opens, click on Microsoft Graph, then click on Application Permissions
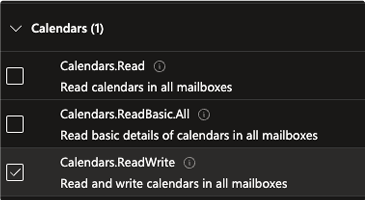
- Scroll down and look for the Calendars section and add
Calendars.ReadWrite
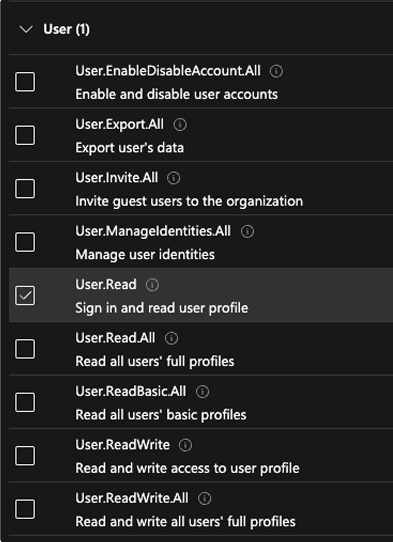
- Add another Microsoft Graph permission, but this time use Delegated Permissions
- Scroll down and look for the User section and add
User.Read
- After adding the permissions, click on Grant admin consent for your tenant, your Configured Permissions should look like this:
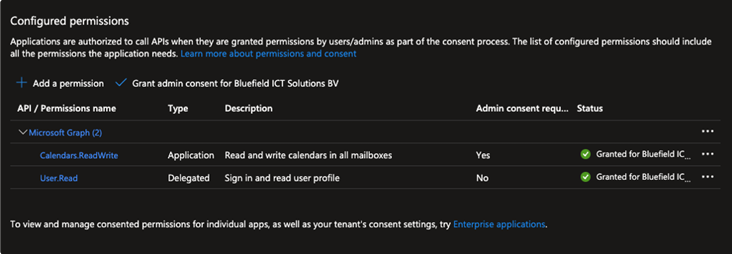
Make sure that Admin consent has been granted for the requested permissions and the green checkmark is showing on the right side of the table.
Step 3: Add a client secret
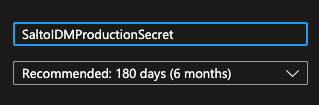
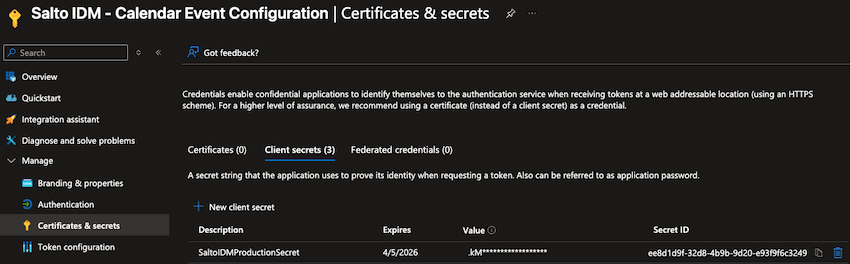
- Click on the Certificates & secrets tab and click on New client secret.
- Add a representative Description to your secret, and choose an Expiration according to your own security and maintenance rules.
- Once you create the secret, make sure to copy the Secret Value (not the Secret ID), and store it in a safe place (for example password manager). Once you leave this page, you won't be able to see the value again, and if you don't save it, you'll need to re-create the secret.
Be aware that after the secret is expired, the integration won't work and you have to create a new secret and update it's value in Salto IDM.
Make sure to have a mechanism in place to alert you when the secret will expire to avoid login issues in production environments.
Step 4: Get IDs required to link the mailbox to the App Registration
Click on the Overview tab and copy the Directory (tenant) ID (
<TENANT_ID>)On the top search bar, search for "Microsoft Entra ID" and click on it
Go to the Enterprise applications tab, search and click the App Registration you created on the previous steps, and on the Overview page that is displayed copy the Name (
<APP_DISPLAY_NAME>), Application ID (<APPLICATION_ID>), and Object ID (<ENTERPRISE_OBJECT_ID>).

- Create a new mailbox account (or use an existing one) and copy the email address (
<EMAIL_ADDRESS>) that will be used by users when creating calendar events.
This step is important for the integration to work. This mailbox is used by the integration to detect any invitations sent by users and automatically generate visitor invitations into Salto IDM.
Make sure that this email is not used by any other integrations or with any other purposes.
The only requirement for the invitation integration to work correctly is that when an user is creating a calendar event, they should CC this email address in the calendar invitation.
Step 5: Run commands in PowerShell to register the mailbox
- Lastly, run the following commands one by one in PowerShell as Administrator (in Windows) to link the email address with the app registration we created on the previous steps.
Install-Module -Name ExchangeOnlineManagement
Import-Module ExchangeOnlineManagement
Connect-ExchangeOnline -OrganizationId "<TENANT_ID>"
New-ServicePrincipal -AppId "<APPLICATION_ID>" -ObjectId "<ENTERPRISE_OBJECT_ID>"
Set-ServicePrincipal -Identity "<ENTERPRISE_OBJECT_ID>" -DisplayName "<APP_DISPLAY_NAME>"
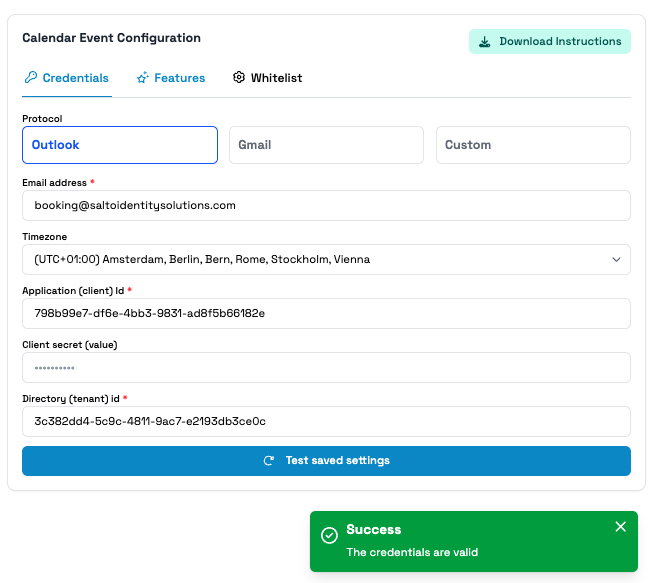
Add-MailboxPermission -Identity "<EMAIL_ADDRESS>" -User "<ENTERPRISE_OBJECT_ID>" -AccessRights FullAccessStep 6: Create a new Email Calendar Invitation Configuration in Salto IDM
Log into Salto IDM, navigate to Administration > Automations > Create Automation
Choose the environment it should run for, add a name for the automation and mark it as enabled
Choose Calendar Events as time schedule type, and choose how often it should check for new invitations (for example every 5 minutes)
On the right side choose Outlook as protocol
Enter the following details:
a. Email address: Mailbox previously configured
b. Timezone where the environment is running
c. Application (client) Id:
<APPLICATION_ID>d. Client secret (value): Secret (value) previously created
e. Directory (tenant) id:
<TENANT_ID>Click on Save, and you should be able to see a success message if everything is correct.